Photoshop light effects in photoshop online is the effect of creating shadows in online photoshop to create eye-catching light effects on Photoshop images.
Photoshop light effects in online photoshop is a step that almost any image needs if it needs editing. From advertising posters, pictures to make videos, pictures of catalog design or on website design.
So, mastering it will help you a lot. Please master it when you want to Tutorials photoshop or adobe photopea. I’m sure anyone who works as desgin needs to master how to create shadows in photoshop.
What is Photoshop light effects in online Photoshop?
The first step, before learning it, grasp it. We have to understand what is Photoshop light effects in Photoshop online? I only share according to the experiences and knowledge I have. So maybe it’s a bit wrong for some of you.
But the key is still the product after adjusting Photoshop light effects in online photoshop you create. Every job is the same, it doesn’t matter how you do it. It is important that you create quality products or not ^^.
Adjusting lighting in photoshop online has many cases. I would like to list briefly the basic things I know for those who do not know how to refer. Apply to Adobe Photopea online (Adobe Photoshop may differ a few steps)
In some cases, adjust the lighting with PTS
- Adjust the brightness of the image to be higher than the photo: When you take a picture with a dedicated camera or most often a camera. Light will not be satisfied. That’s for sure!
In some places, it is too bright, so the image will be blown out and cannot see what it is in detail. Some areas of the image are too dark to meet the expectations of the village (especially in backlight – the scene is bright, his face is dark).
- Make photos darker with photoshop : This is also a common case, especially photos that want the subject in the image to pop with shimmer.
If you have used adobe photoshop copyright on PC. There will be a lot of videos on youtube instructing light effects editing from foreign desgin.
- Light align a selected area: This usually applies to product posters or model portraits. When applying light alignment, light up or darkens on 1 item. Help the product look perfect and eye-catching.
Create shadows in online photoshop
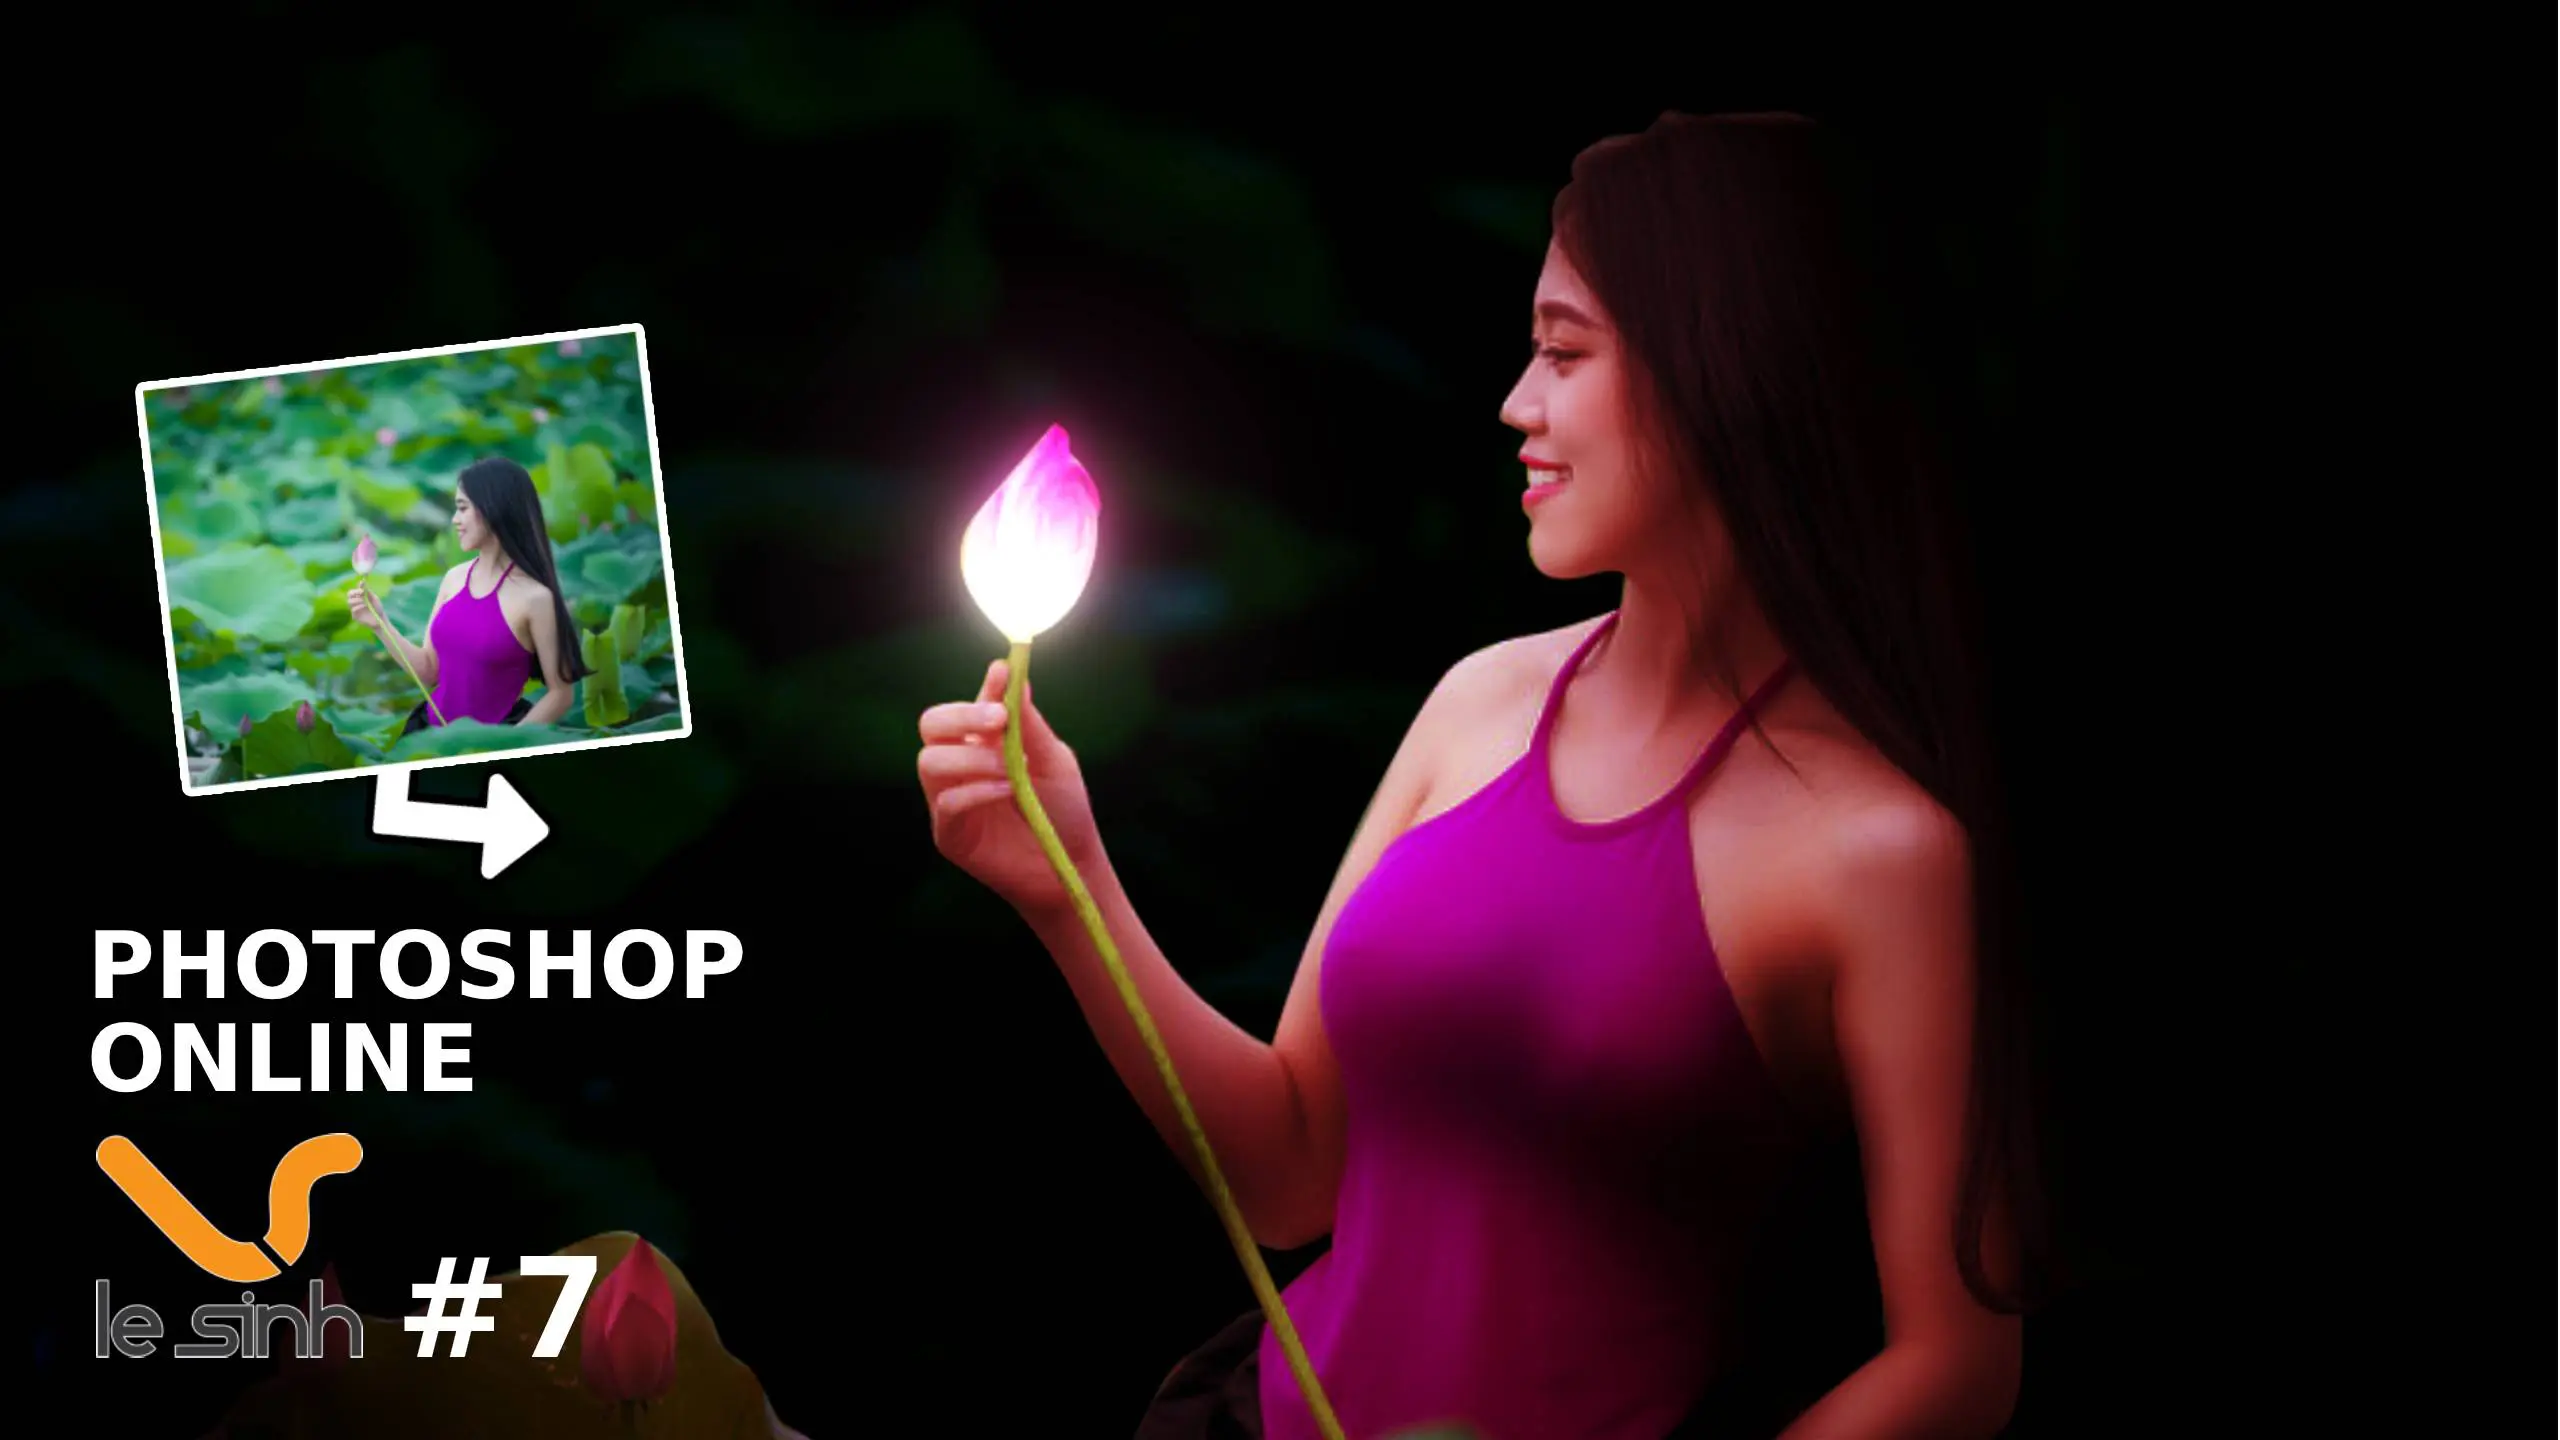
In the article sharing Photoshop light effects in photoshop online today, I will basically guide you to create shadows in online photoshop to change the “weather” for the captured image.
You will learn how to turn a photo from day to night in just 10 minutes using online photoshop by creating shadows to separate the subject.
And darken the surroundings, while the girl subject would light up as if there was light from a light bulb. The light bulb here is from a flower that is maximized with a blurring effect.
Detail how to create shadows in Photoshop
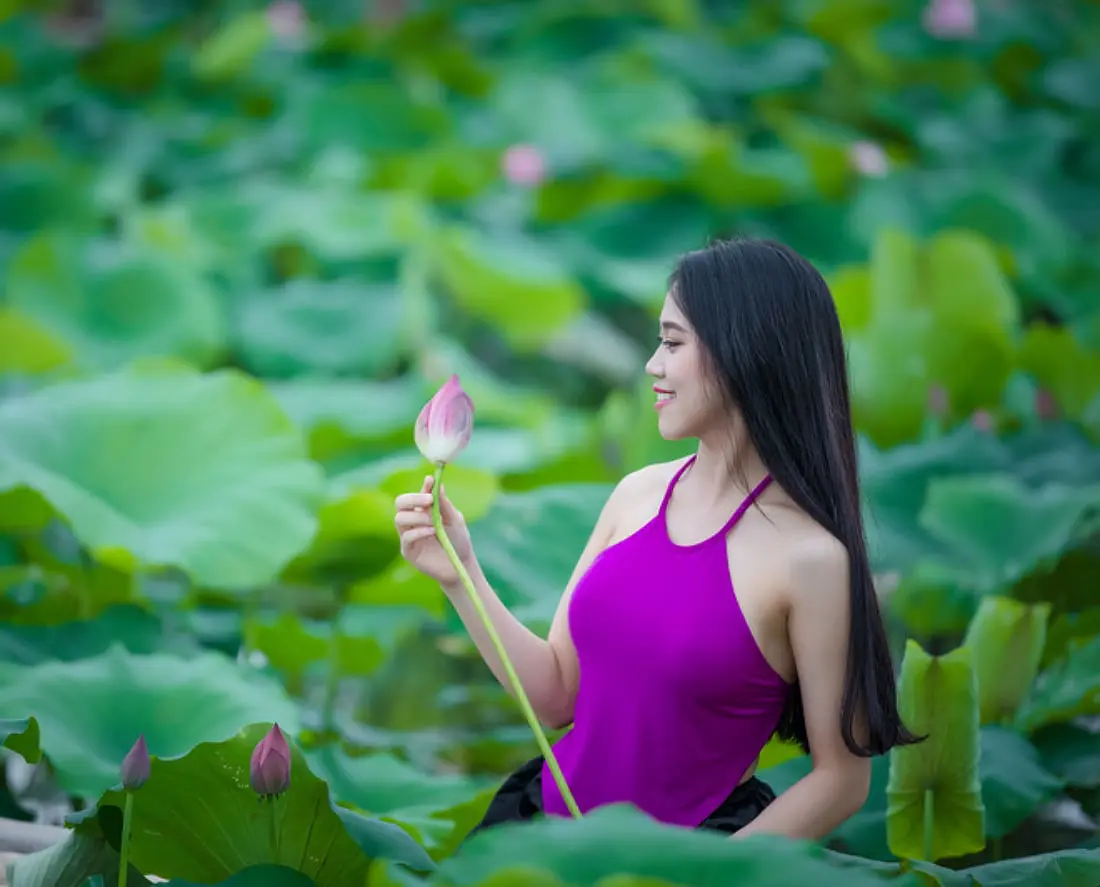
Step 1 : Open the photo carefully edited to create shadows in online photoshop. By going to File> Open (the shortcut is Ctrl + O). I would like to attach pictures in this post for everyone to conveniently test according to the video.
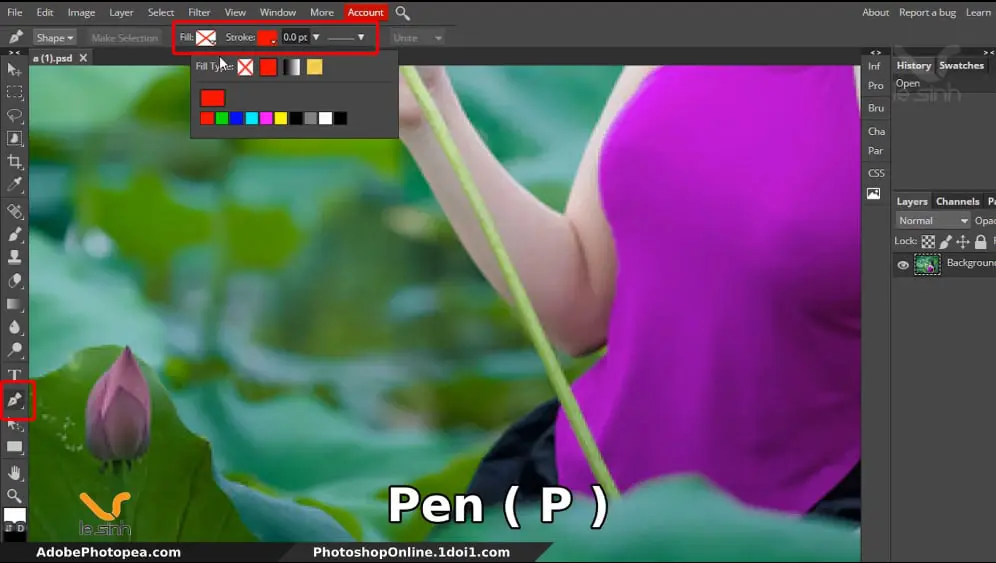
Step 2 : Select the Pen Tool (shortcut P) to cut the girl out of the background of the photo. If you don’t know how to use the Pen. Please refer to this video = >>>> Pentool illustrator (Used for illustrator – But similar to photoshop).
Fill and stocke choose as you like so that the background color doesn’t cover the girl while you’re using the Pen (P).
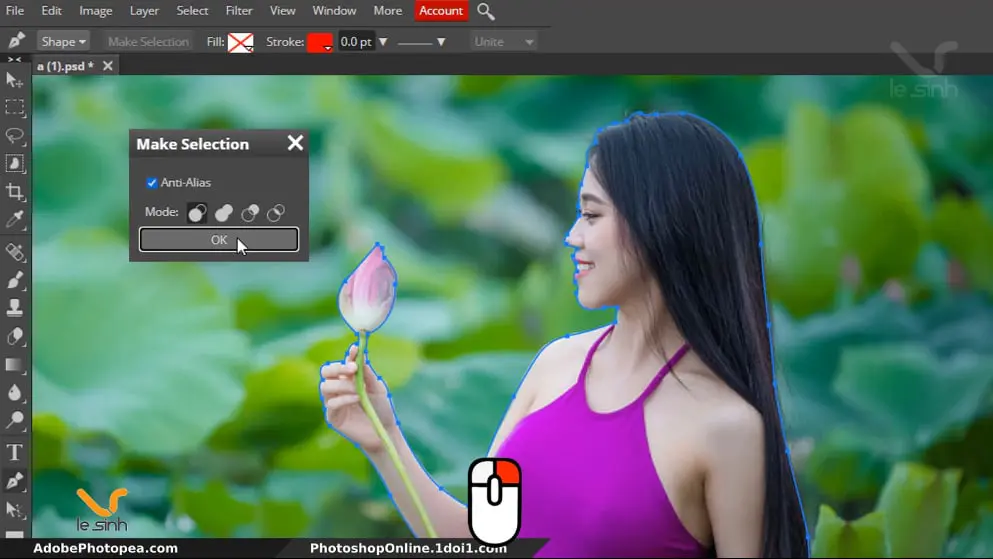
Once you have Pen, the entire selection is the girl. Right click on the image> Make Selection to make a selection of this beautiful and sexy girl ^^.
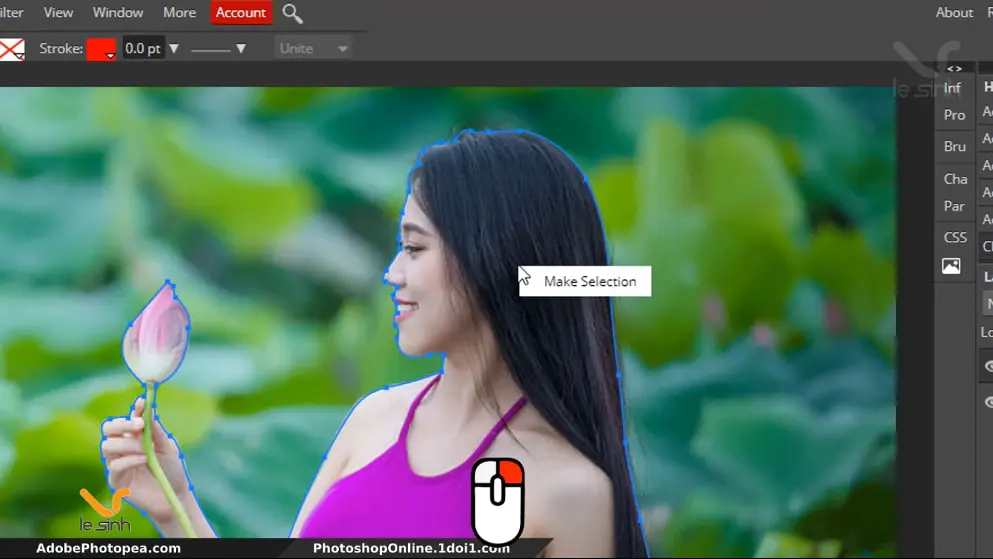
A Make Selection dialog box will appear. There are a lot of choices. But I will click on “Ok” according to the default parameters suggested by the software.
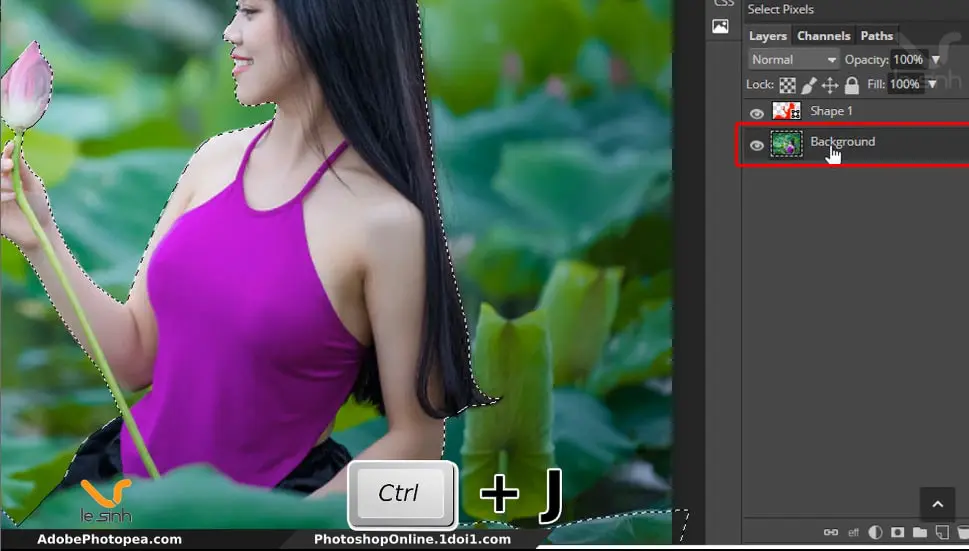
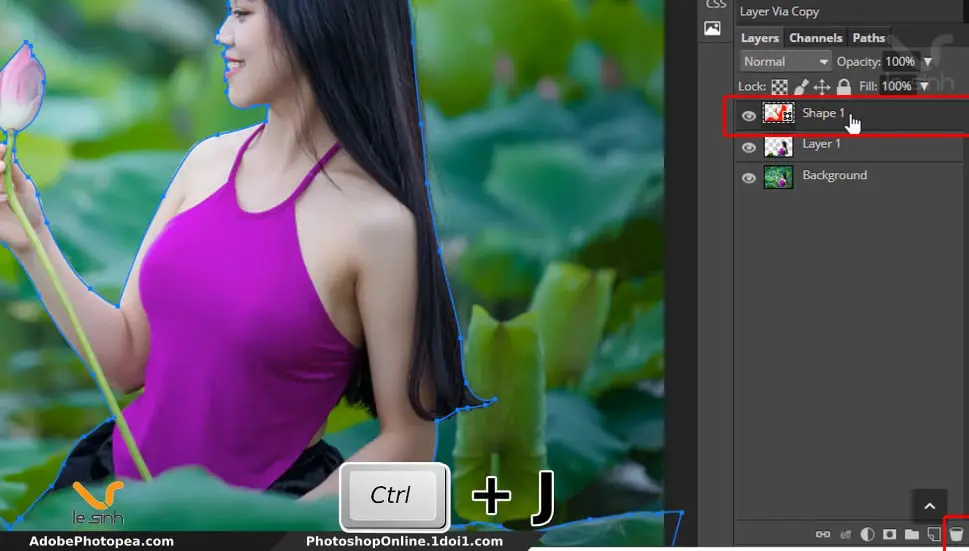
Step 3 : Please press Ctrl + J key combination. The goal is to create clones for girls – from clumsy pre-selected measurements. You have to do this step to make it easier to create shadows in Photoshop thanks to separate subjects.
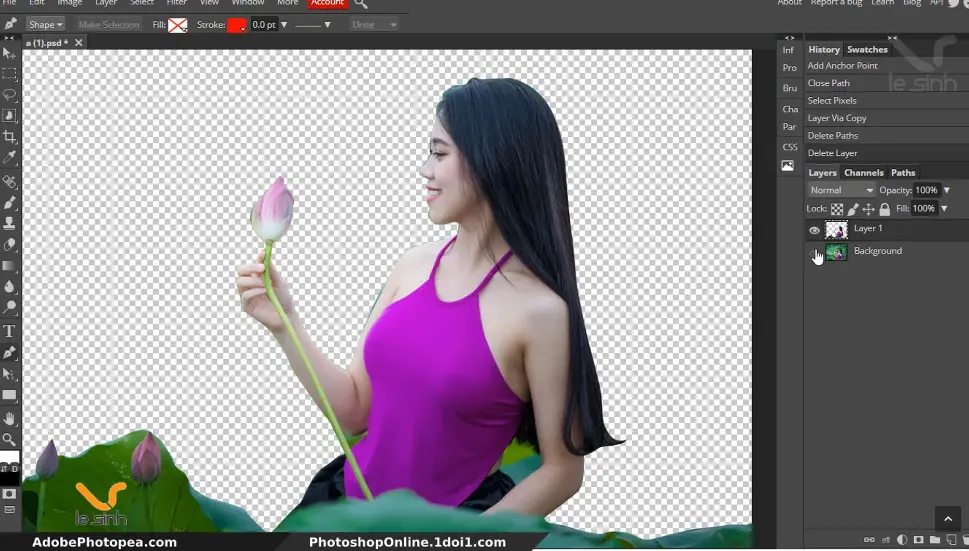
Layer Pen task (Shape 1) is done. Delete it by pressing the Delete key or clicking on the layer with the left mouse button. And pull it in the trash. Aim to the top layer area – clean. ( shortcut key in photopea )
Now, the beautiful girl has been separated from the background. Very convenient for any editing after that. Make good use of the Pen because separating the background in Photoshop requires frequent use.
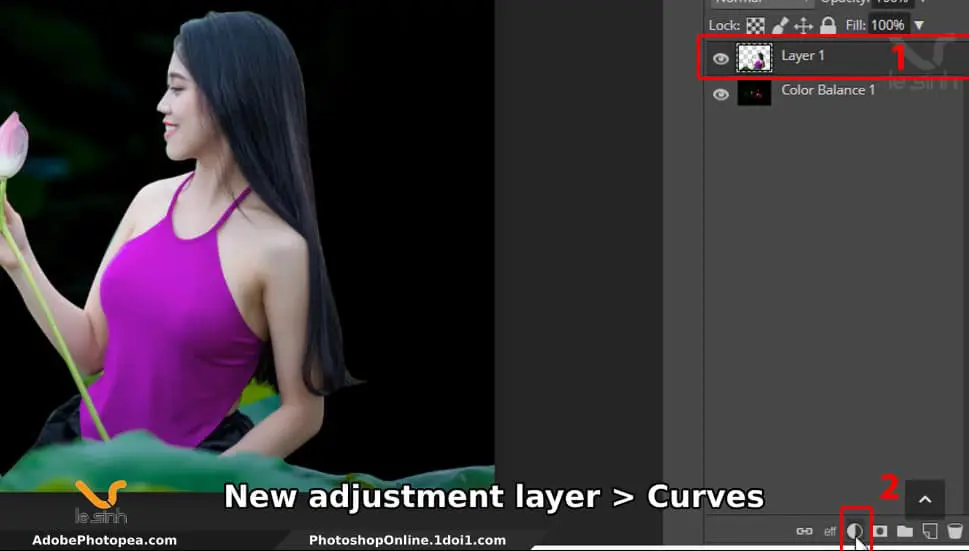
Step 4 : Select on the bottom Background (Number 1). Next Notice below the frame containing the layers with the circle icon (New Adjustment layer number 2). Choose Curves (number 3). New Adjustment layer> Curves
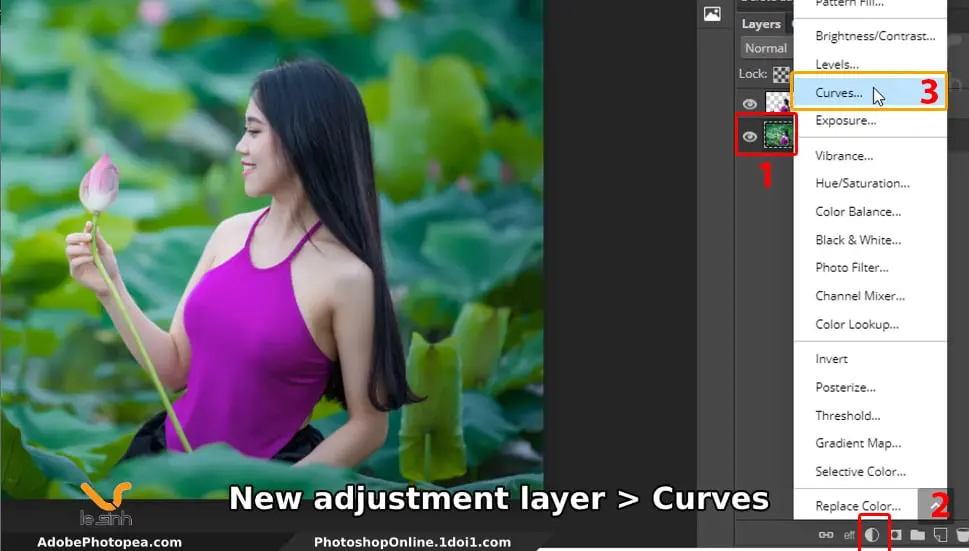
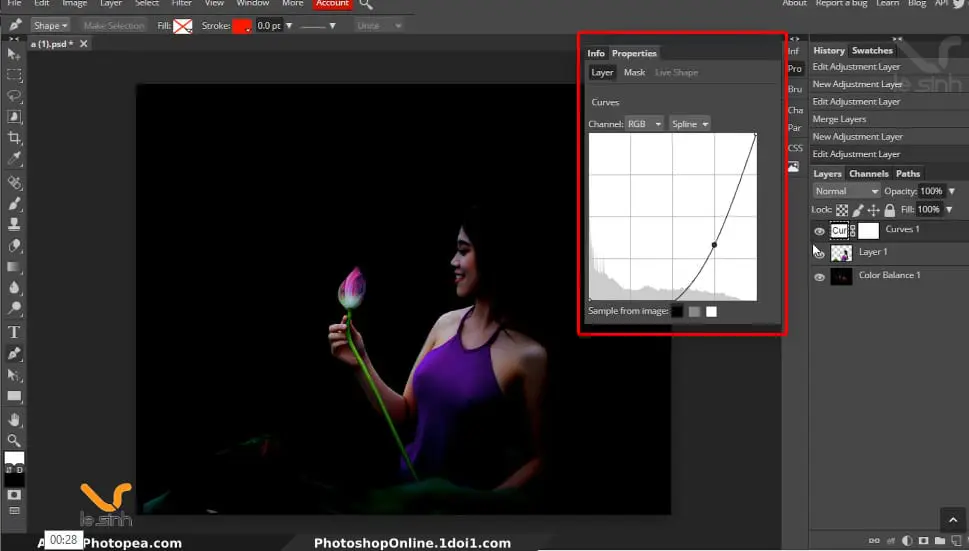
Left-click the graph bar. Pull down to the lowest level to match evening lighting. The goal for this is to lower the intensity of the background’s glow.

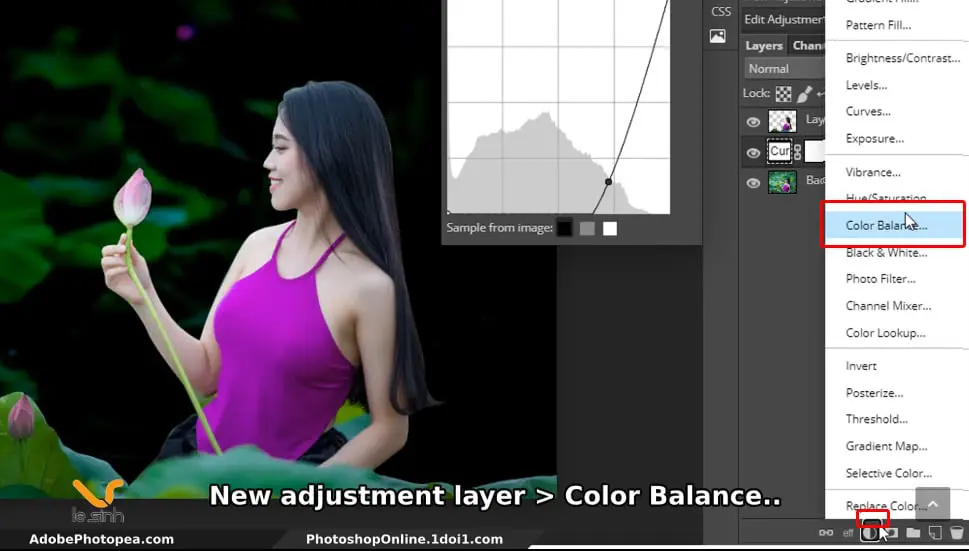
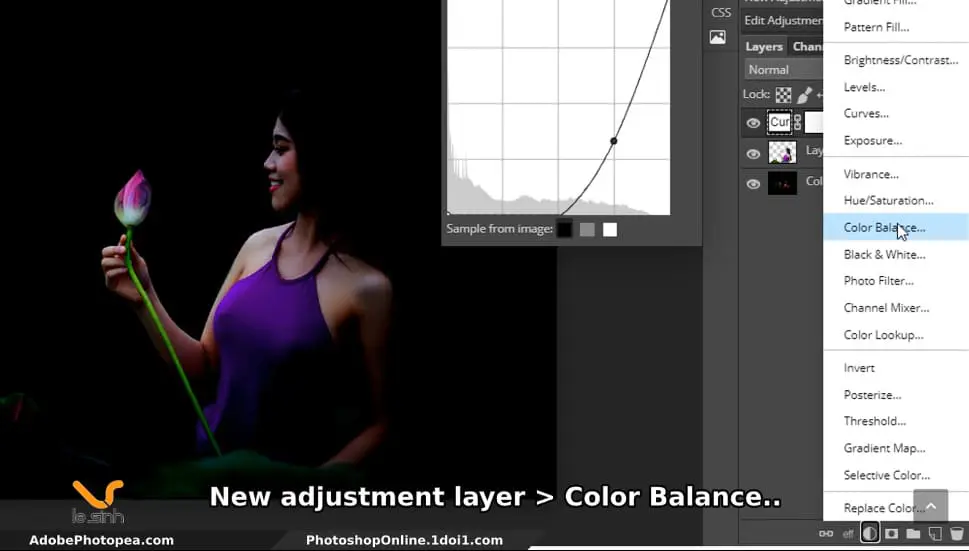
Step 5 : Similar to the above step. But choose Curves instead. Select the Color Balance cell … Details are as follows: New Adjustment layer> Color Balancer …
Color Balancer helps you to re-adjust the color of the image such as Red, Green or Blue intensity intensity to produce a light environment with the colors you want.
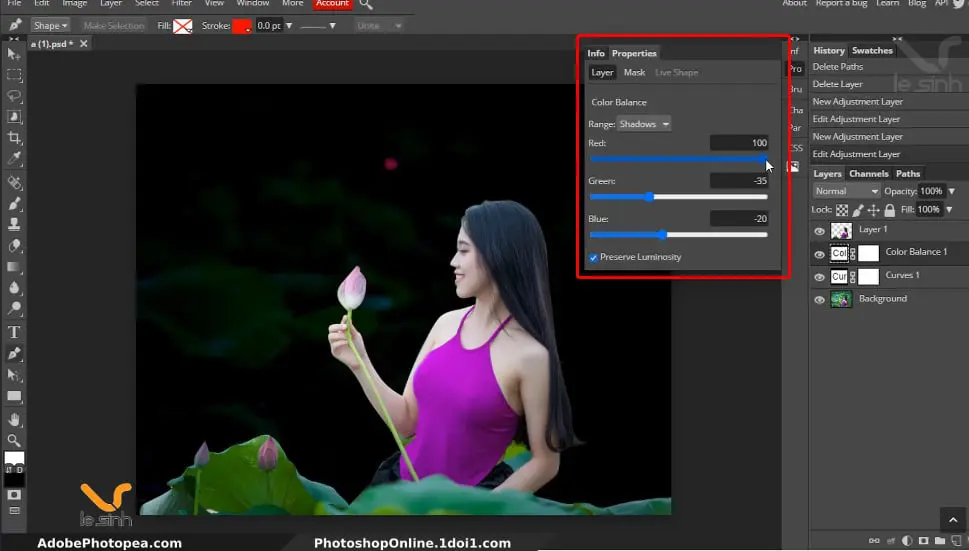
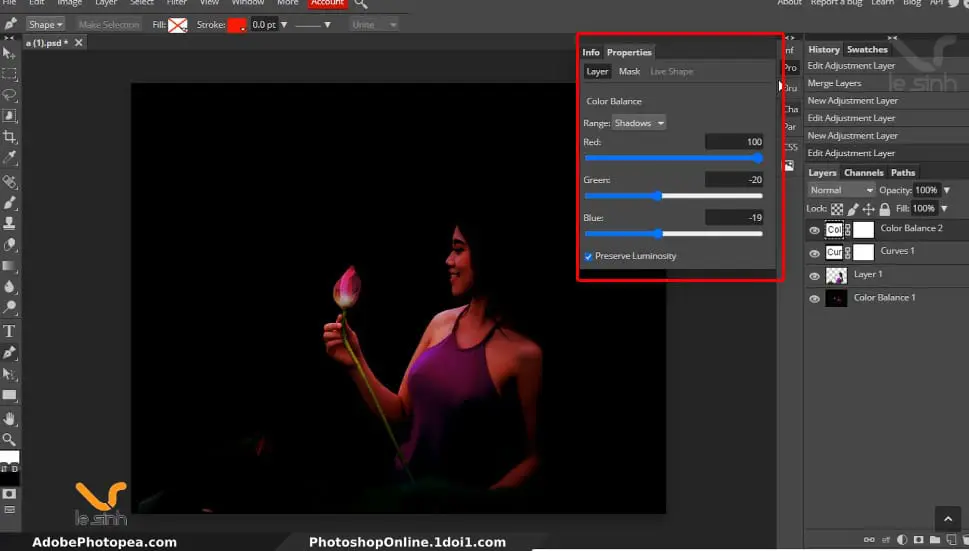
Adjusted to suit your needs desired. You can refer to my specifications in the image below. With the turn lane color options are:
- Red: 100
- Green: -35
- Blue: -20
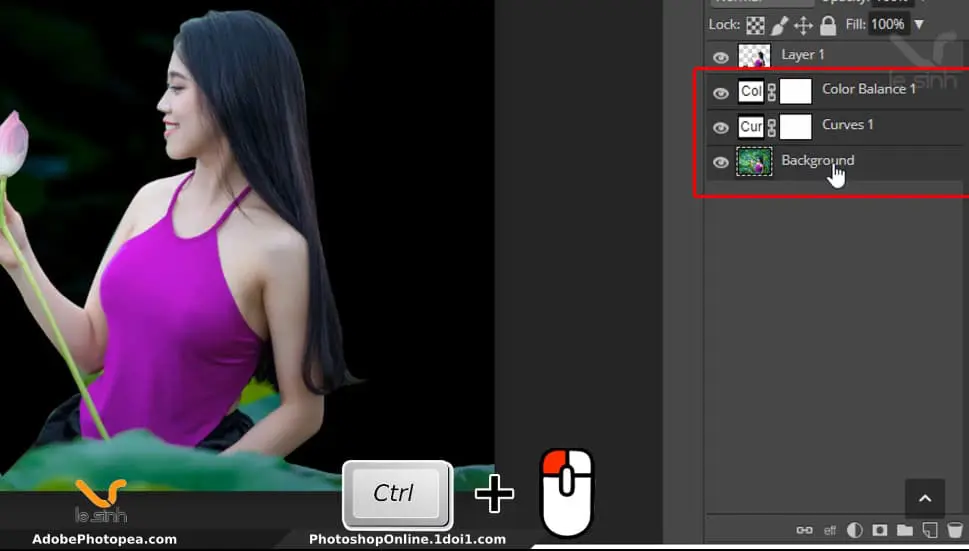
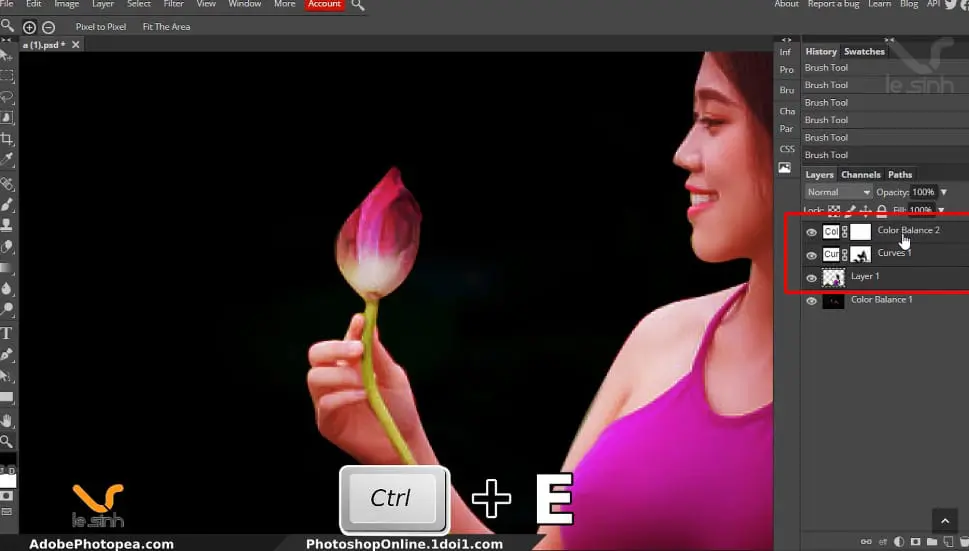
Step 6 : Hold Ctrl + Left click on 3 layers “Color Balance, Cures, Background” to select 3 layers at the same time. Continue, press Ctrl + E to group 3 layers Color Balance, Cures, Background into 1 layer.
The reason I do this is because online photoshop does not support “assigning New Adjustment layer effect to a specific layer”. Otherwise group the layers. The action of the next New Adjustment layer will not be controlled.
Step 7 : Working with the Background layer is done. Now let’s select the girl layer. Repeat the action Select the girl layer (Number 1). Select the New Adjustment layer icon (number 2) and choose Curves. New Adjustment layer> Curves
Adjust the Curves settings to low. Adjust Photoshop light effects in online photoshop so that the girl gradually “goes into the dark”. Don’t worry about Black Background! That will be dealt with later and extremely simple.
Step 8 : Continue to create a new Adjustment Color Balancer by going to the path New Adjustment layer> Color Balancer … the purpose when I do is still the same – Change the color of the girl as desired.
Parameter New Adjustment Layer> Color Balancer … this time I chose Red: 100, Green: -20, Blue: -19. Notice that the girl’s image has turned to Pink and Red.
Because my thoughts are: the light from the flower will be Pink and Red (similar to the light from the fire + the led light). So you can completely change according to your needs. For example, turn green ^^.
Step 9 : Select the Curves layer. Here the layer mask is white. Remember to choose this Curves cell. Because it is necessary to use Brus to erase the dark areas from Curves. Lightens some areas of the girl’s body.
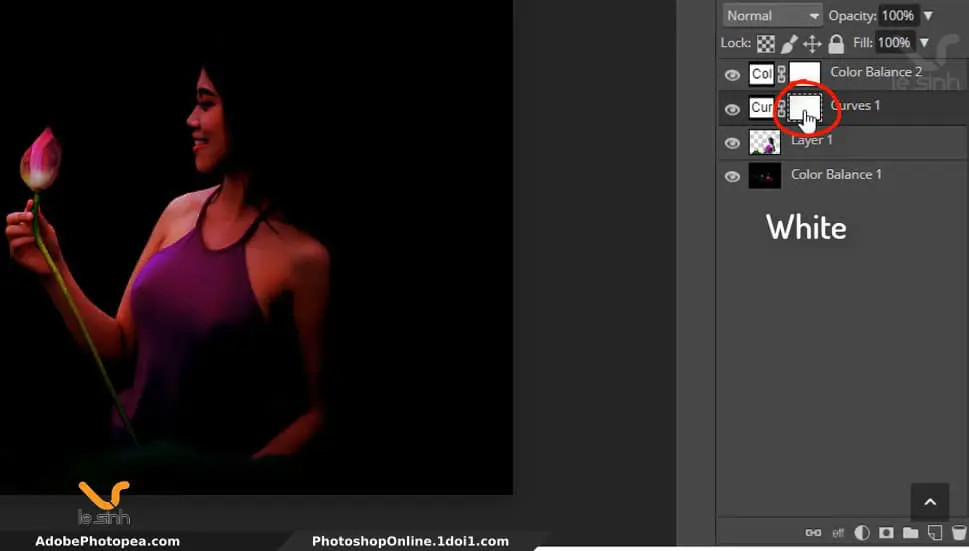
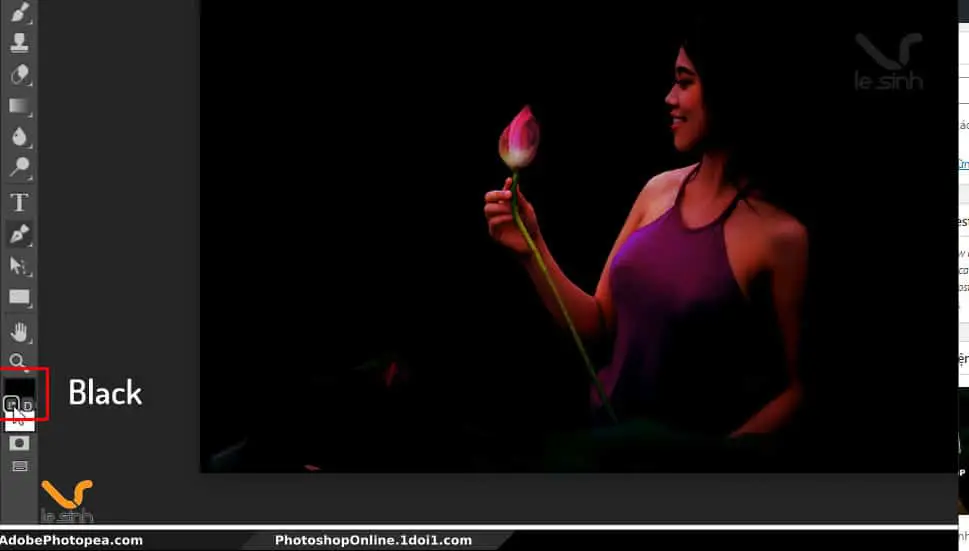
So I changed the Swap colors (X) to black at the top
Step 10 : Use the Brush Tool (shortcut is B). And the parameters of the Brush Tool as in my image below, you can refer to and give the parameters that are right for you.
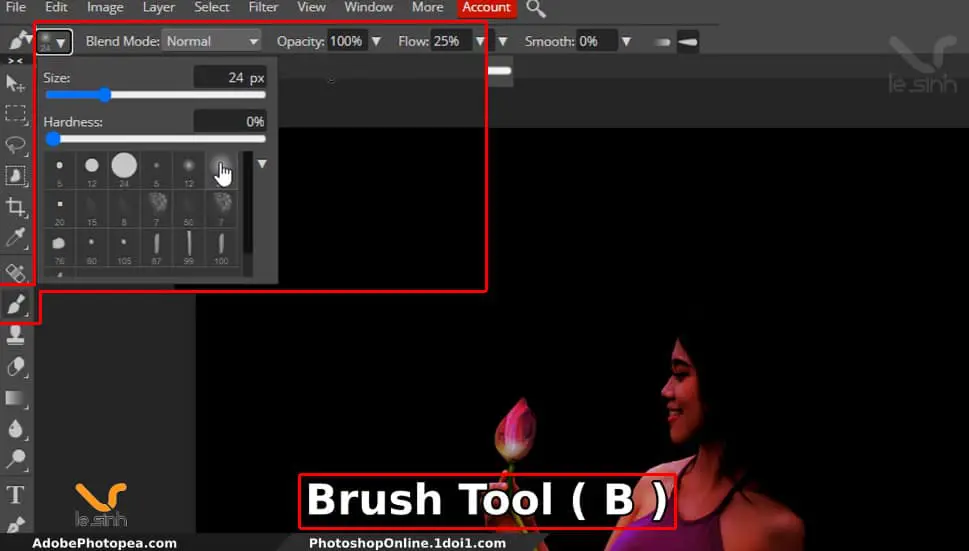
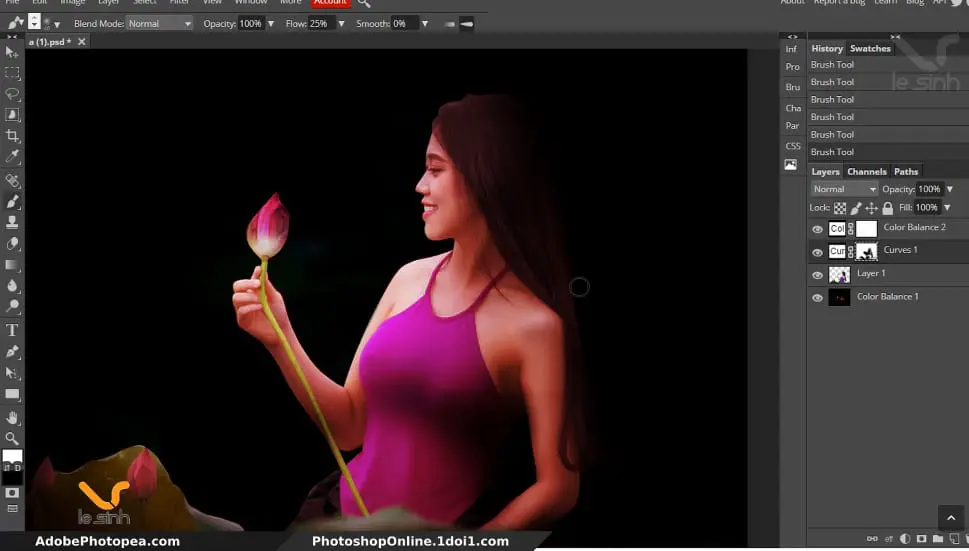
Hover over the girl, left click (with Brush Tool). And left-click on different areas of the girl’s image. This depends on how you “choose your zone”. Choose the correct “highlight” area.
And here is my girl after using the Brush Tool. Not really good. So you should do better than I do !.
Step 11 : When satisfied with the light from the girl. Please group the layers by holding Ctrl + left mouse button on 3 layers. Here it is: girl layer + Curves layer + Layer Color Balance. Then Ctrl + E is to merge the layer into one layer.
When finished executing this command. The background will no longer be dark!
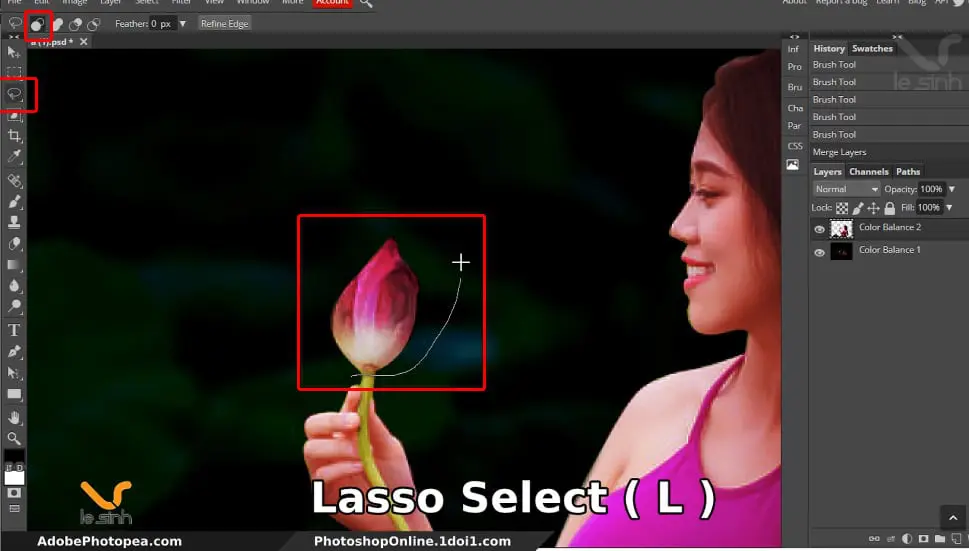
Step 12 : Select the girl layer. I am wanting to take the flower, make a separate layer. And increase the brightness of the flower. So now we’re just going to get the flower.
I used the Lasso Select tool (L) to quickly select the flower. Once you have Lasso Select to select the flower. Press Ctrl + J to duplicate the selection (containing the flower).
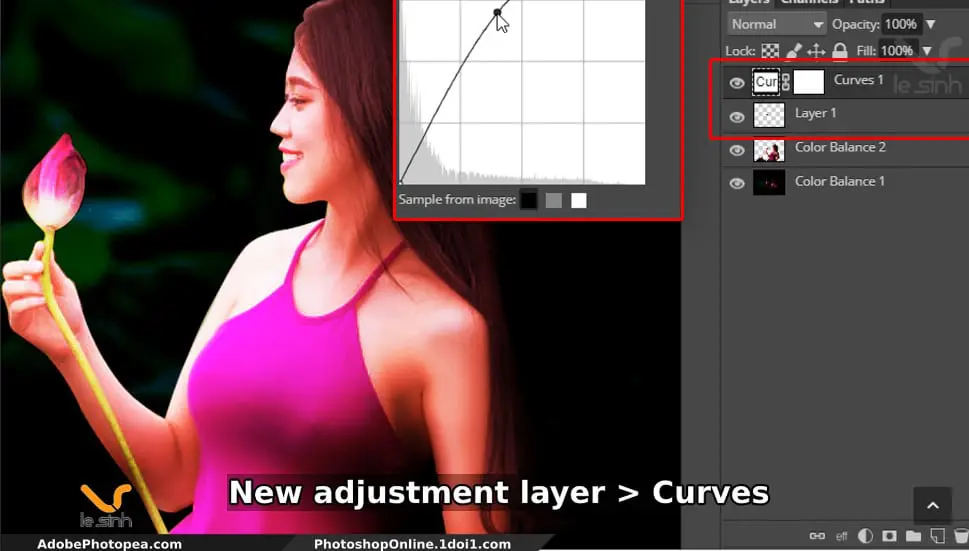
Step 13 : Continue to select New Adjustment layer> Curves and push the Curves light bar up. Aim to brighten the light! (You can replace this step with the command Ctrl + M)
Then Ctrl + Left Mouse. Select the layer with flowers + Curves layer. Press Command + E to merge these 2 layers into 1 layer. This helps the Curves parameter only affect the flower. Do not affect the girl and the background.
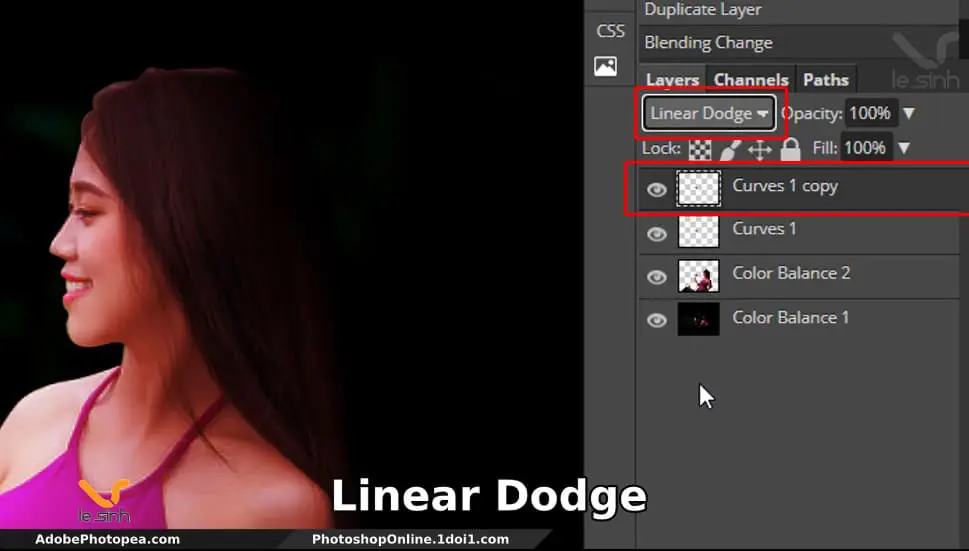
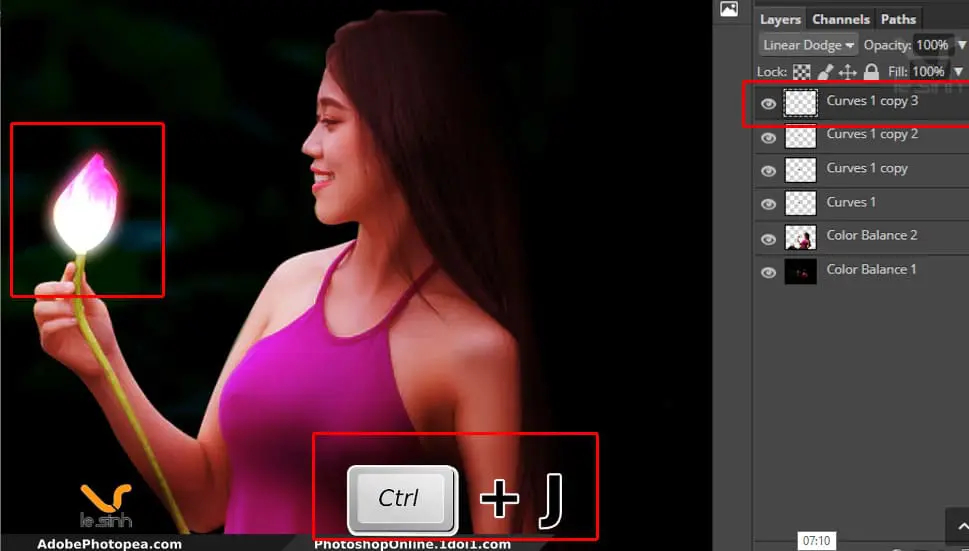
Step 14: Select the layer containing the flower. Press Ctrl + J to duplicate the flower layer object. Next choose Linear Dodge blend 2 layers containing 2 flowers together for a better light effect.
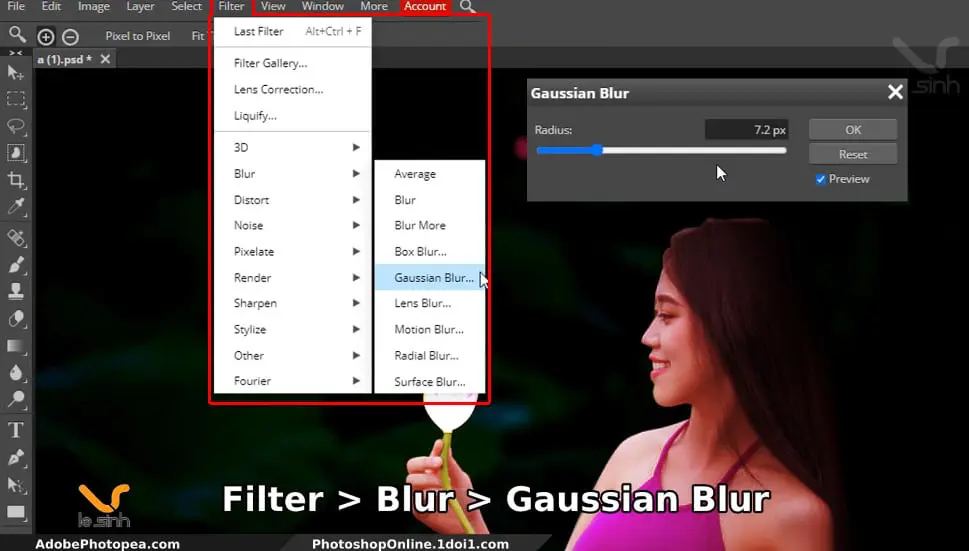
Step 15 : Select the flower layer (duplicate). Go to the menu Filter> Blur> Gaussian Blur (blurring the image in photoshop onlnie). Leave default settings as given by software. The Radius is 7.2 px. Varies depending on your needs!
Step 16: Repeat step 14 and step 15. Duplicate flower layer (done with Gaussian Blur in previous step). Then go on to the Select flower layer (made with Gaussian Blur in the previous step).
Go to Filter> Blur> Gaussian Blur to continue Blur to the flower layer (done with Gaussian Blur in the previous step). But each time perform the operation again. Let’s increase the Radius (of Gaussian Blur).
Radius ( Gaussian Blur )
- First time: 7.2px (Layer Curves 1 copy)
- Second time: 20 px (Layer Curves 1 copy 2)
- Third time: 50 px (Layer Curves 1 copy 3)
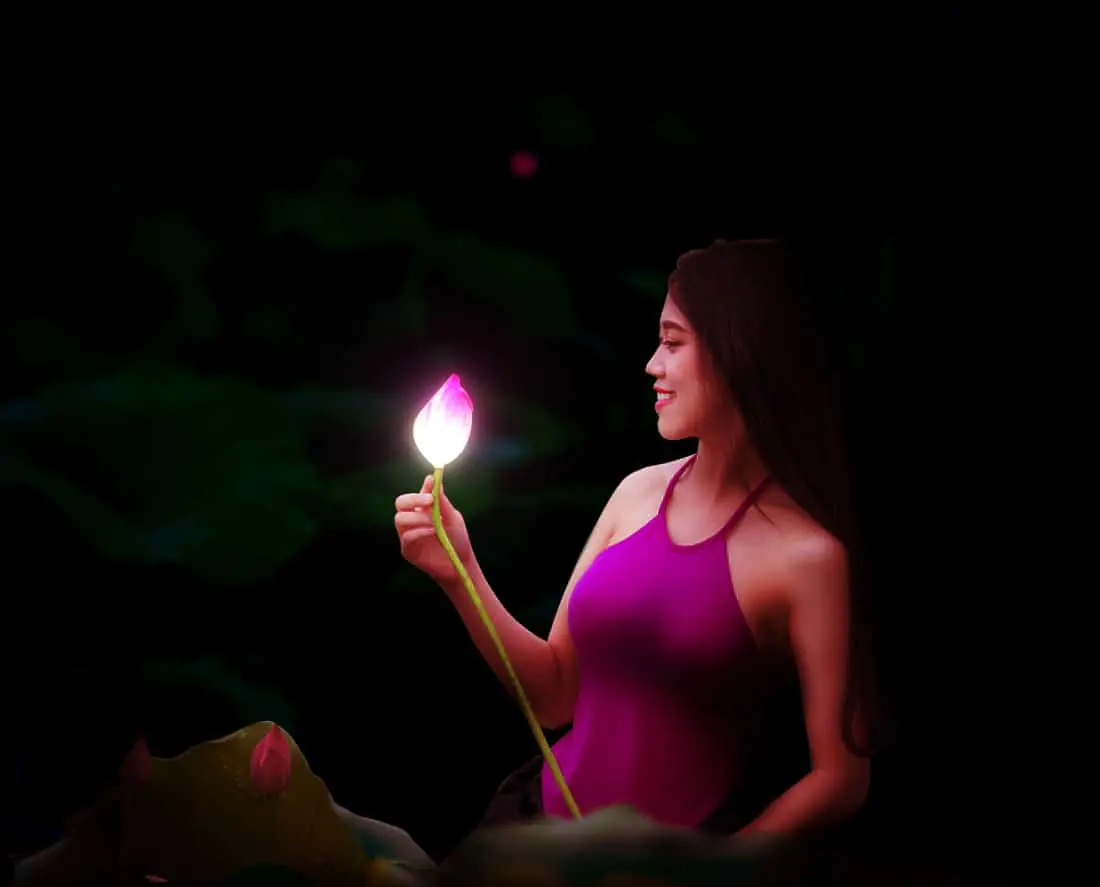
So the homework is done! From an image with daylight. This online Photoshop tutorial has turned the photo into night time. Hope you are successful. And here is the final product from this tutorial:
Video tutorial on creating shadows in photoshop online
For you to have easy access to visual information. I have recorded the video during writing. Watching the video will definitely help you do this exercise a lot better.
Don’t forget to support the channel and website if what I do is fun and effective. You can subscribe to youtube channel or click ads on the website. I am very grateful for that action of you.
I have an article to beautify skin with photopea that was posted on the web. It will be interesting if you see it and apply it as needed.
Thanks You Watching website ^^.