To use the mockup photoshop we simply need to open it on Photoshop software in PC version and edit the image file to be changed by left mouse edit contents with the mockup photoshop file.
The simple thing is so, but if in case you need to edit the mockup photoshop file on photopea’s online software (or photoshop online). The hard thing here is that you can’t left click to show the menu edit contents. And this tutorial will show you step by step to edit mockup files online.
What is mockup photoshop file?
Is a .psd file format that is adjusted by the creator for perfect photo collage parameters on a certain material. From there, you just need to change the material you want to join to get “collage file that is close to reality and suitable with the material”. Similar to you using 3dsmax software to render the product.
In the pre-made mockup photoshop file, usually you just need to replace a photo or a line of text to have a realistic render photo collage template. Its strength as mentioned is that rendering simulated jigsaw puzzles quickly in just a few minutes, instead of as long as rendering in 3d software can take hours.
Brand mockup is used to render logos, render name card designs, poster designs , menus, advertising posters, … It can be said to simulate realistic 2D designs in printing when actually constructed. in real life.
Download logo mockup photoshop
As always, I will attach the link to download the logo mockup file used in the tutorial so that you can easily grasp the practice as in the article and the video at the end of the article. Please note that the mockup photoshop used online should only choose files with medium size and medium size. If the file size is too high (50MB or more), the software will load slowly.
Link down mockup logo: https://bit.ly/2QkhhZ0
Once the attachment has been downloaded, it can be used immediately by visiting adobephotopea.com and waiting for the software at the web page to finish downloading. Press F11 to browse the browser in full screen mode to avoid errors when manipulating.
Instructions to edit online mockup file
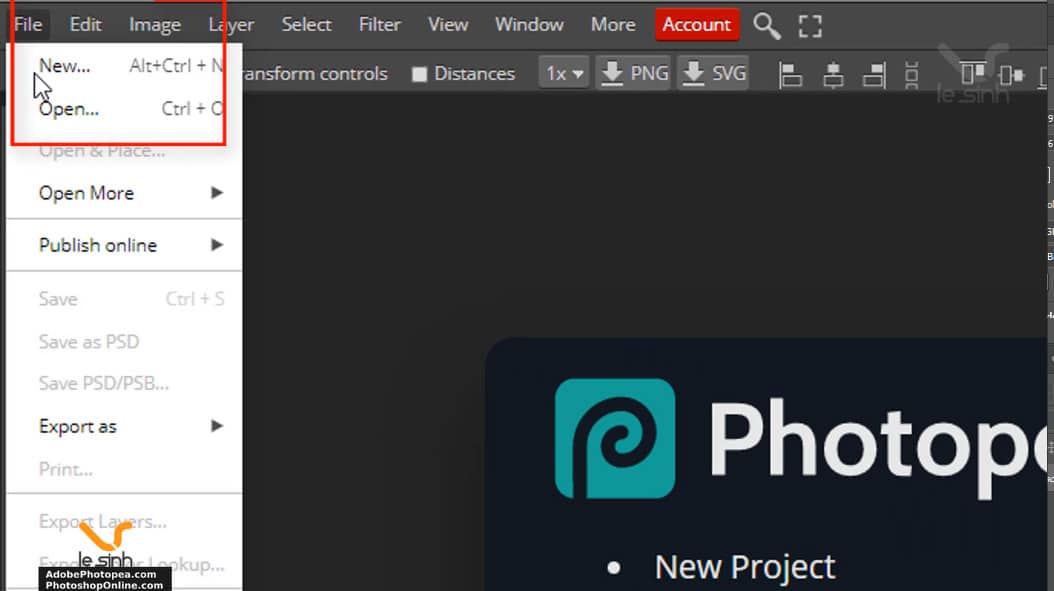
Step 1 : Remember to press F11 to full screen the browser before doing. Use Ctrl + O command or go to File> Open to open the mockup photoshop file you have downloaded. The file loading process will have a delay and there will be notice above the toolbar “loading”.
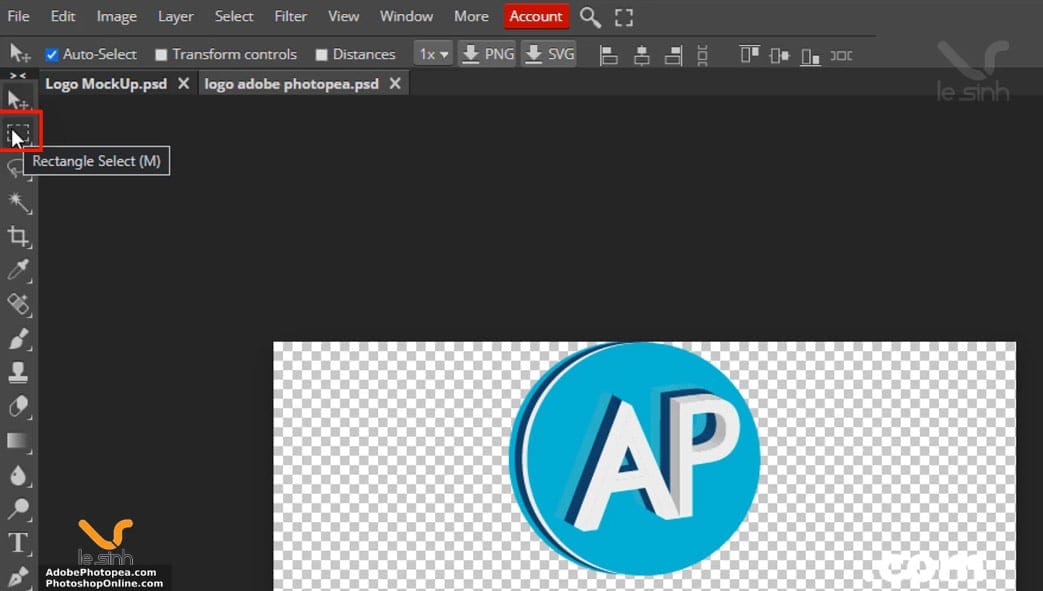
Step 2 : Open the image file you want to change. Because this post instructs to change logo mockup. So I will use a transparent logo image file (.png) for collage. Next, crop the image with Rectangle Select (M).
Actions as follows: select the Rectangle Select tool (M)> Click and hold the left mouse button in the corner of the image> drag the left mouse in one direction to cover the desired cut to make a selection> release the mouse.
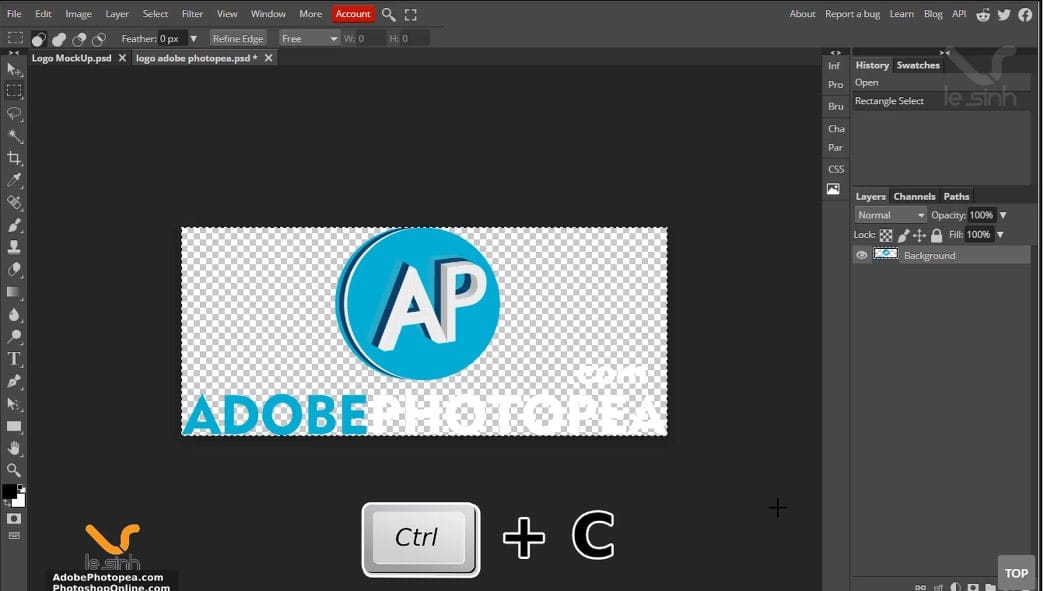
This will appear a selection around the logo file. Copy the logo file with the shortcut CTRL + C. Go back to the tab containing the mockup photoshop file (Logo MockUp.psd)
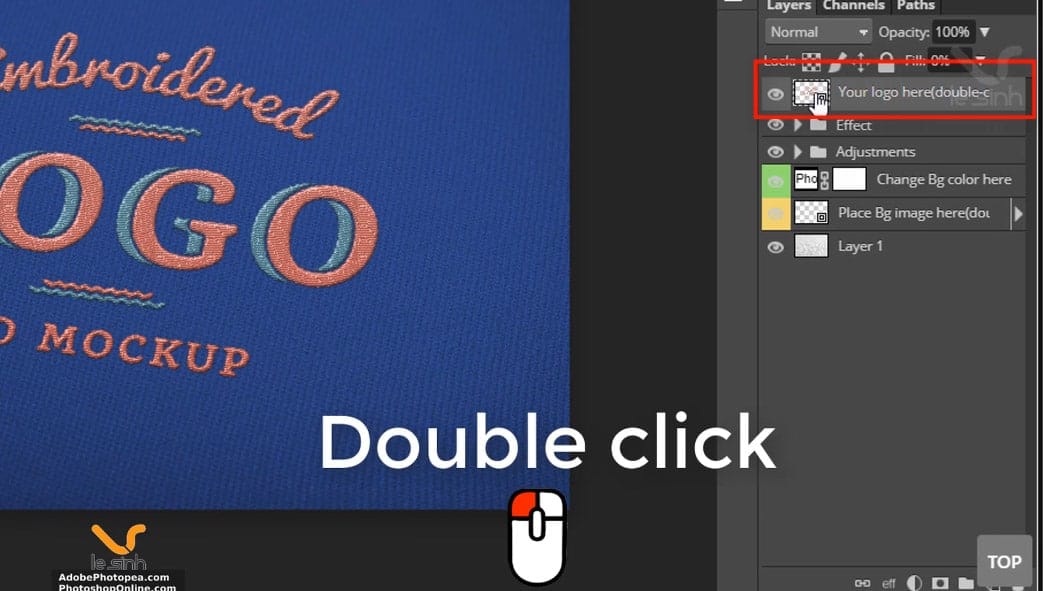
Step 3 : Once in the editing interface of the mockup photoshop file named “Logo MockUp.psd”. Look at the Photoshop software’s layer canvas. Here there is a layer called “Your logo here …”. You double left click on that layer to continue to edit the logo to be grafted.
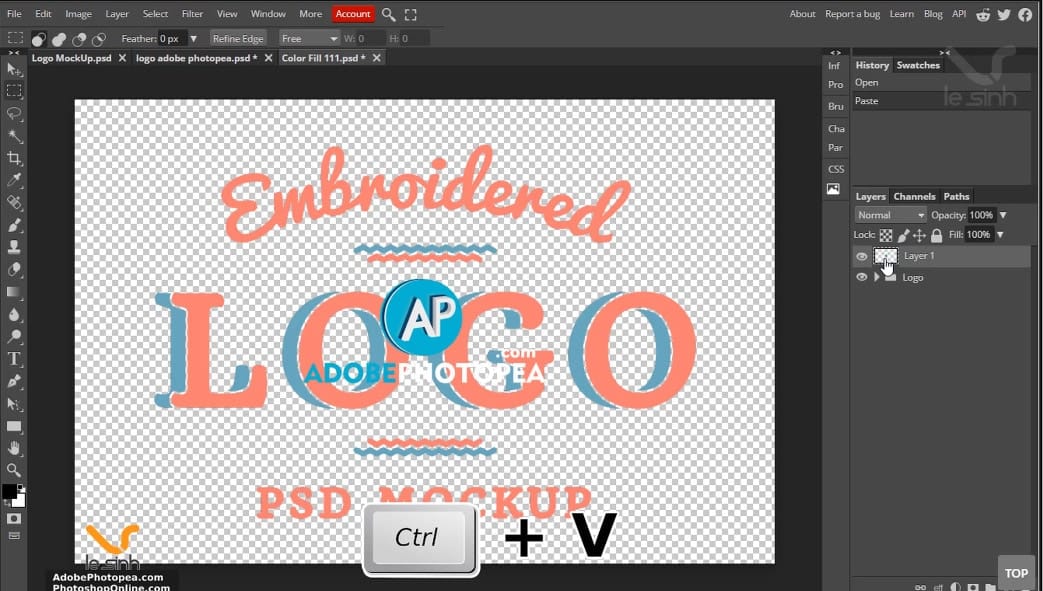
Step 4 : Because earlier we have used the CTRL + C command to copy the transparent logo image file. Right now, please use the command paste CTRL + V file to duplicate the copy file here. Next, delete the layer named “Logo” below or hide the visibility of the layer by left-clicking on the eye image – in front of the layer name.
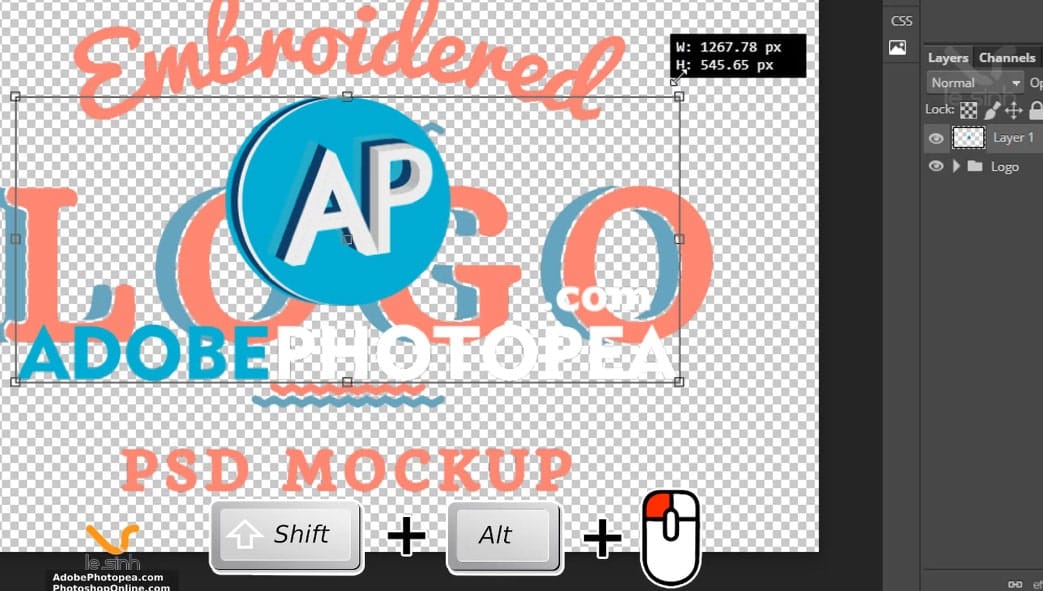
Step 5 : This operation is used to adjust the display size of the logo file you just pasted when they are too big or too small. First, in the layer containing the image file of the logo, use the command CTRL + T to select the enemy> Press and hold Shift + Alt + left-click on the corner of the selection (small square)> Keep the same action and drag left mouse out or in> Enter finish.
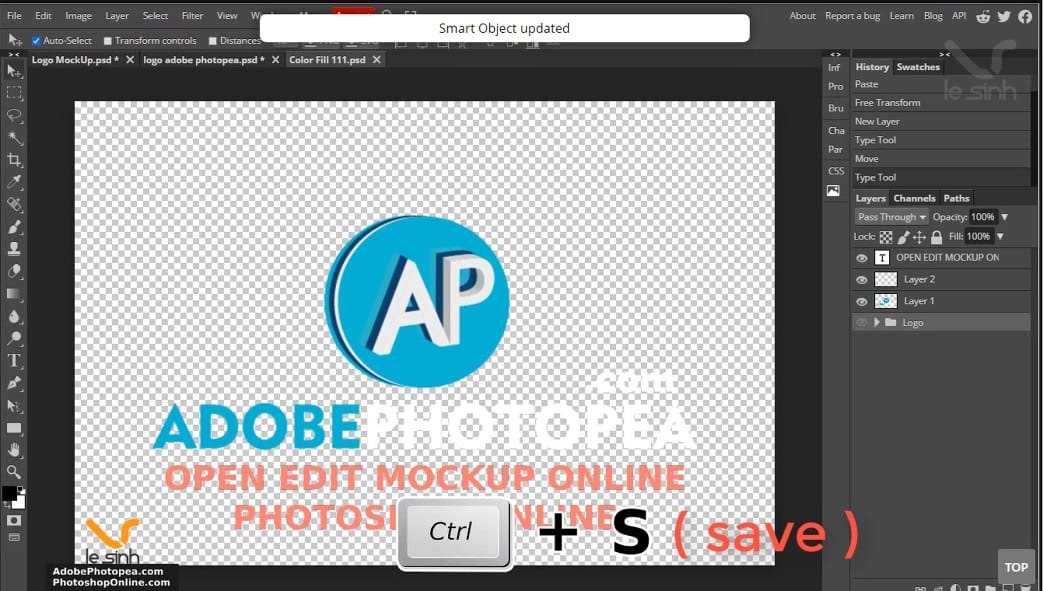
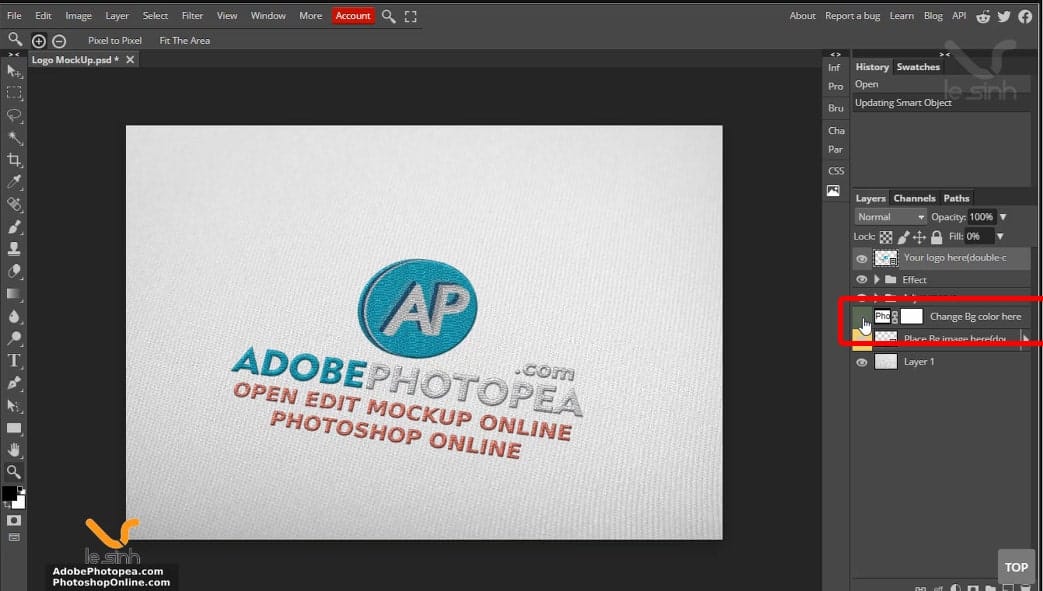
Step 6 : When the photo alignment is complete. Press the CTRL + S keyboard shortcut to save the settings. In this process, the software saves editing information will be long or fast depending on the quality of the mockup photoshop file you are doing. If the file is saved for a long time. The message “smart Object updated” will appear to notify.
Step 7 : When the file saving process is complete, go back to the tab “Logo MockUp.psd” to view the post. So finished editing mockup photoshop online with photopea software on a web browser. The background of this file can be changed by enabling – all layer eye icons “Change BG color …”
Video tutorial to edit mockup file of photoshop on photopea
At the end of today’s Tutorials photoshop , I will send a video so that the members find the description on the website difficult to understand. If I do not understand what I write above because of the language. Check out the mockup photoshop editing video below for the easiest look.
Thank you very much for watching the article. Please share and click on the ad on the website to support yourself a cup of coffee in the process of compiling the next online photoshop content. That is a great source of encouragement there. Thanks you view website. Link article in Vietnamese