Poster design in photoshop is a way to make beautiful posters ,poster design in photoshop software to make posters beautiful and easy, depending on the needs of each individual or group.
There are many different poster sizes depending on where you want to place posters, so there are almost no required sizes for graphic designers and people who are Tutorials photoshop and poster design in photoshop when creating them.
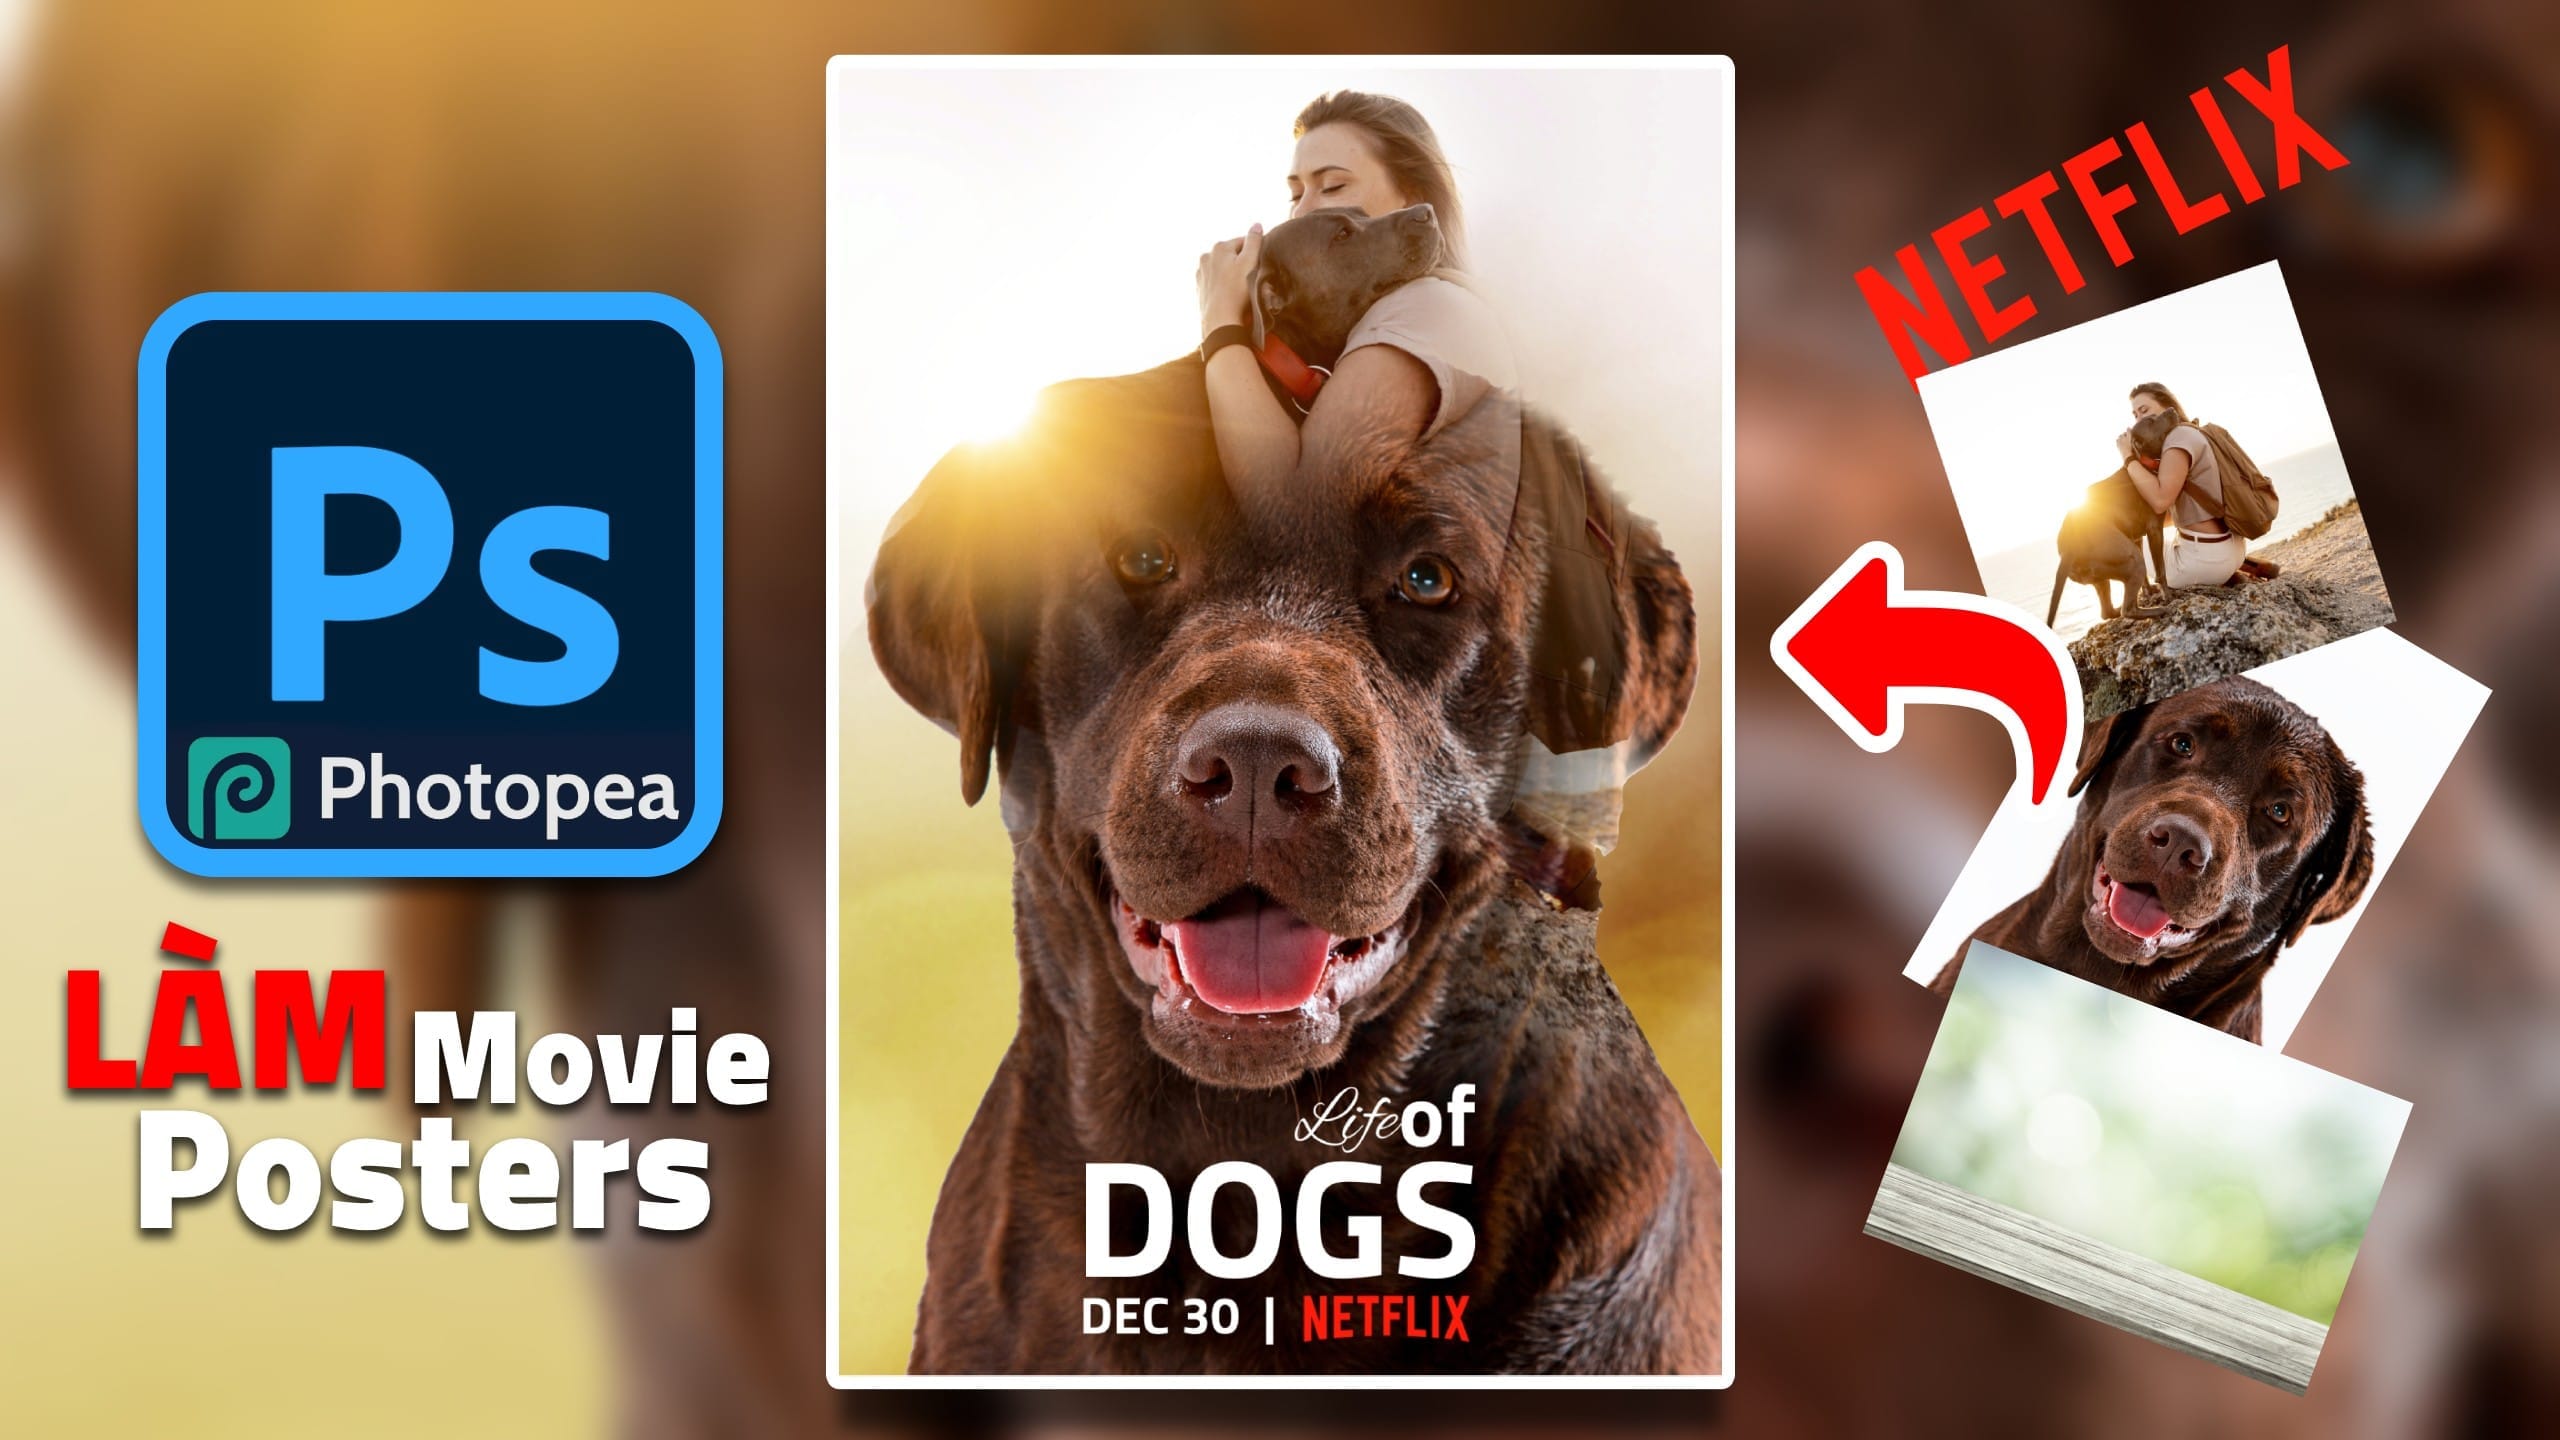
What is poster design?
A poster is an advertising publication created from a combination of imaginative and technical imagery and text effects as well as aesthetic thinking of graphic designers. Beautiful poster will cause the visual effect to attract the most effective viewers.
Beautiful poster design in photoshop are often used for markerting strategies for products, movies or informational messages that need others to see and remember. Or for signs in bus stations, docks, traffic locations or in the home or for decoration.
Best poster size
Although it is said that the poster size is not limited in any framework. But in order to have a great poster design in photoshop, graphic designers need to follow some of the most used standards ever when it comes to poster size in the creation of this graphic product.
Smallest poster size
Small poster of 8.5 in x 11 in (21,590 x 27.94 cm) or 11 in x 17 in (27.94 x 43.18 cm) is the most frequently used size in corporate and business documentary publications in consumer advertising events, entertainment activities, … with a need for 1 to 3 visible individuals.
Medium poster size
The average poster is 18 in x 24 in (45.72 x 60.96 cm) or is used to promote movie posters to hang in the cinema, in advertising notice boards at universities, medical facilities , … used for purposes where 5 to 20 people can see it
Largest poster size
Large 24 in x 36 in (60.96 x 91.44 cm) or 27 inx 40 in (68.58 x 101.60 cm) and 40 in x 60 in (101.60 x 152.40 cm) size poster suitable for big events or events advertising space on outdoor advertising panels when the attention of a large number of people can be from a few hundred to several thousand people
Poster design in photoshop online
And you are the person who likes to do everything by hand to learn or hobby or want to save money during difficult economic times. The movie poster making lesson today will be a good and economical solution for you to easily have the best poster product possible.
Raw materials for advertising posters
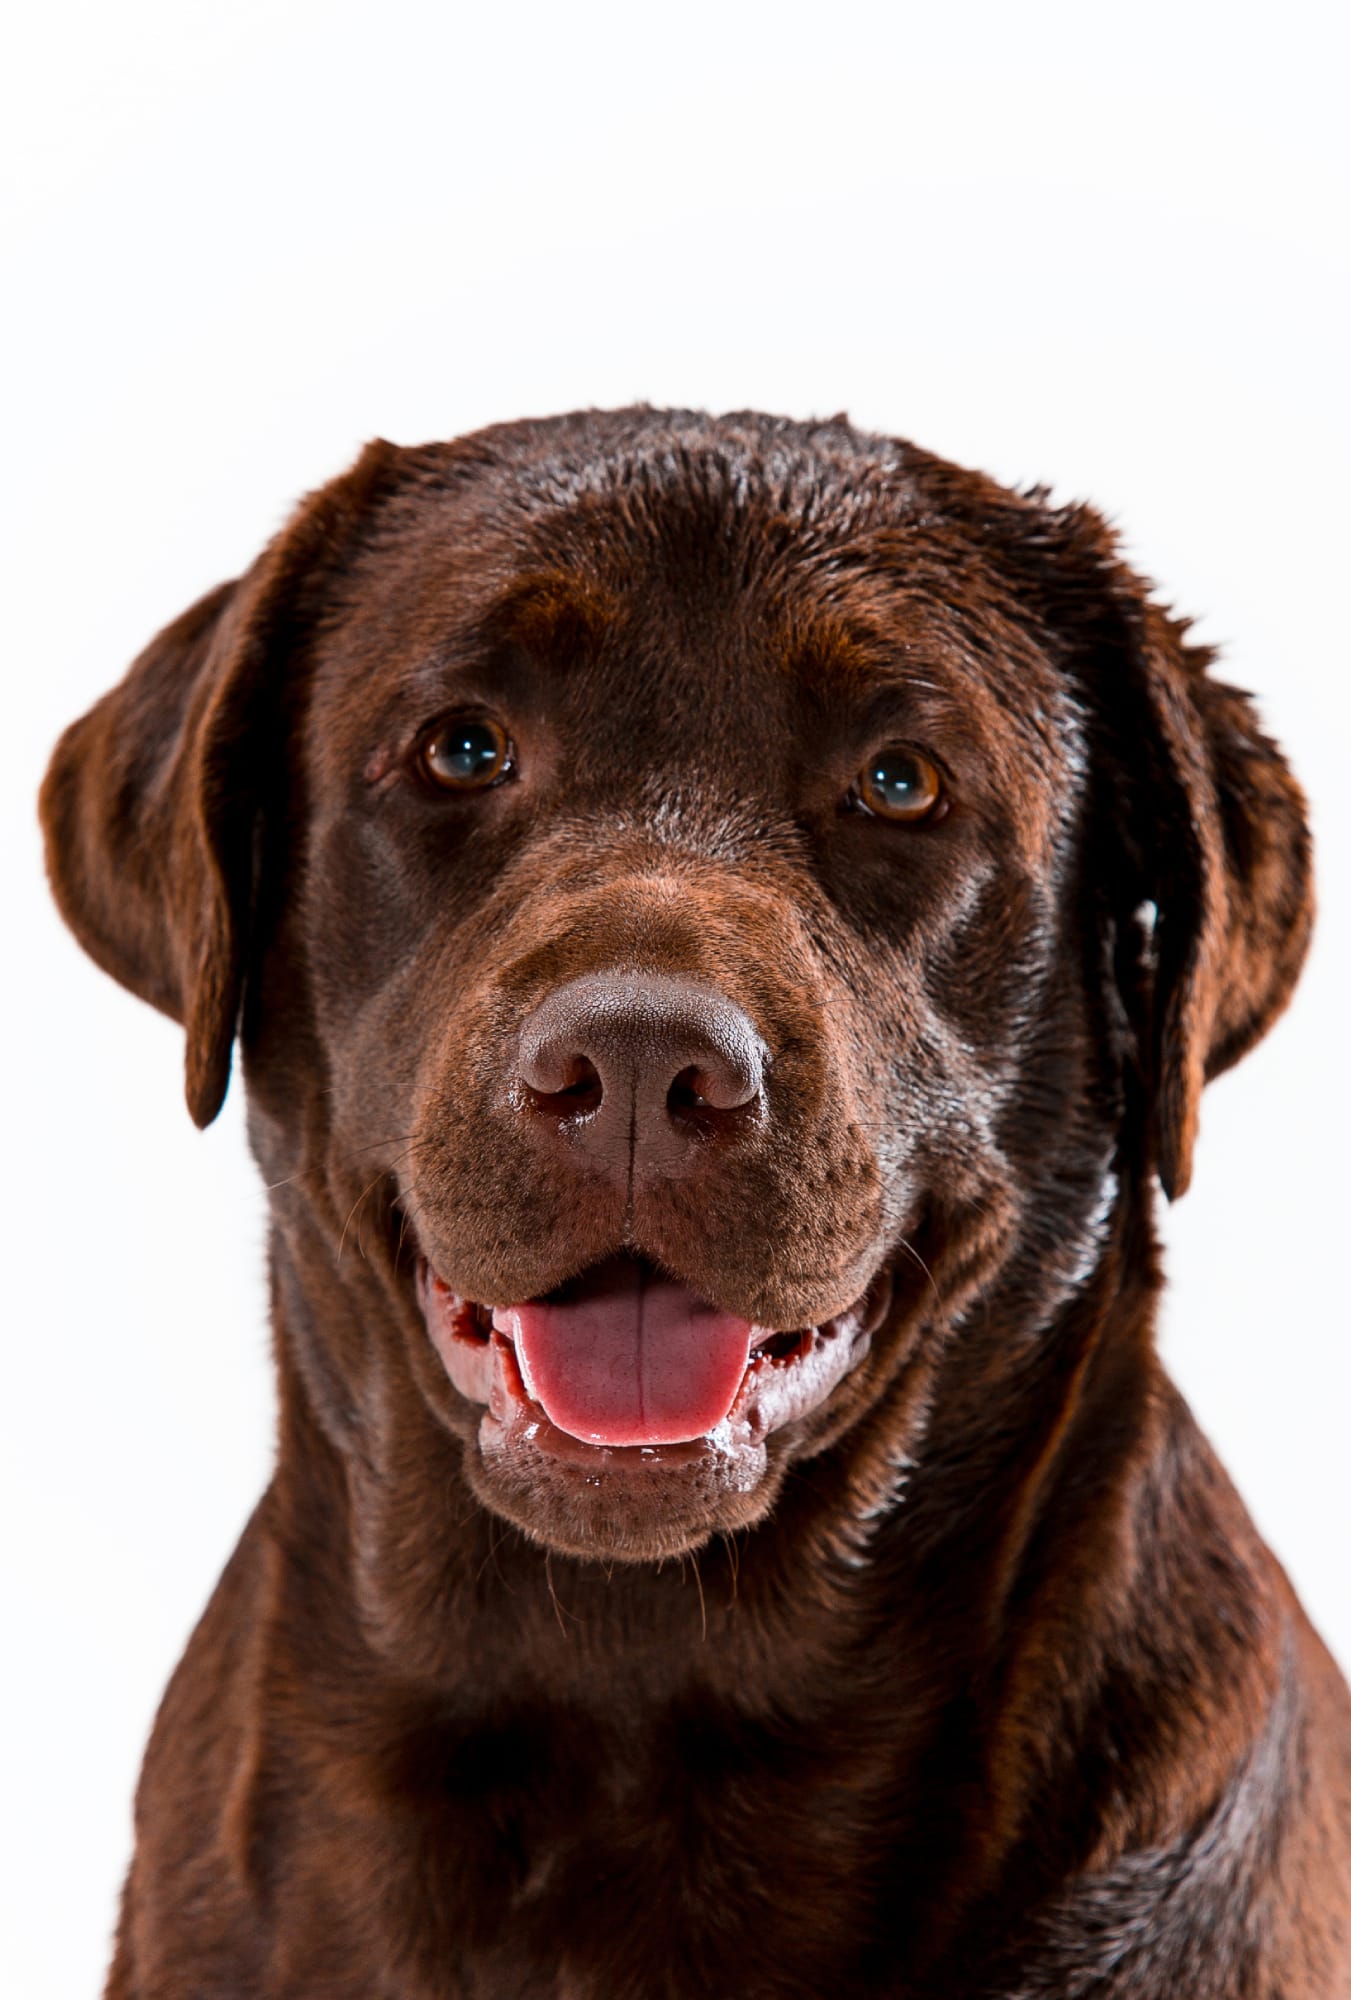
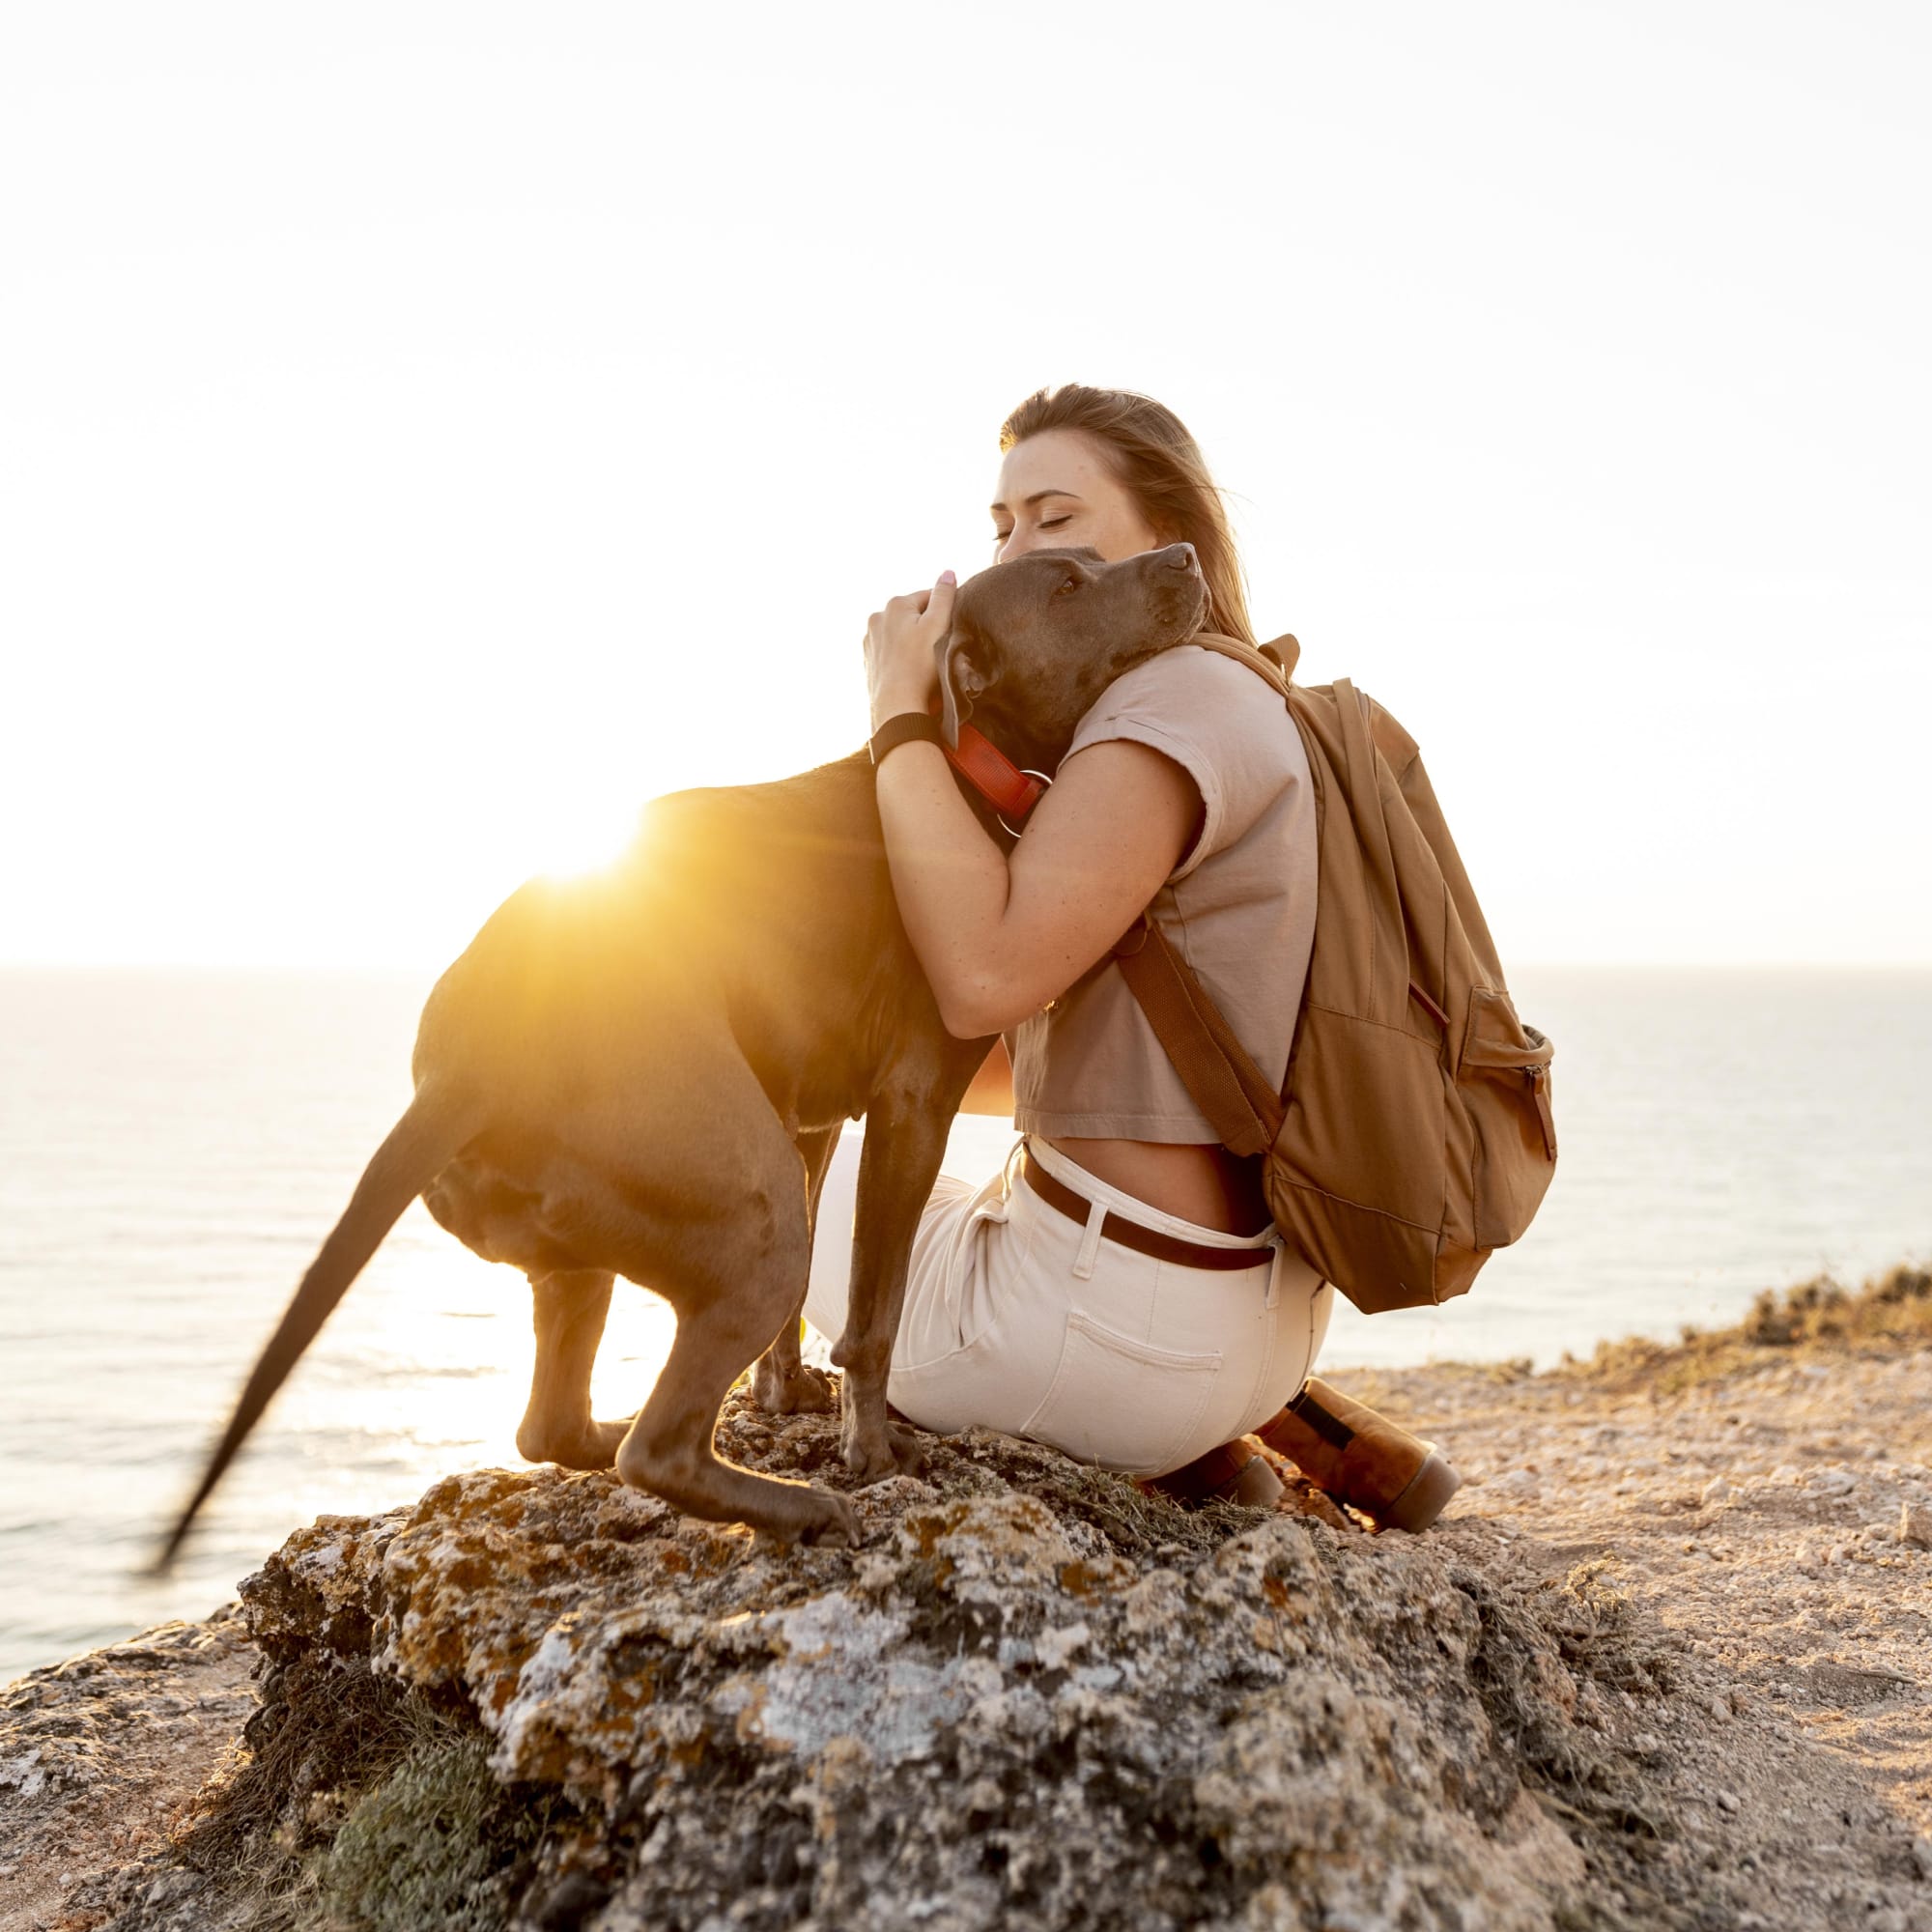
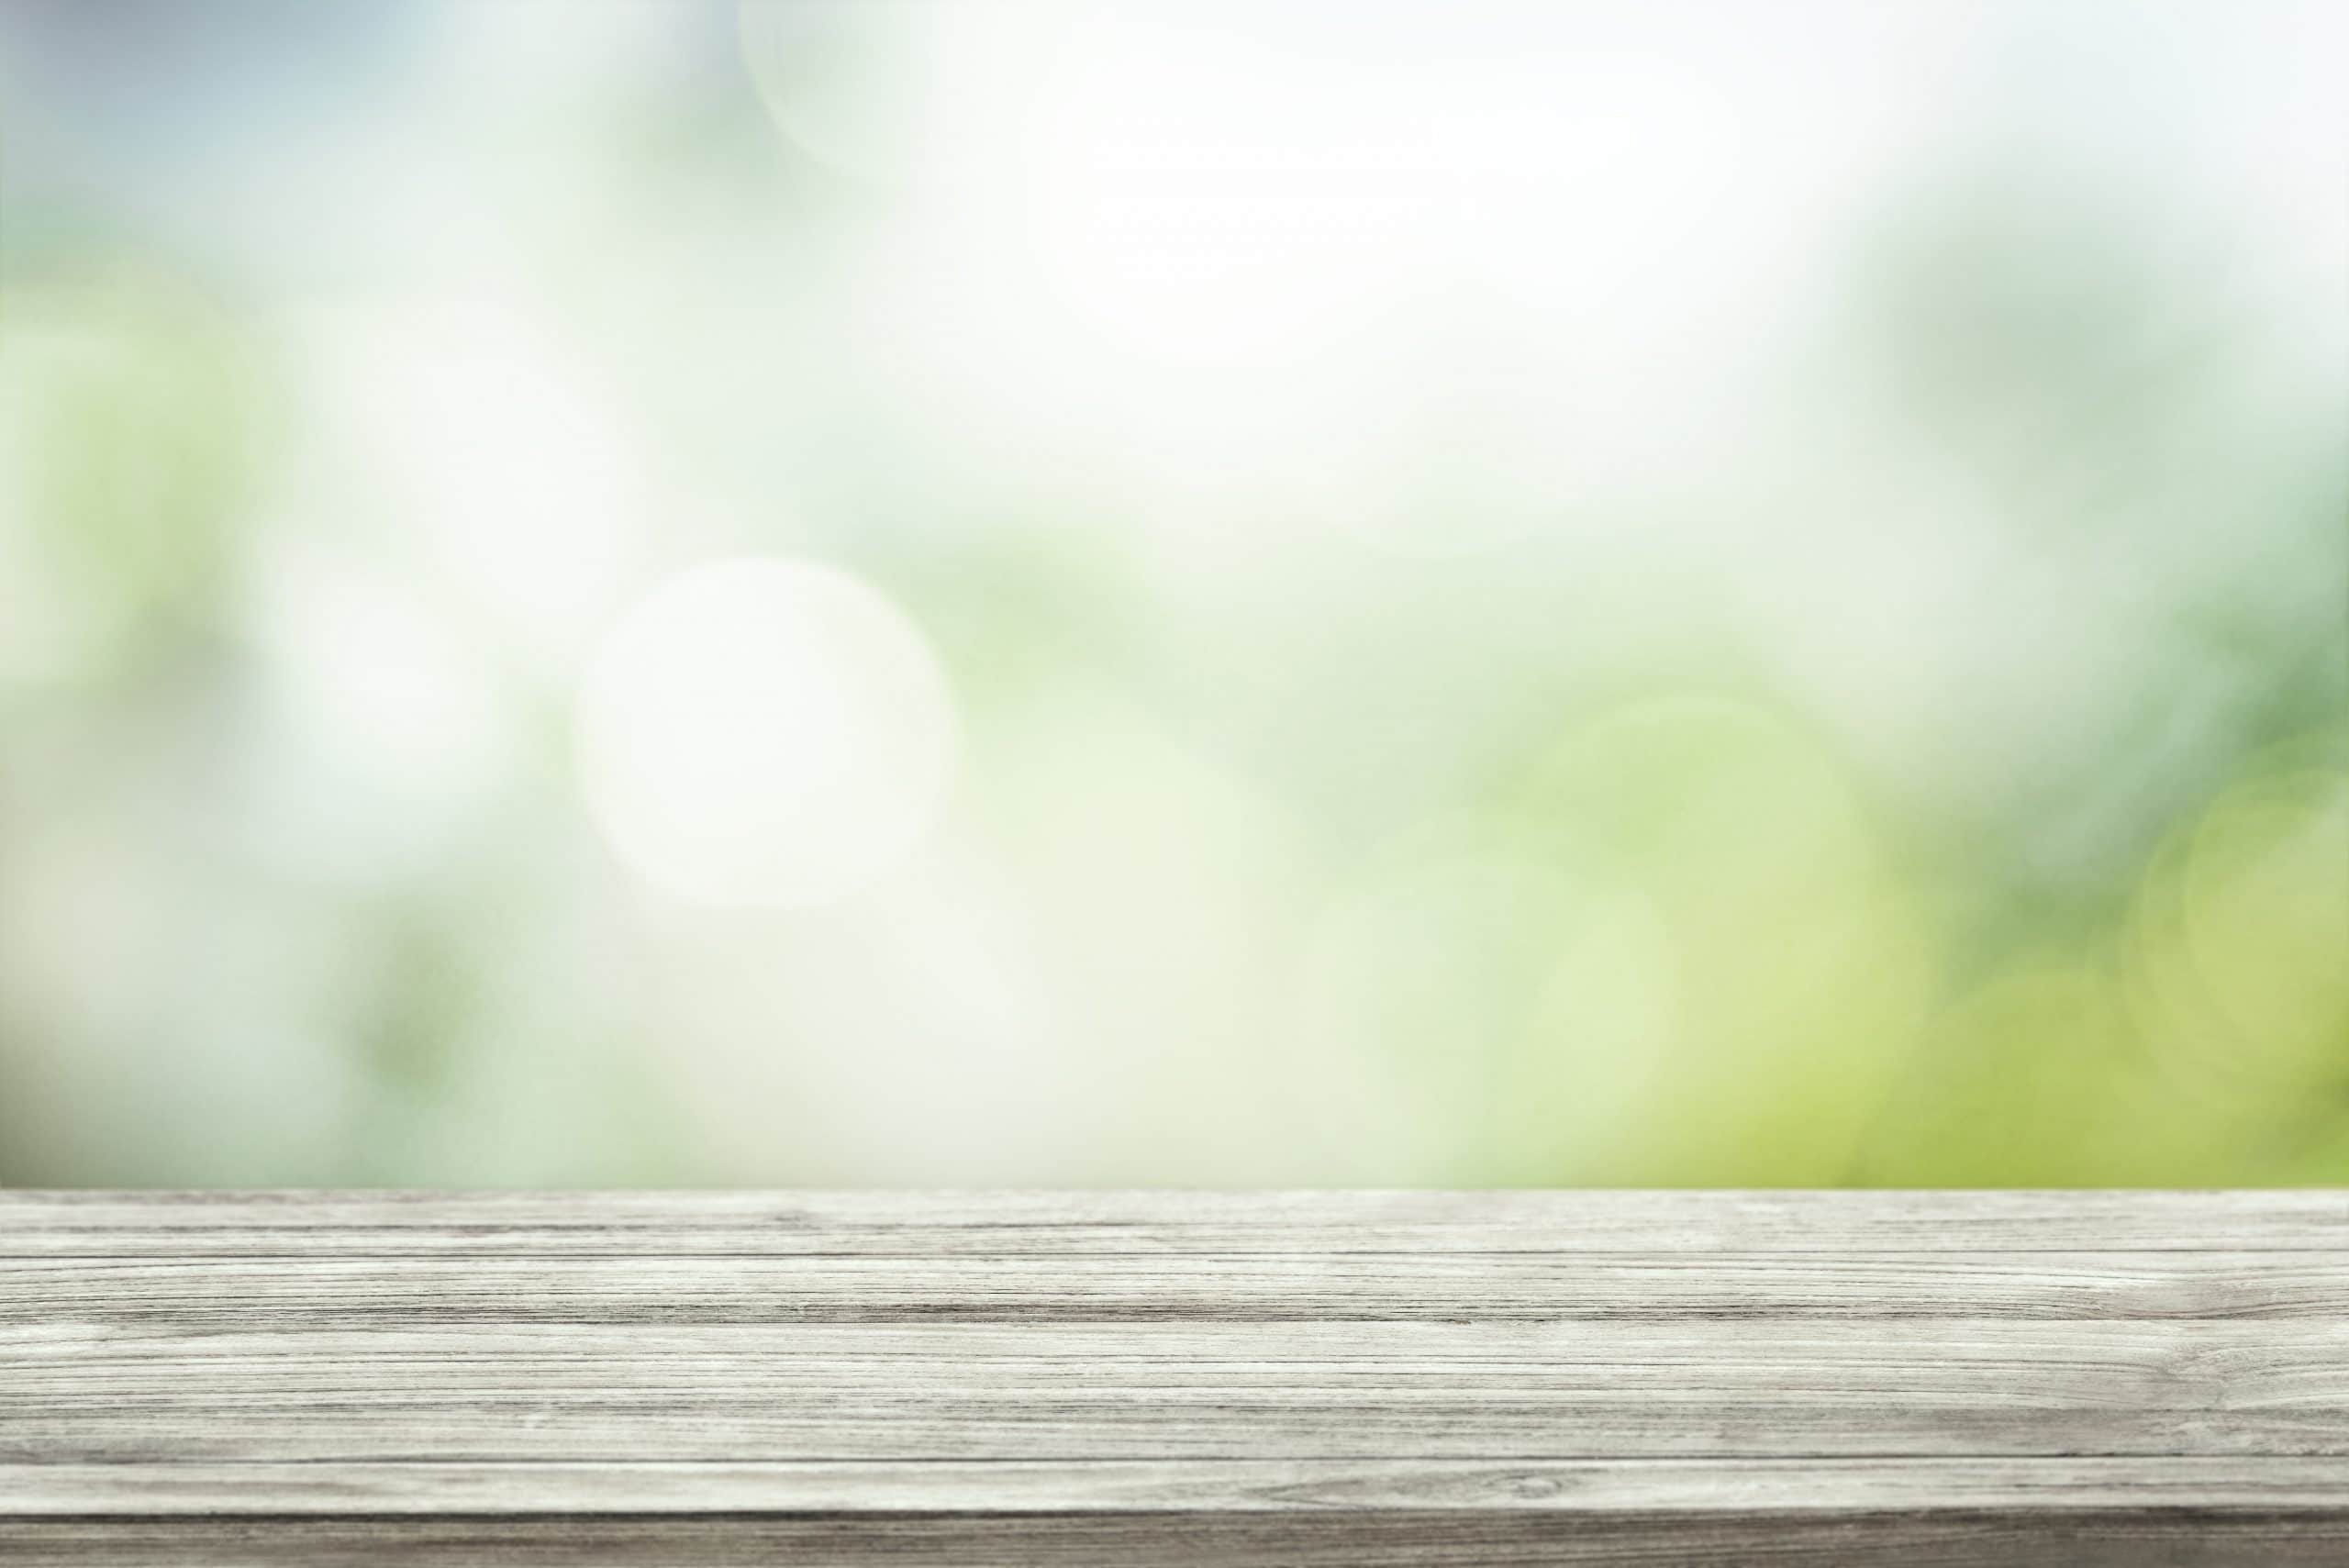
As always, first of all to be easy to grasp information and convenient to practice following this article. I would like to provide the original file for the poster material of the lesson. Everyone is welcome to download from the images attached below to get us started. Download another photo at freepik

Isolate the subject’s background in photoshop
Step 1 : If you are using photoshop online from photopea, please F11 before working so that the browser screen is full screen, avoid errors while using. Use online photoshop or adobe photoshop software to open the above attachments after you have downloaded them all. The command to open the file is Ctrl + O
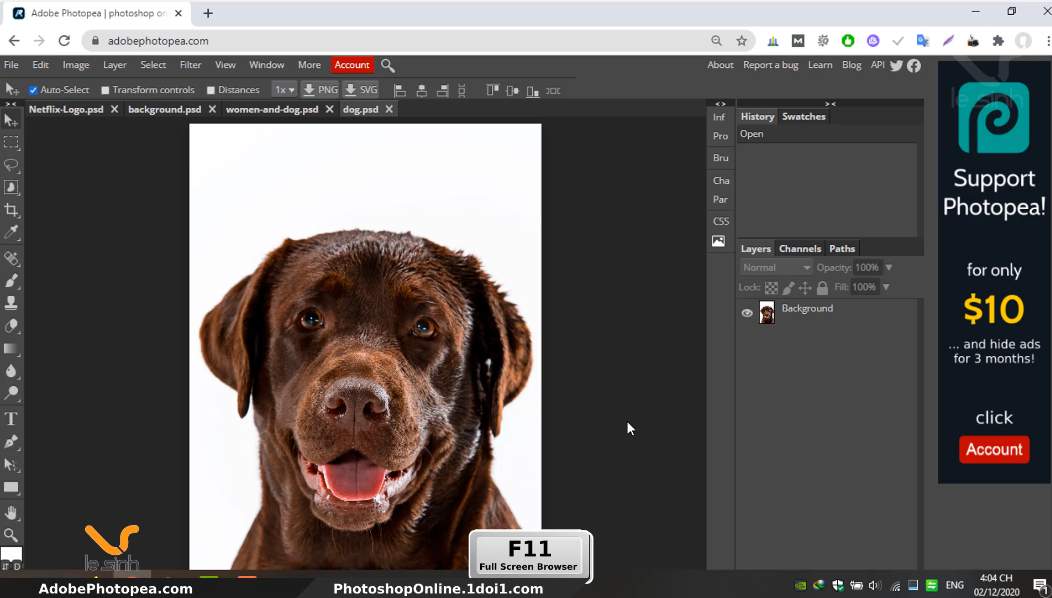
Step 2 : I will separate the background for the Dog layer object with the Magic Wand tool (W is the shortcut for quick access). The Magic wand parameter will be left as software default. Next, left click on the white image area in the Dog layer image.
The magic wand will select all the time when the field has a color that matches the white in the image, and these colors will be similar and seamless.
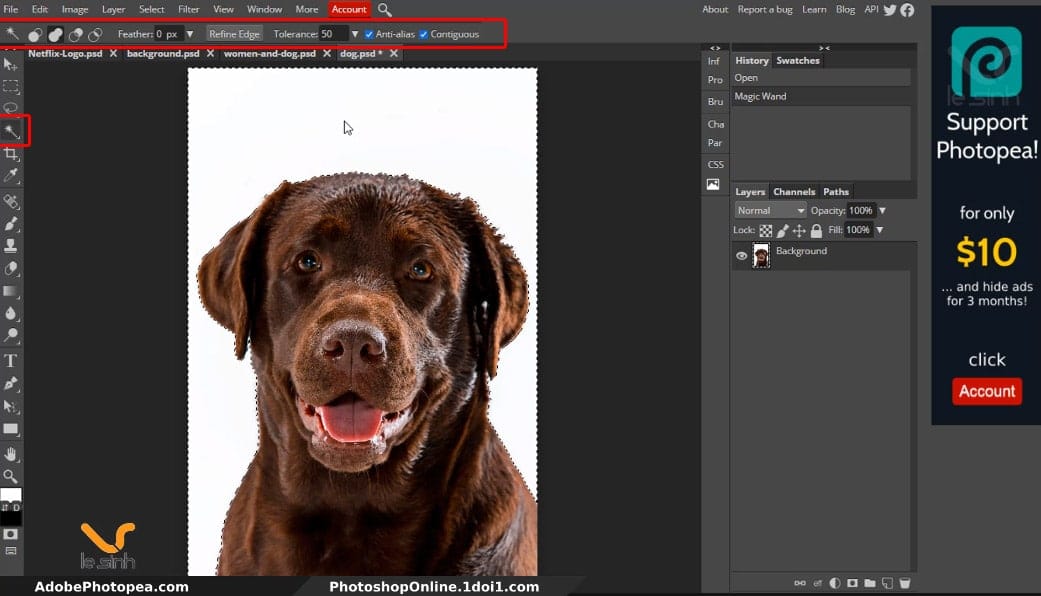
Step 3 : Use the command Ctrl + Shift + i to invert the selection of the tool. Meaning, earlier we selected the white area around the dog. Now with this command, the entire selection will “pick the dog”. About this tool I have mentioned in article # 9 about editing photos with photoshop
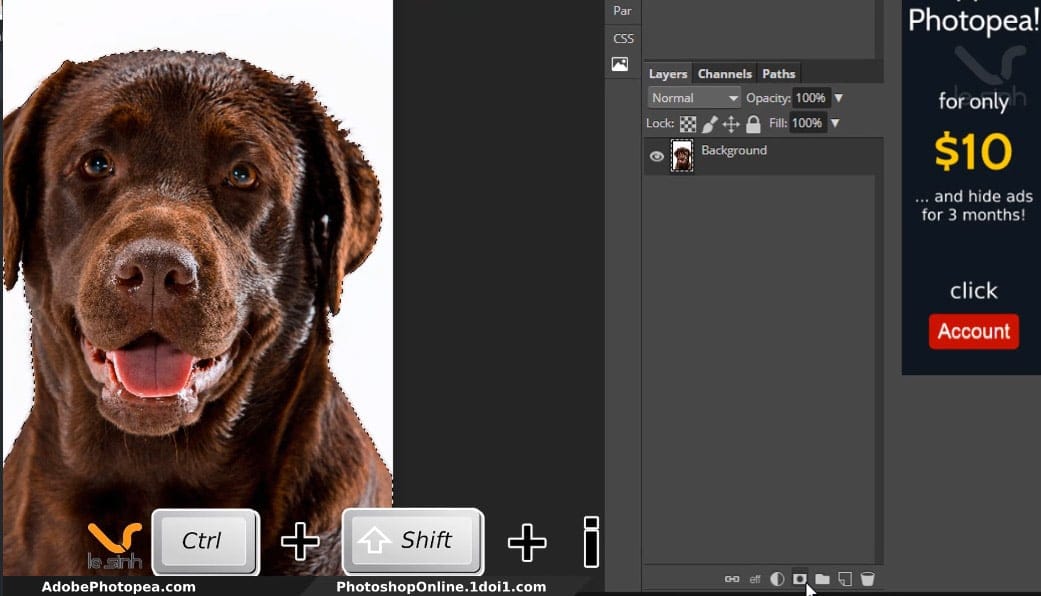
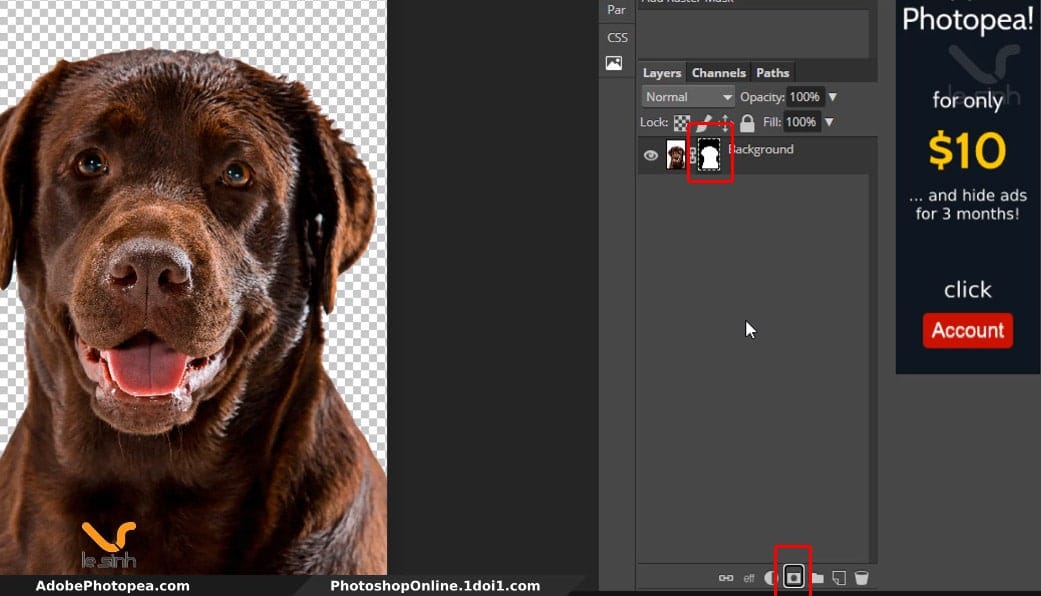
Step 4 : Create the mask according to the selected area earlier when clicking on the add raster mask tool of photoshop online. Adobe Photoshop Photoshop software will be named an add layer mask tool. Even though the two names seem different, the same feature is the same as masking the layer
Step 5 : Create a new layer, and fill this layer with white color by shortcut command in Photoshop that combine the keys Atl + Delete (or Ctrl + Delete) depending on the existing palette in the toolbar on the left. of the monitor you worked on in today’s poster design in photoshop post.
The reason I did this is in the next steps using the Brush Tool (B) to remove the fur on the edge of the dog’s ear. You can skip this step if you don’t want to do it.
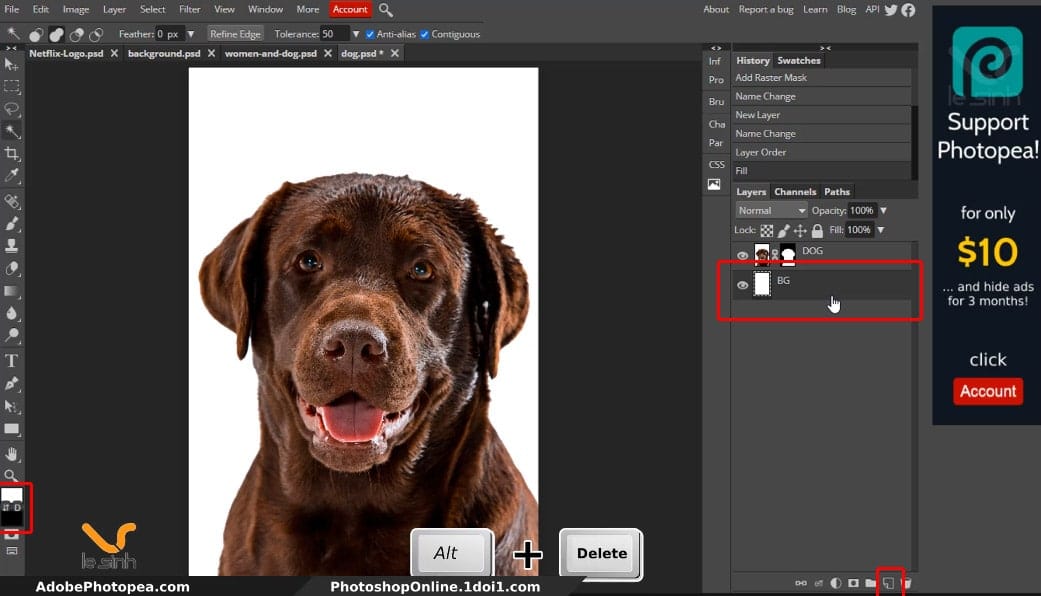
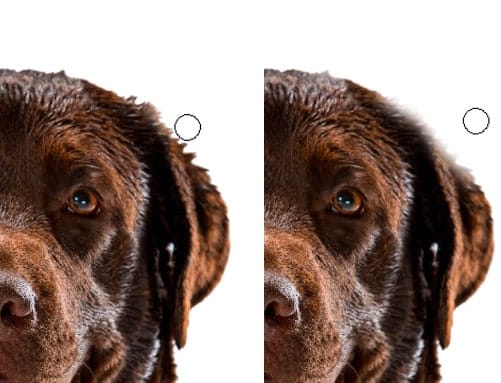
Step 6 : Before 
The reason I did this is in the next steps using the Brush Tool (B) to remove the fur on the edge of the dog’s ear. You can skip this step if you feel it is unnecessary.
Select the Brush Tool (B) and I suggest the parameters in the image below for your reference: Matte brush, Flow 30%, size 160px. Remember the color code is selected as the black above.
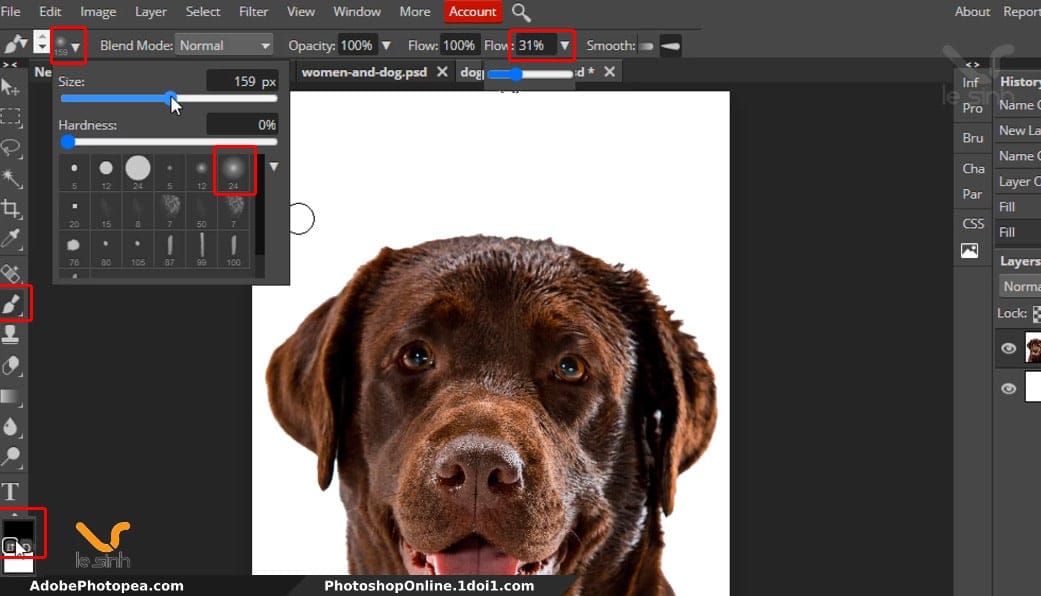
Erase redundant details or can deteriorate the image when stitching. Use the Pen tool (P) to separate this image from the background. Perhaps it will be smoother and there is no need to do this step. But this article I think will definitely guide anyone who is learning Photoshop, so applying the magic wand is probably easier.
Mix 2 photos in Photoshop
Step 7: Now copy the girl and dog images to blend into the dog layer. Open the “women-and-dog” image and quickly select the entire image by pressing Ctrl + Click left. Next use the command ctrl + c to copy the women-and-dog “object.
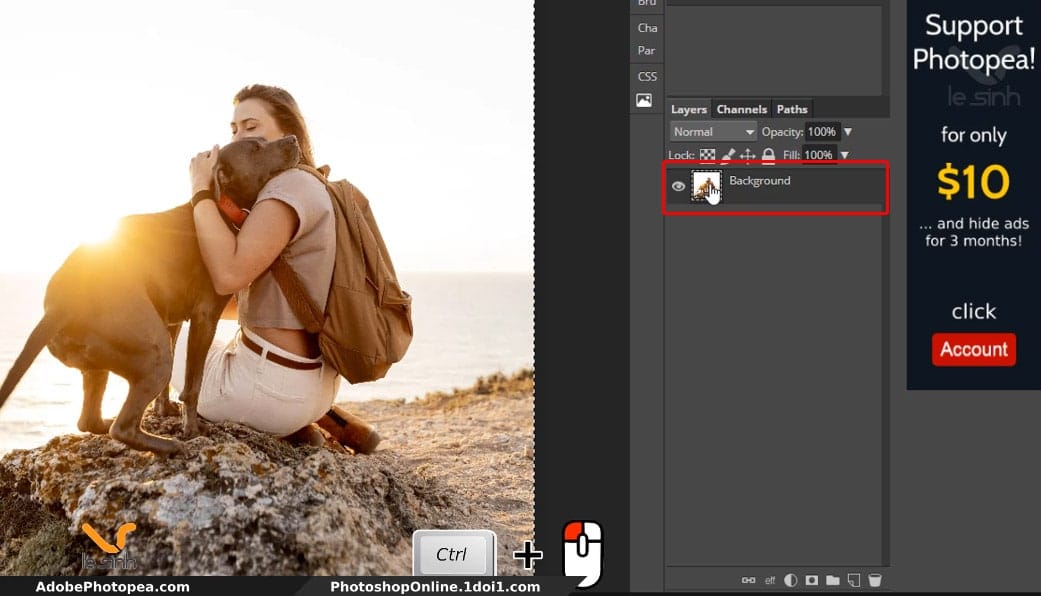
Create a new layer and use the paste command ctrl + v to paste the copied “women-and-dog” image from the other side into the newly created blank layer. You can ctrl + v directly without having to create a new layer. But sometimes this makes mistakes when the layer mask is present. So, I recommend creating a new layer so that there are no errors.
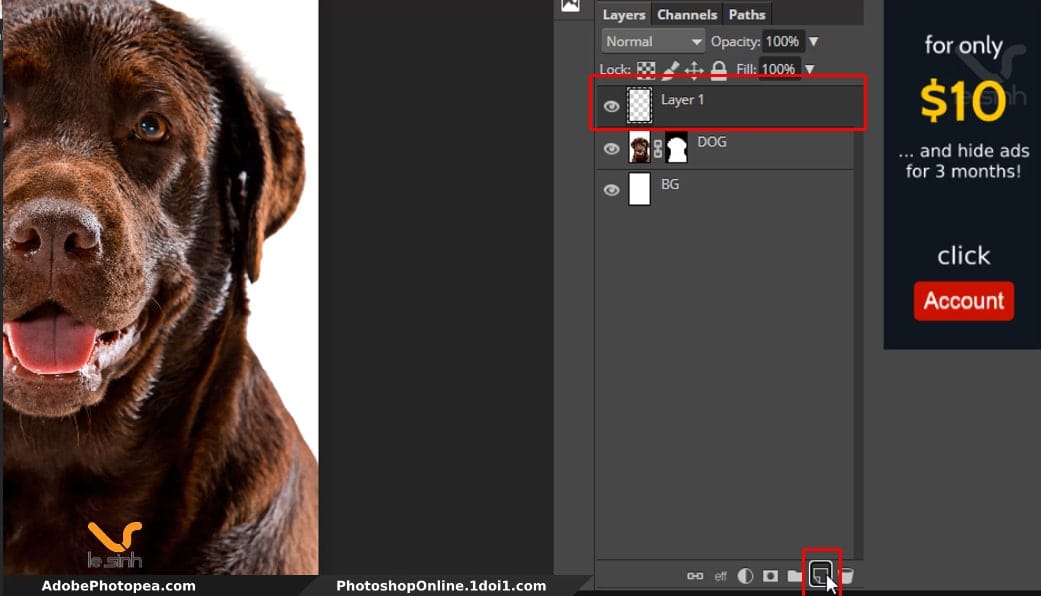
Press the keyboard shortcut V (the Move tool) to move the “women-and-dog” layer to the desired position. I reduced the opacity to 50% to make it easier to move when both layers are visible at the same time. Once you have moved the “women-and-dog” layer to the desired position remember to set the opacity to 100%.
You can use the command ctrl + T to zoom out the object. Left click and hold Shift to drag the image to an angle. You execute the command Shift + Atl + left click and drag the image outward or centered. This command helps the image to be enlarged and reduced in accordance with the current center position. Enter ends the command
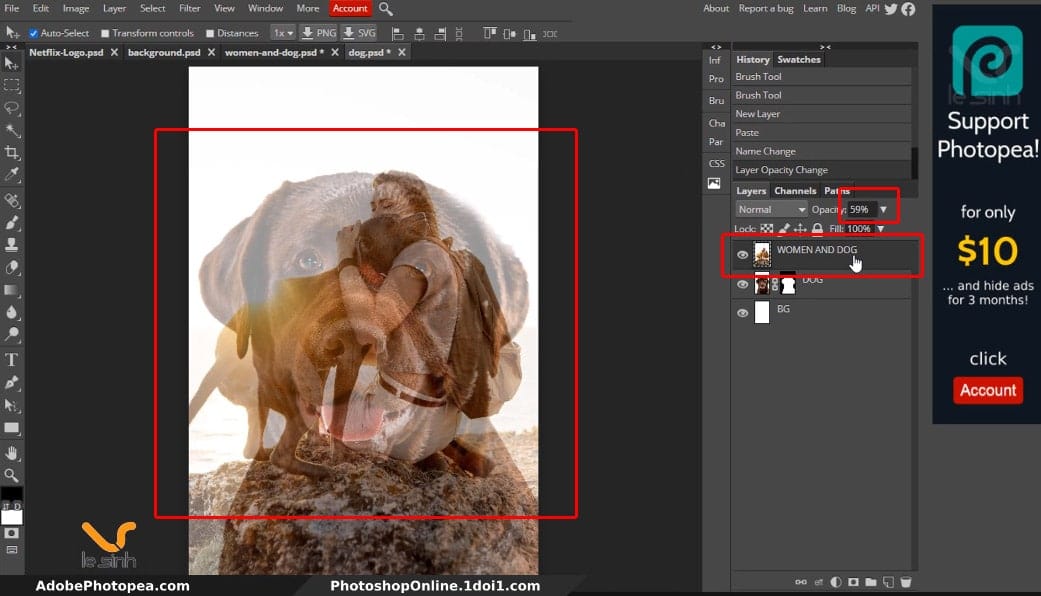
Step 8 : Once you have moved the “women-and-dog” layer to the desired position and the layer opacity is back to 100%. Select the layer “women-and-dog”, hold down the alt key and left click on the “dog” layer mask. Drag the left mouse button over the “women-and-dog” layer to copy the mask of the “dog” layer onto the “women-and-dog” layer.
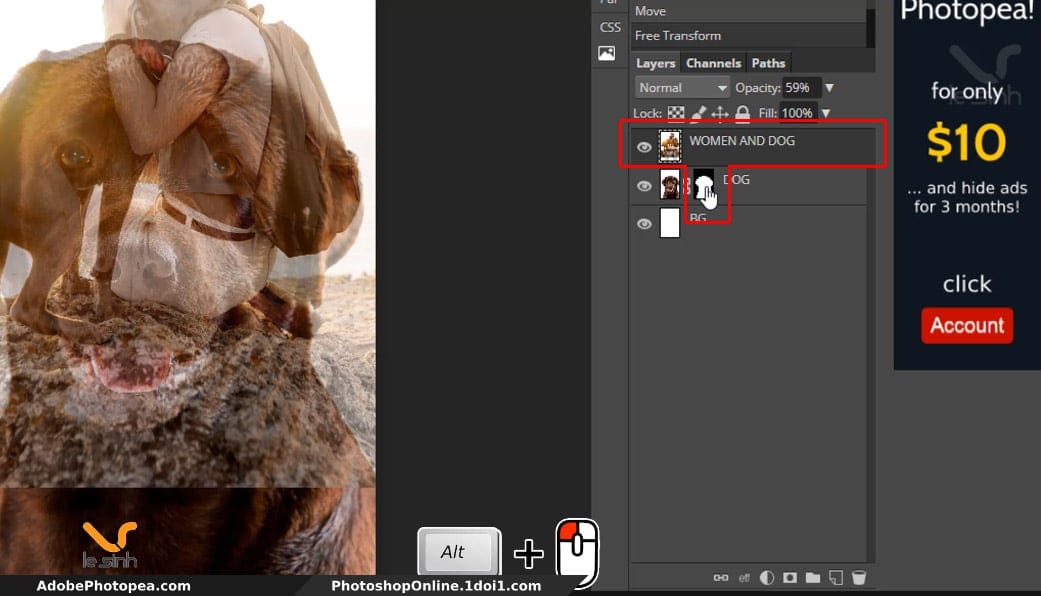
Use the Brush Tool (with the same parameters as step 6, can increase the size for faster use). Select the mask of the “women-and-dog” layer and the color palette is black above. Click and hold the left mouse button over the areas you want to delete to blur the “women-and-dog” layer to reveal the “dog” layer below.
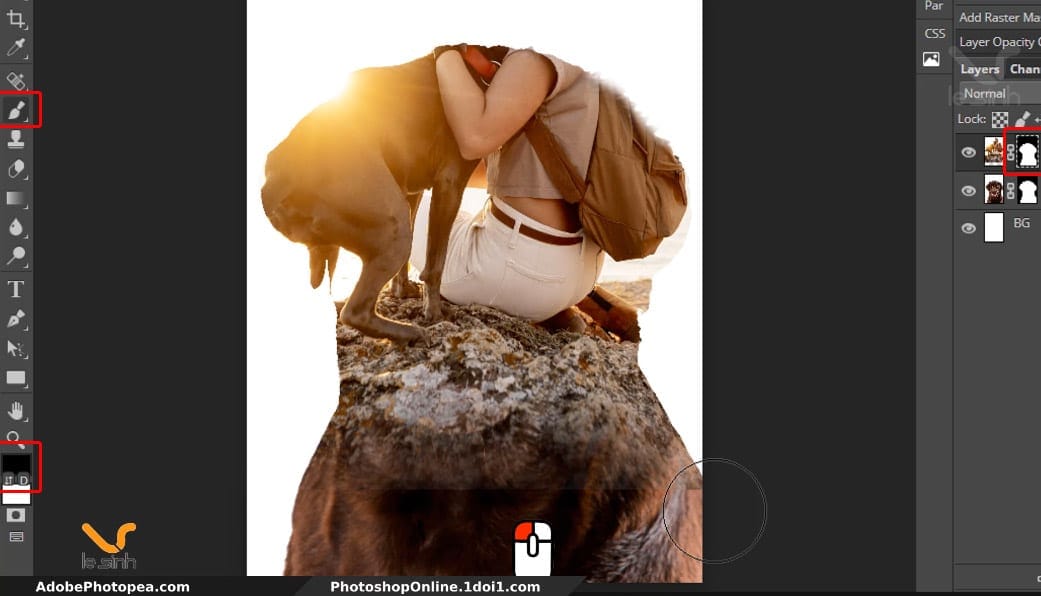
Continue on the layer mask of the “women-and-dog” and continue using the Brush tool. But reverse the color code by adding white to the top. Use the Brush tool to make the “women-and-dog” image clear above the top of this photo, the goal is to show the girl holding the dog to the top.
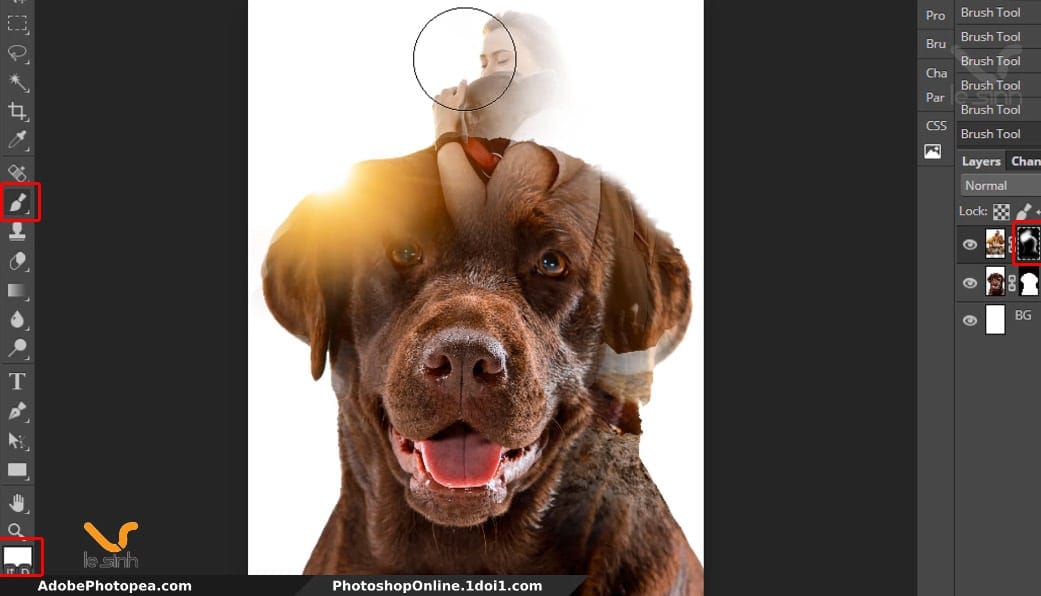
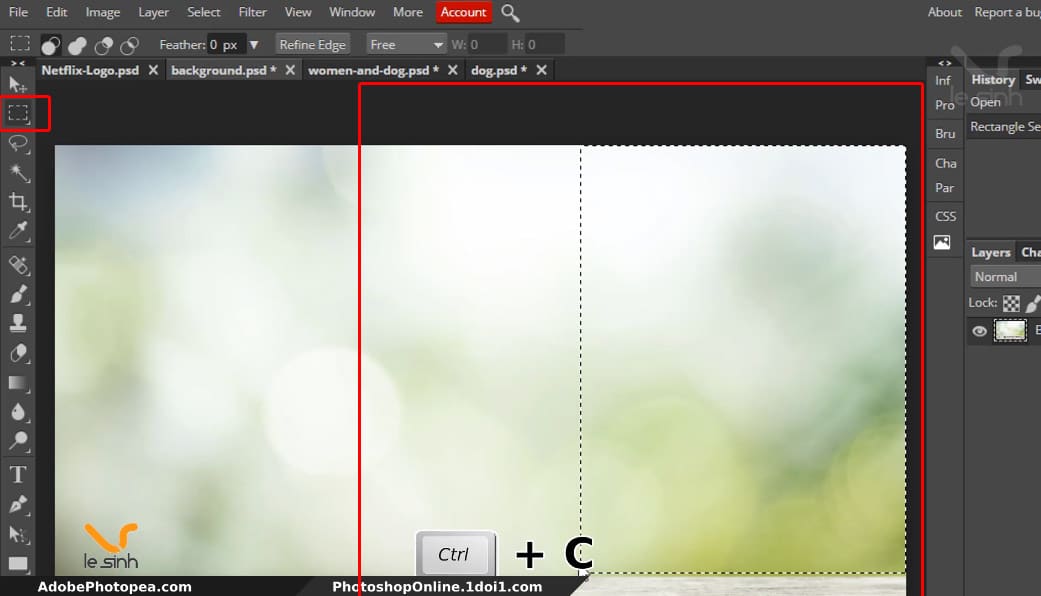
Step 9 : Open the “background” image file. Use any photoshop cropping tool you want. Or use Rectangle select (shortcut M) to quickly select an area of any image you like on the layer “background”. When you have selected the image area, Ctrl + C to copy.
fdsf
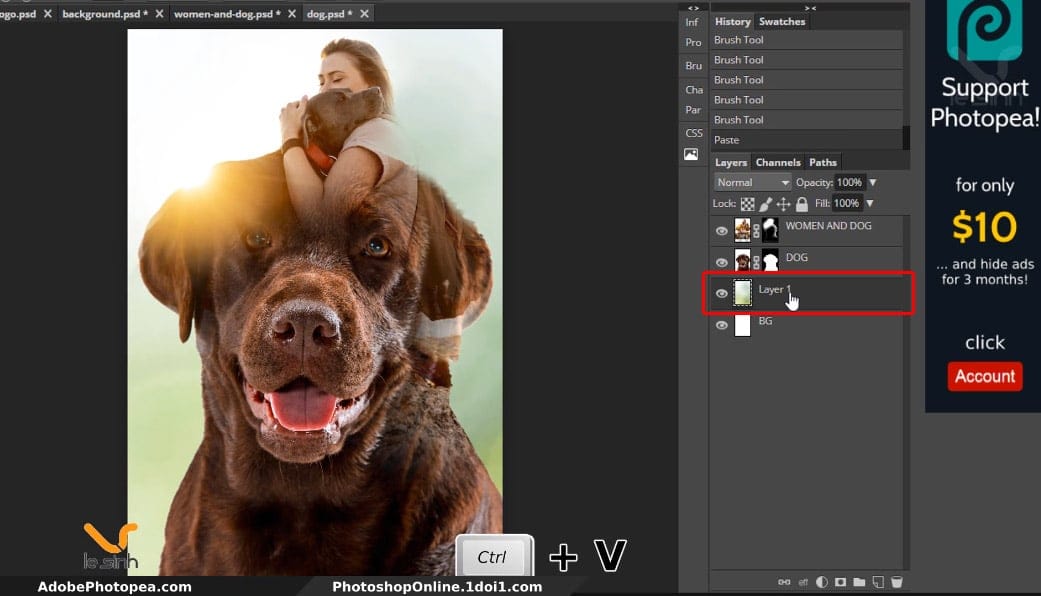
Step 10 : Ctrl + V copied image is a picture of “background” here. Place this image below the “dog” layer and above the white “BG” layer. Since we will be using images from the “background” layer to decorate the back of this poster design in photoshop for a smooth and dreamy look.
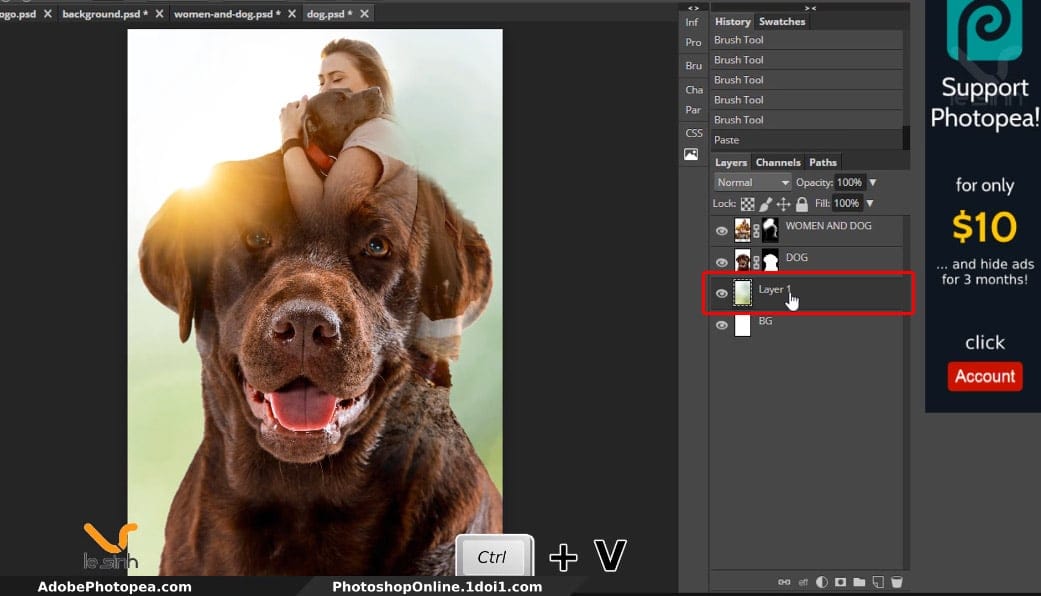
Because you want the color of the layer “BG color” (background) to be the same color as the dog’s. I use tool to change the color of the image in photoshop as color balance. I used to use this tool ” Adjust lighting in photoshop ” invite you to see more
Create a new Adjustment Color Balancer by going to the New Adjustment layer> Color Balancer … path.
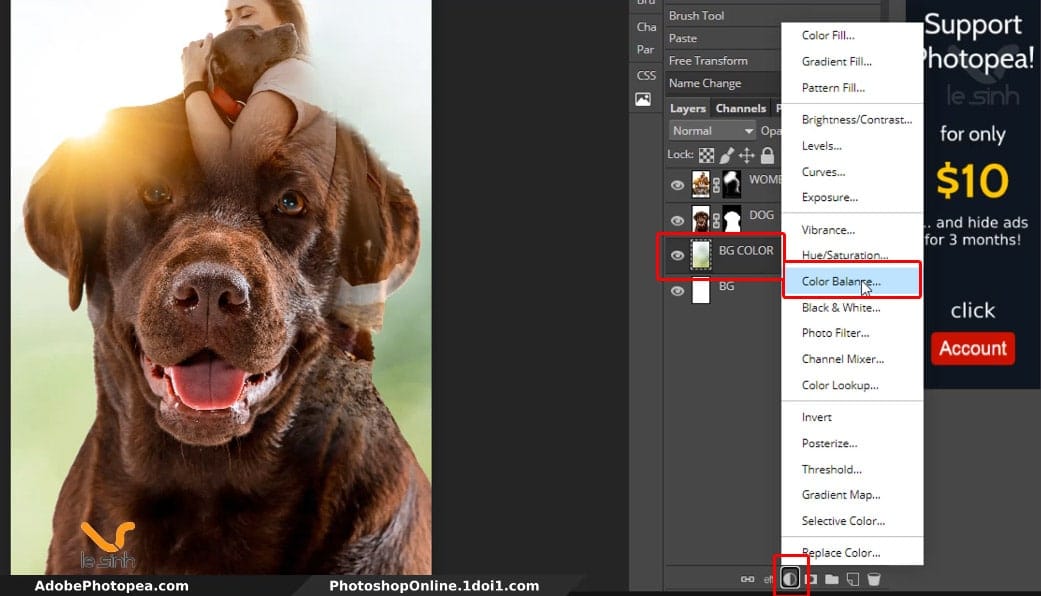
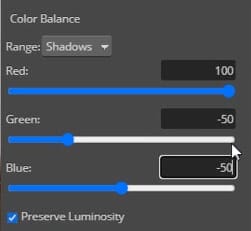
My color balance parameters are red: 100, Green: -50, Blue: -50 you can refer to apply for this photo. Remember that this is optional, depending on your preference. Adjust it until the poster colors look good in your eyes.
Add text to the picture in Photoshop
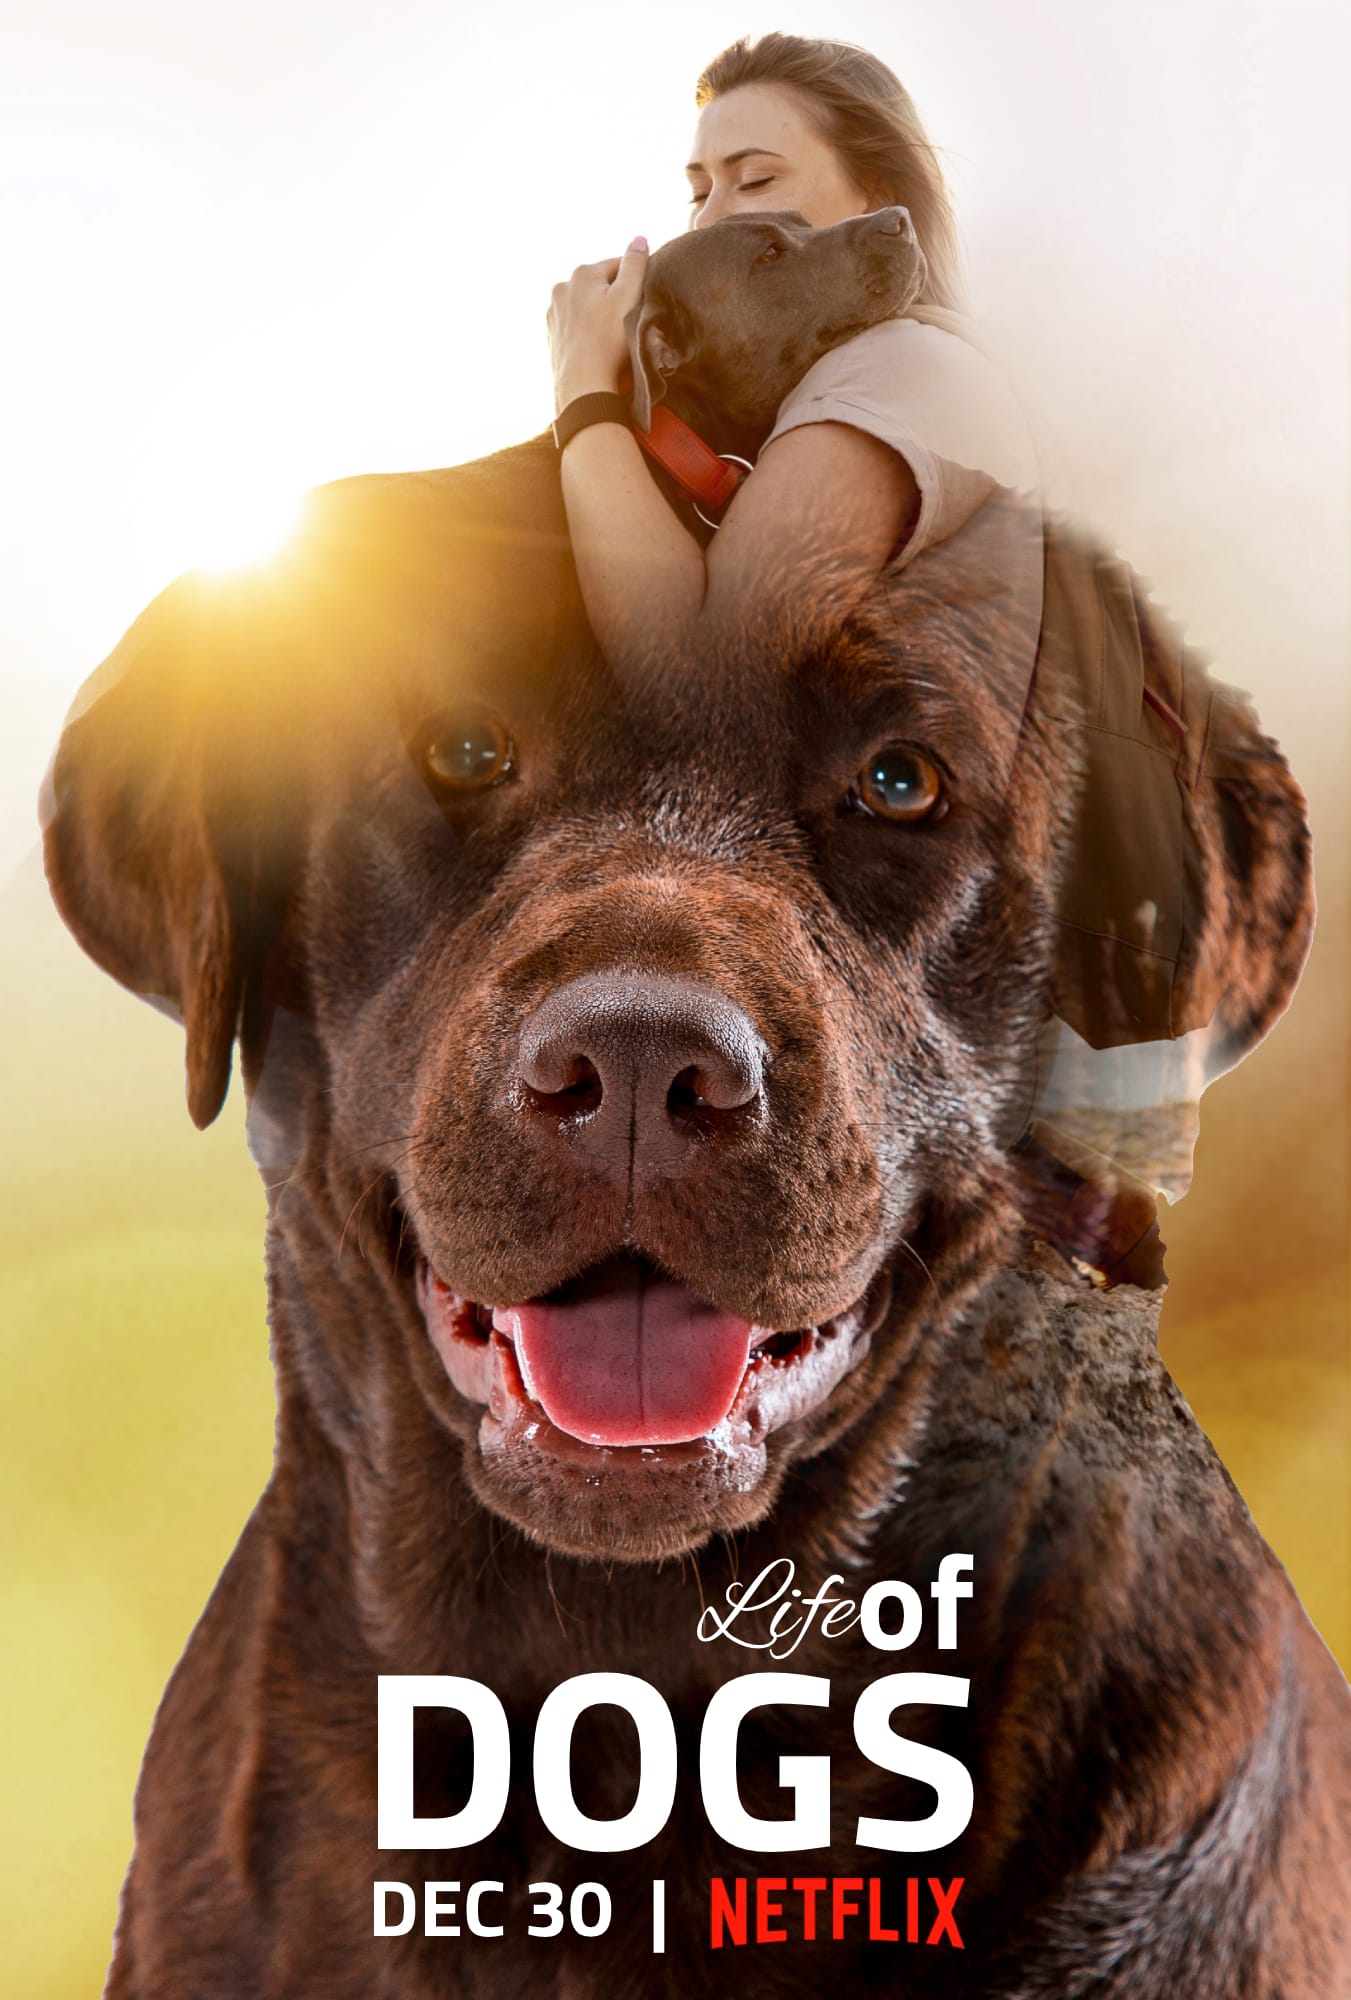
Step 11 : Basically, the tutorial on poster design in photoshop is almost done on the poster design for image processing. If you do well, you can create a beautiful poster thanks to the technique of integrating and adjusting the colors.
Now we will complete the final steps on how to design a poster in photoshop. That is to combine the logo and text into the image.
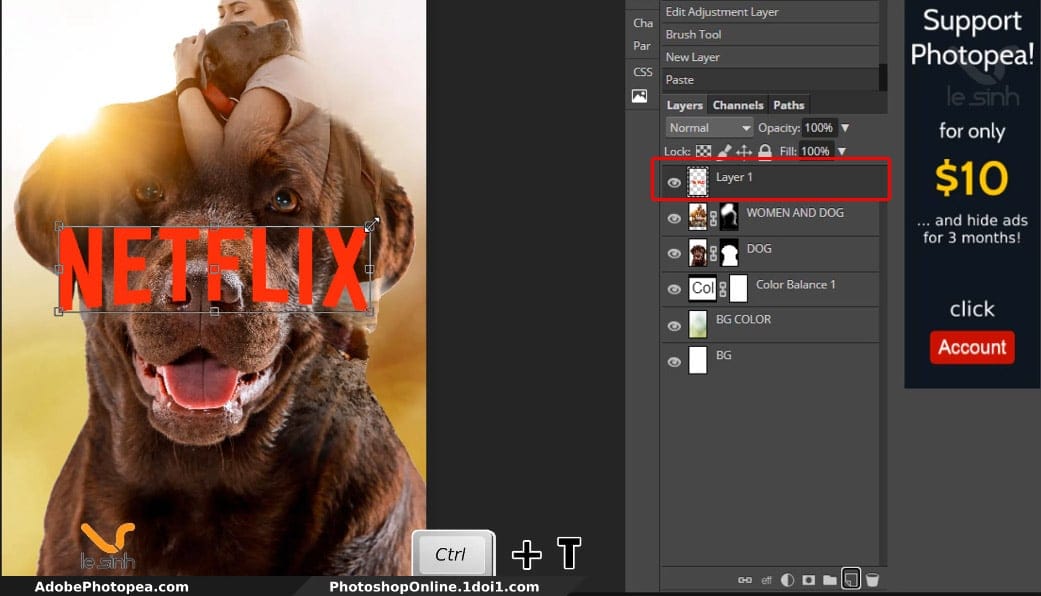
Copy the netflix logo and paste it into the photoshop file we are working on. Please paste the logo in the command ctrl + v after copying with the command ctrl + c. Put the layer “logo nexflix” on top, above all the other layers.
You can zoom out with the command Ctrl + T and combine Shift + Atl + left click to zoom in or zoom out the image to the center or Shift + left click to zoom in and out by an angle.
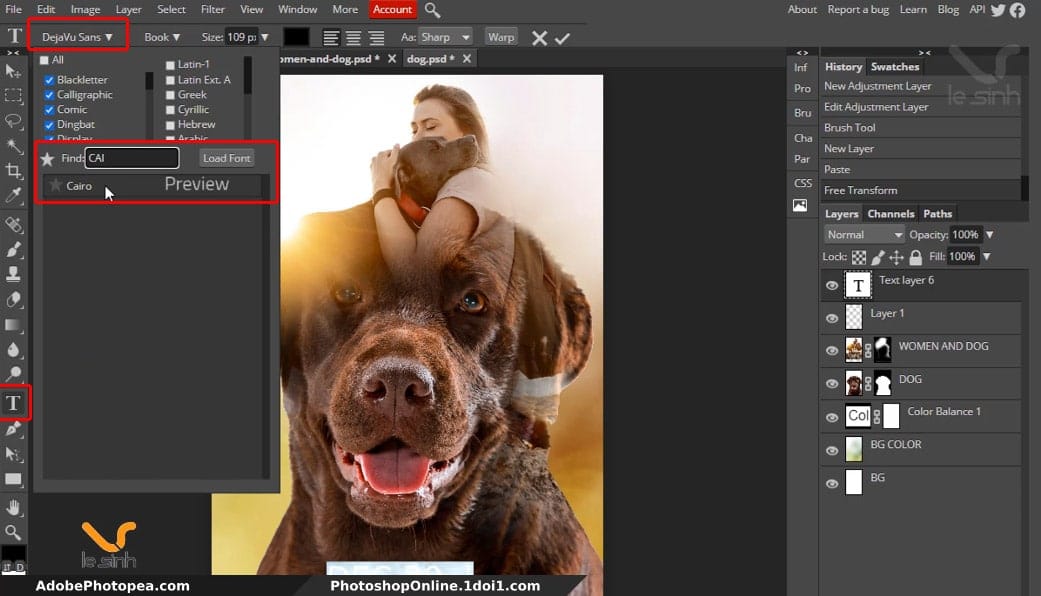
Step 12 : Press the shortcut T to select the Type tool to help you write text on images in photoshop online. And choose as shown in the picture to find the fonts you want. I chose Cairo font for large text and Alex-brush font for small text.
All you have to do is adjust the position and font size to suit your beautiful poster design in photoshop criteria so don’t consult my specifications in this step.
And this is the final product of today’s tutorial on designing posters in photoshop. Whether the poster product is beautiful or bad depends on how people perceive it. But mainly in this article, is imparting basic Photoshop skills to those who are just starting to learn Photoshop online.
I believe that, with your effort and ability, it is possible to create beautiful poster design in photoshop that are not inferior to anyone if they master the tools in photoshop.
Video how to poster design in photoshop
The detailed video of making posters with photoshop attached will be helpful for you to better understand the operations in this design post. You should watch the video because I think it will be easier than reading the content, if you have questions about making this poster keep reading. Because I explain more clearly in the article.
Honestly, I am very thankful that you took your time to visit the website and read the articles that I share. Because that is your recognition of what I’m contributing to the free graphic design field. I will always try to produce better articles to serve you.
And did you know I spend 2-3 days recording videos and writing content for this website? Like this post in photoshop poster design it took me 3 days (even when I’m a bit lazy ^^). Hope you click on the ad on the website if that ad is something you are interested in.
If not, the next time you visit the website again, you support the website a lot. Because I know you have many other options on the internet. Wishing you and your family always healthy and happy.