Tutorial with photoshop collage into the scene is to use software tools to combine photoshop collage into the scene, house, stitch human faces or combine products into a landscape background by photoshop online.
The technique to photoshop collage with photoshop is quite simple with just a few clicks that you can nest 2 pictures together or you can simply use online photo collage web to automatically do it without any knowledge. anything about photoshop adobe or online.
Those are common collage needs, but when it comes to professional collage, make sure to use photoshop collage method. Because nowadays, only photos can be stitched together that look real can only be photoshop software. In the near future maybe AI (Artificial Intelligence) will help you with that.
Photoshop collage easy?
Depending on the needs of each person, it can be said that photoshop collage with photoshop is easy to hope. If you just need to combine entertainment, it’s easy. Also if used for business purposes or other work requires real photo collage. For example, put a person in the scene like the person is actually taking a photo there. Then jigsaw techniques need more precision and persistence.
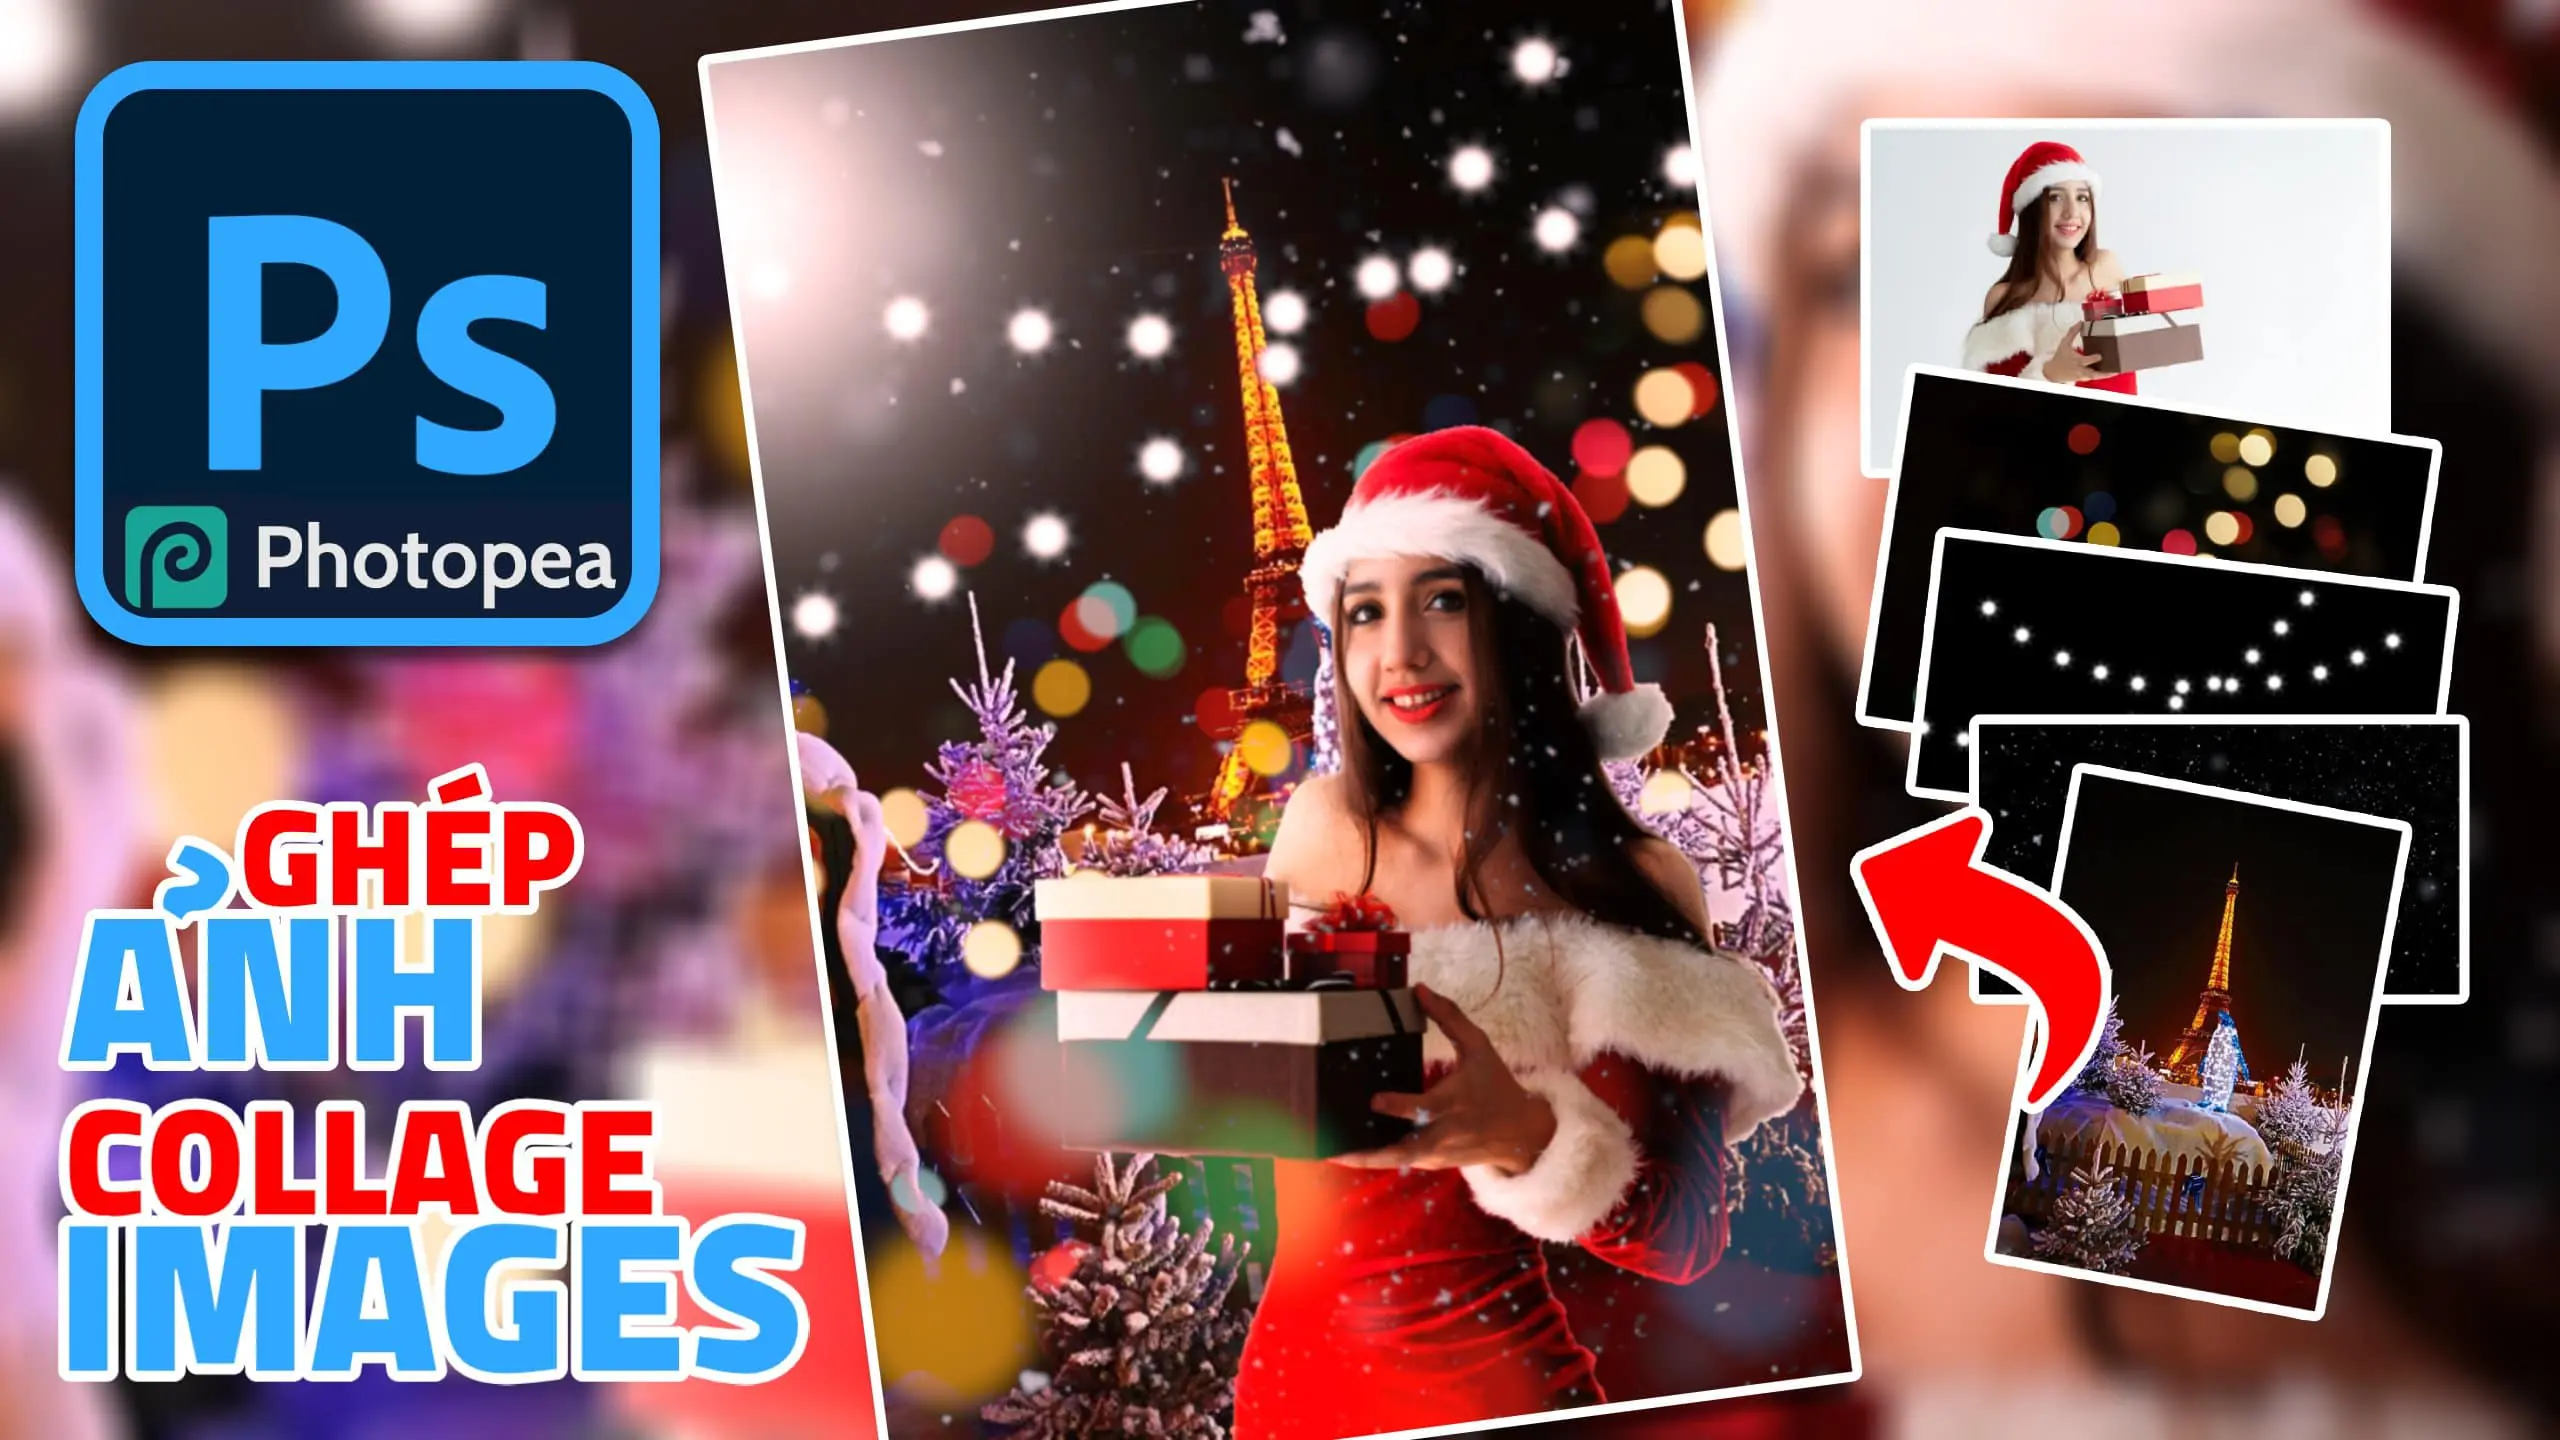
So, in this article, I would like to share a little bit of experience in photoshop online photoshop collage on the Photopea platform . Please see the article or video below to understand the detailed step by step photoshop photoshop.
Materials jigsaw puzzle
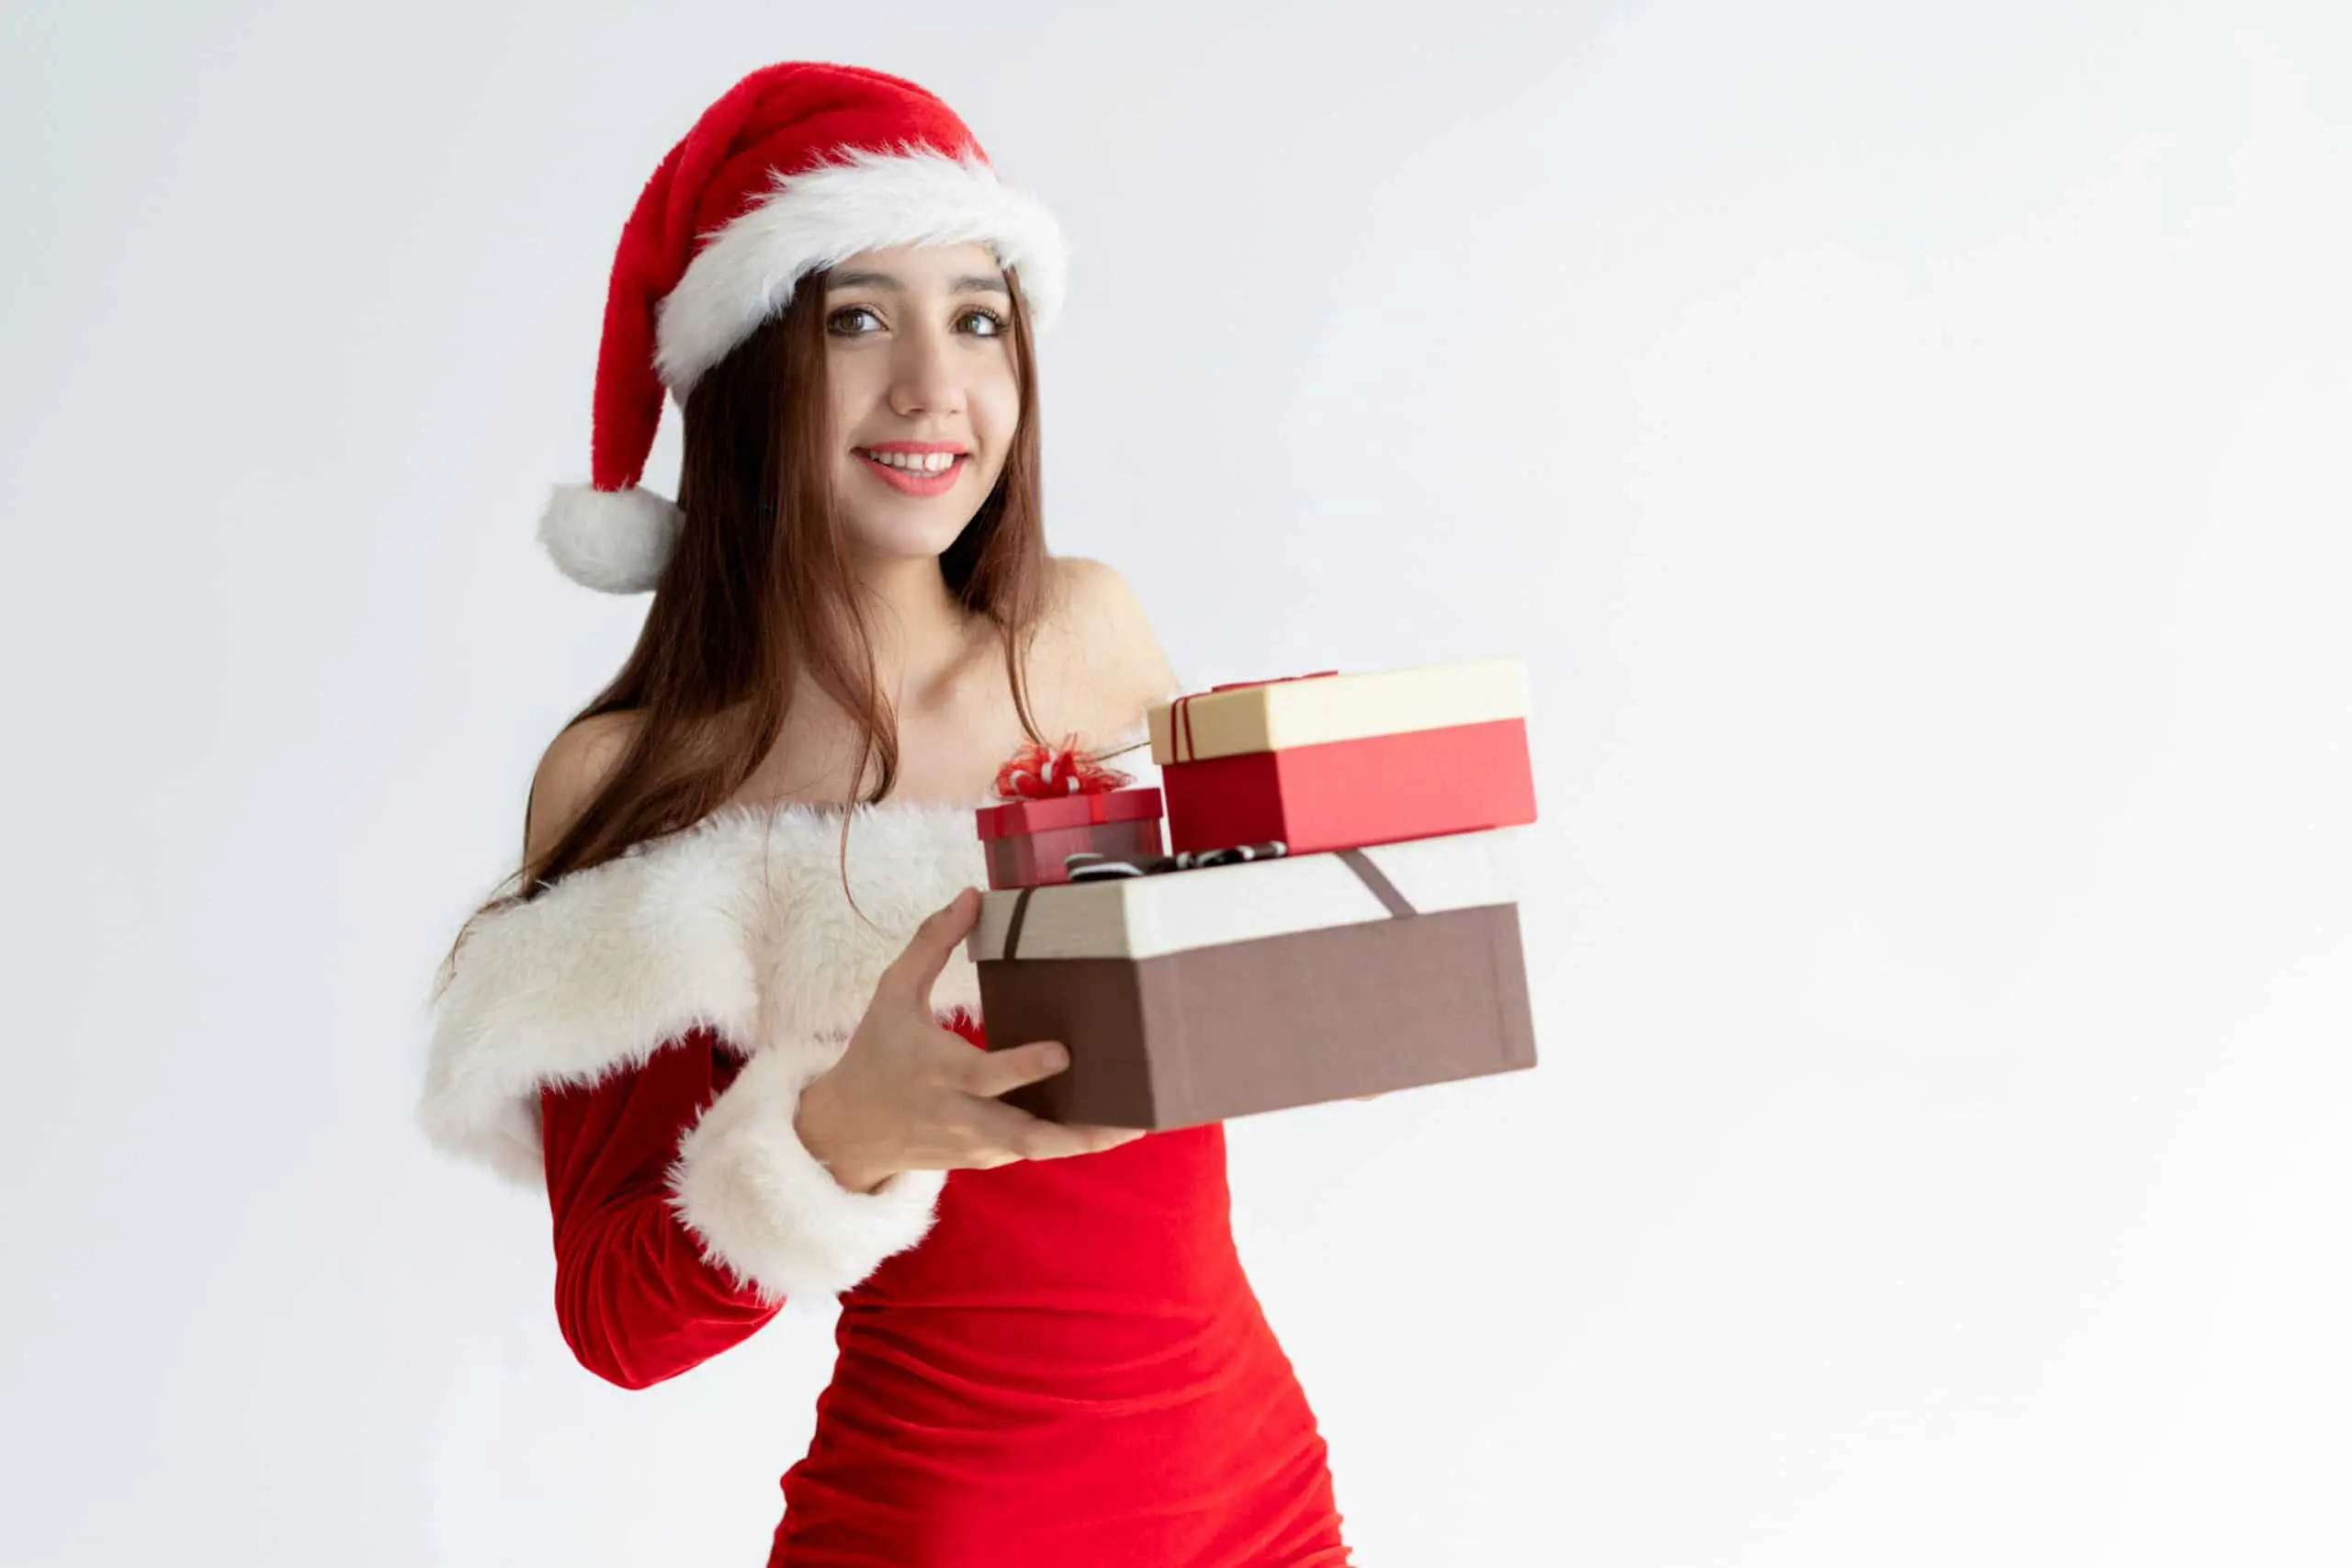
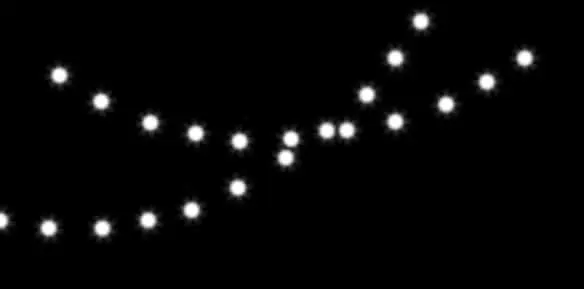
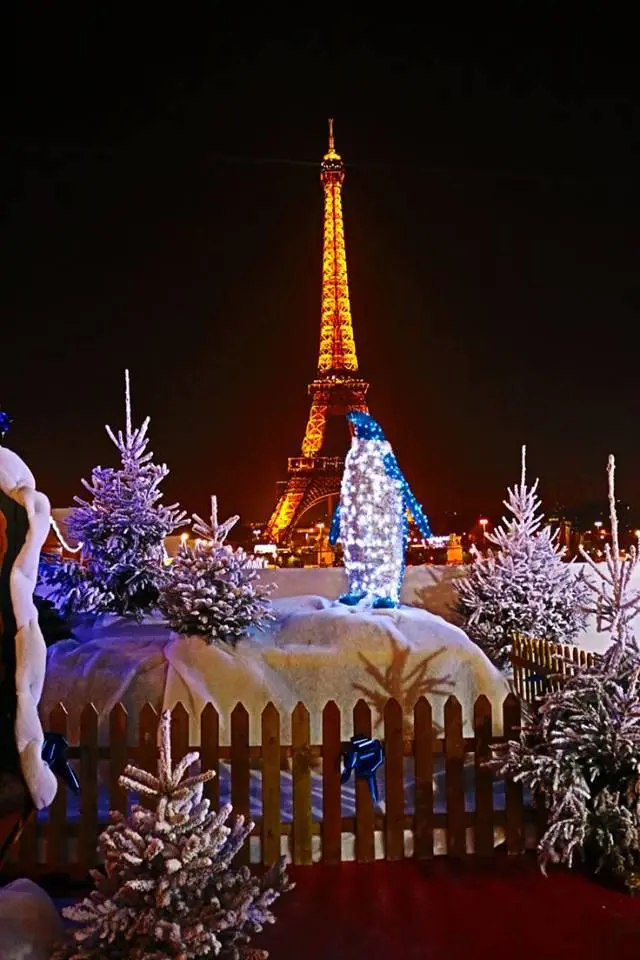
As always, please allow to send the image file in the tutorial for you to use for convenience and easy to grasp throughout the article. Try with the images that I submitted in advance to understand the tool. You can then use another image to follow the needs you are looking for. Pictures in the post are loaded at freepik.com and google.


Instructions on how to photoshop collage with photoshop
Isolate the subject from the background
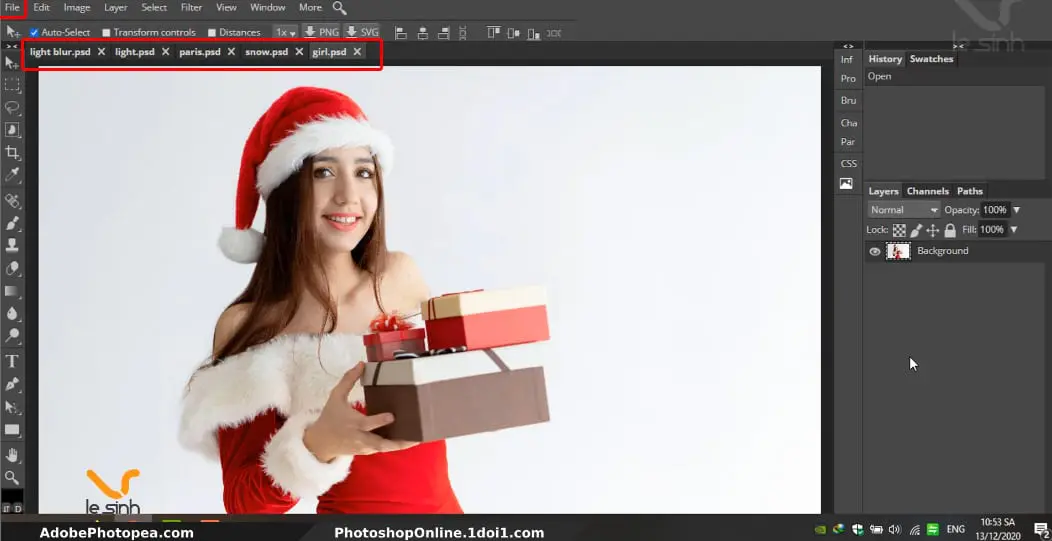
Step 1: Go to the menu File> Open to select the pictures to be merged and open in Photoshop online software. Like here, I open all 5 image files for convenience in the editing and merging process. And remember F11 to full screen the browser to avoid conflicts such as Ctrl + T, …
Step 2: Using the object selection tool (W), select the parameters as in the picture. Then scan the left mouse button around the image “girl” of this tool to select the main character according to the software’s algorithm.
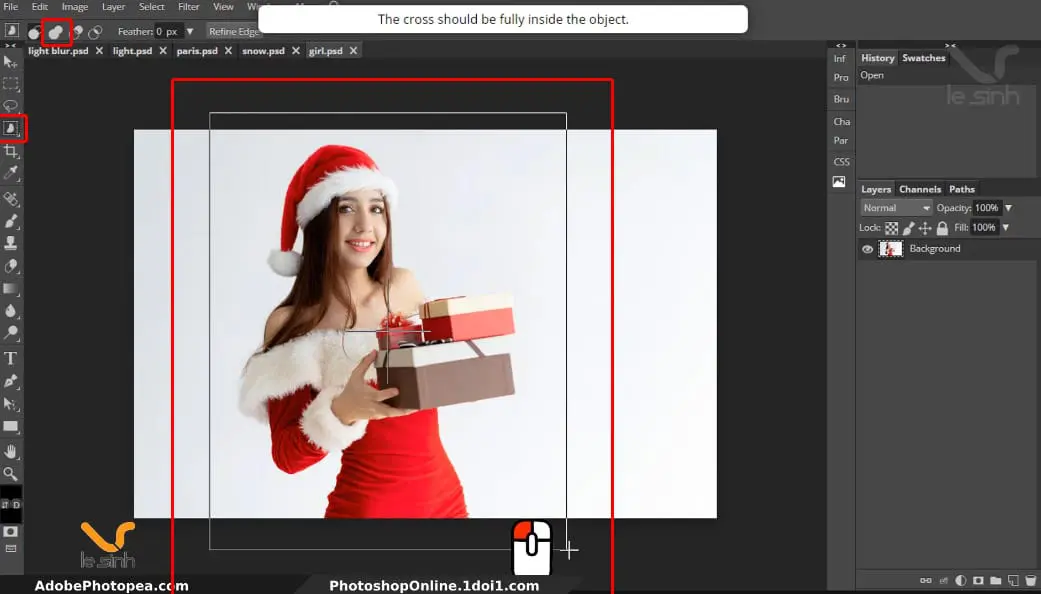
In the process of using object selection object extraction tool. If you cannot select the desired areas. Let’s combine other separating tools such as: Lasso Select (select the image area according to the left mouse area), Polygonal Lasso Select (select the image area according to the lines of the left mouse), Magic Wand (select similar image area in an area), …
Notice the “circular icons” on the parameter bar. In which I temporarily give the order 1,2,3,4 from left to right. 1: select once, 2 select multiple times and combine selections together, 3 select multiple times but will exclude the selection at the next mouse click, 4 select the intersection area between the two available selections.

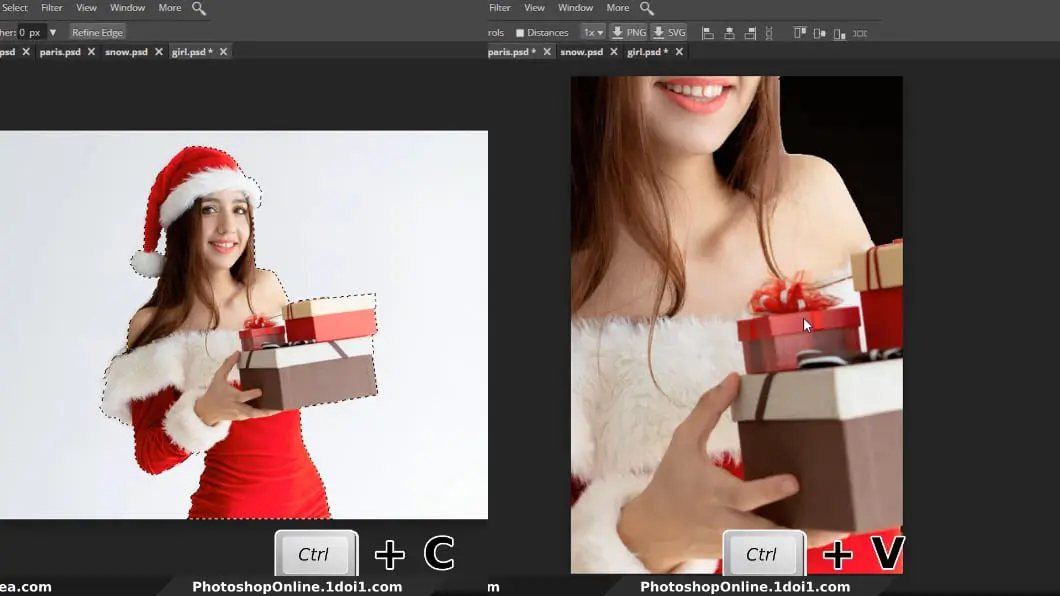
Step 3: To photoshop collage, we have to put 2 photos in the same file. So, Copy object “girl” has extracted background by command Ctrl + C. Select through “paris” image file and execute Ctrl + V command to paste “girl” object just copied into “paris” image file. You can combine the “Ctrl and + (plus)” or “Atl and the – (minus)” keys to zoom in on the image area for easier operation while working.
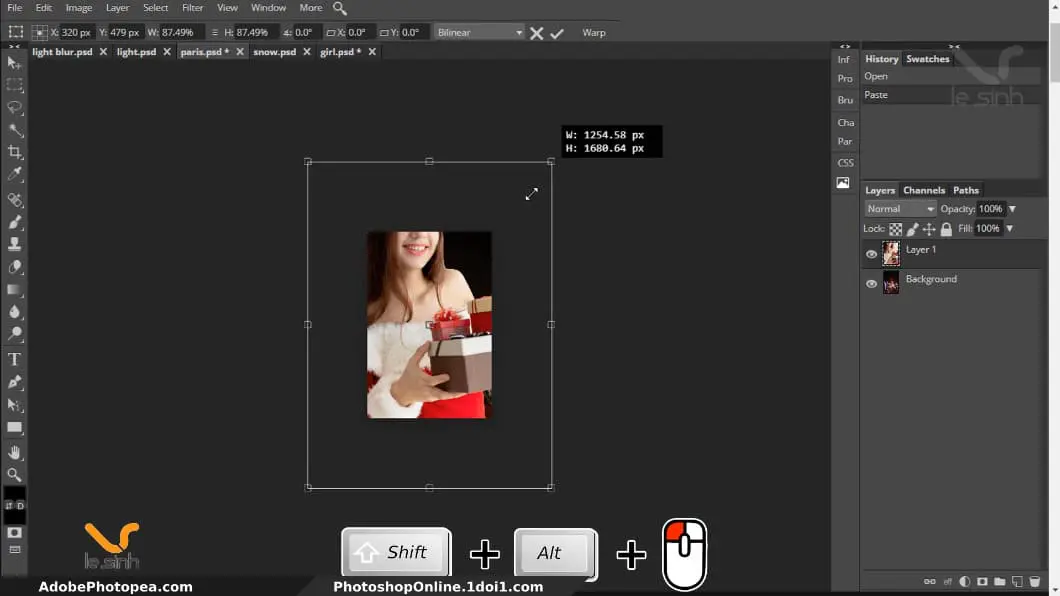
If “girl” image is too big for “paris” image. You can zoom out with the command Ctrl + T and combine Shift + Atl + left click to zoom in or zoom out the image to the center or Shift + left click to zoom in and out by an angle.
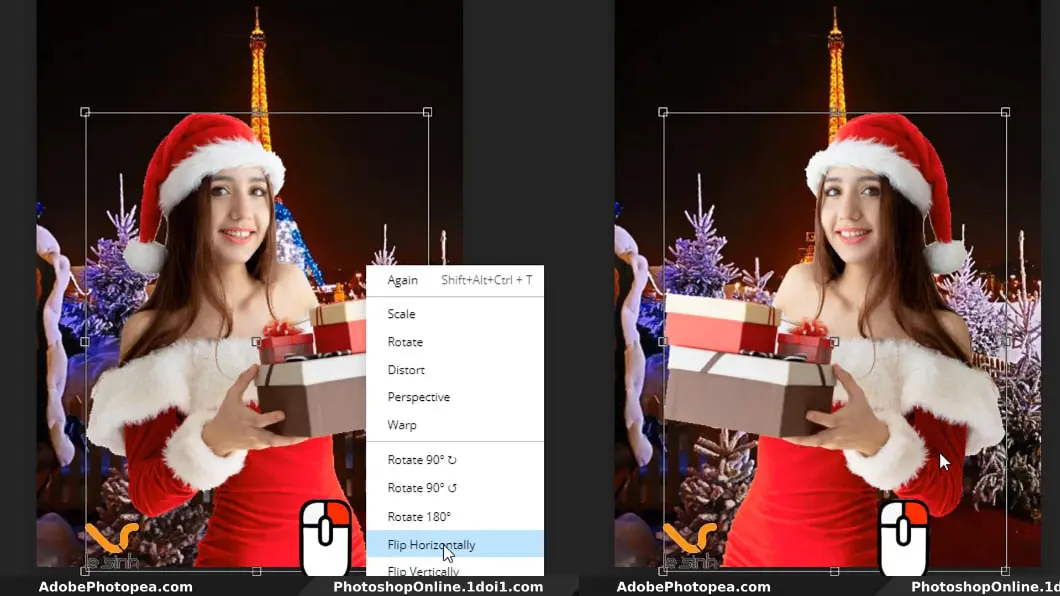
Because I want the girl to turn around to the opposite side. So, while holding Ctrl + T, I right click on the girl image. A menu appears, choose to Flip Horizontally to flip the object in photoshop. Press the Enter key to exit Ctrl + T.
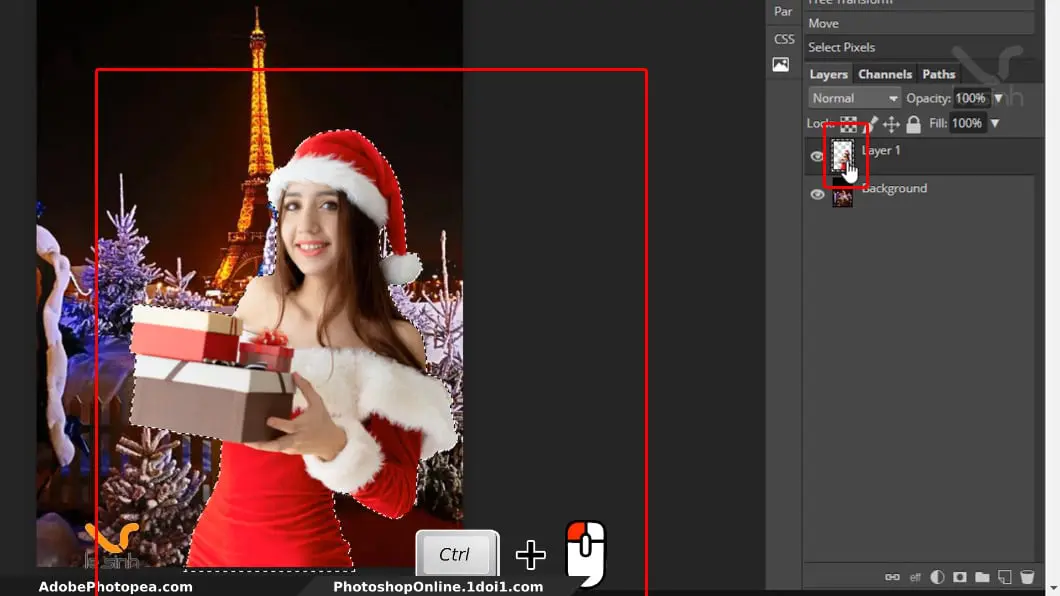
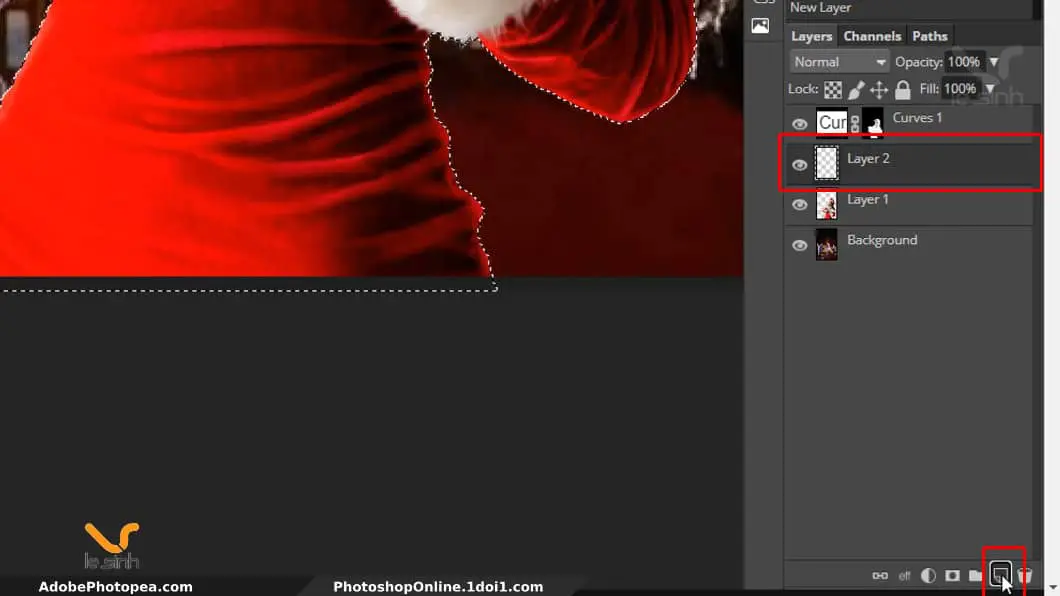
Step 4 : Create a selection around the layer of “girl” by pressing and holding the Ctrl key, then left click on the girl’s layer. A selection around the girl will be created. We have to do this step in order to use the functions in the New Adjustment layer. If using adobe photoshop. You do not need a designer to do this step.
Because the New Adjustment layer Tool of adobe photoshop has an arrow inside. Allow the creator to “assign the” New Adjustment layer “effect to a desired layer without affecting the layers below. But because I am using photoshop of photopea. So temporarily just make a selection to assign a New Adjustment layer effect to the layer you want.
Processing collages
Step 5 : Go to menu New Adjustment layer> Curves and drag the graph bar down to the dark area to reduce the light of the “girl” layer to better match the light background image of “paris”. When this step is done, a layer mask of the curves will be created above the girl’s layer.

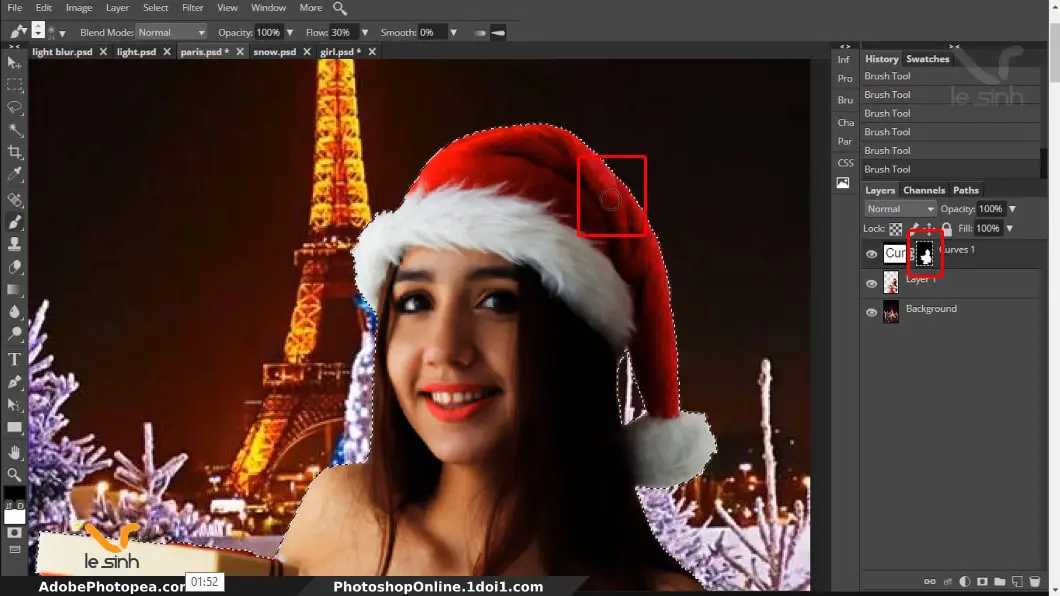
Step 6 : Use the Brush Tool with my reference to erase the dark areas when the Curves layer mask creates. Remember to select the color code with black above (Black above is to remove the layer mask, the white above is to select additional layer mask).
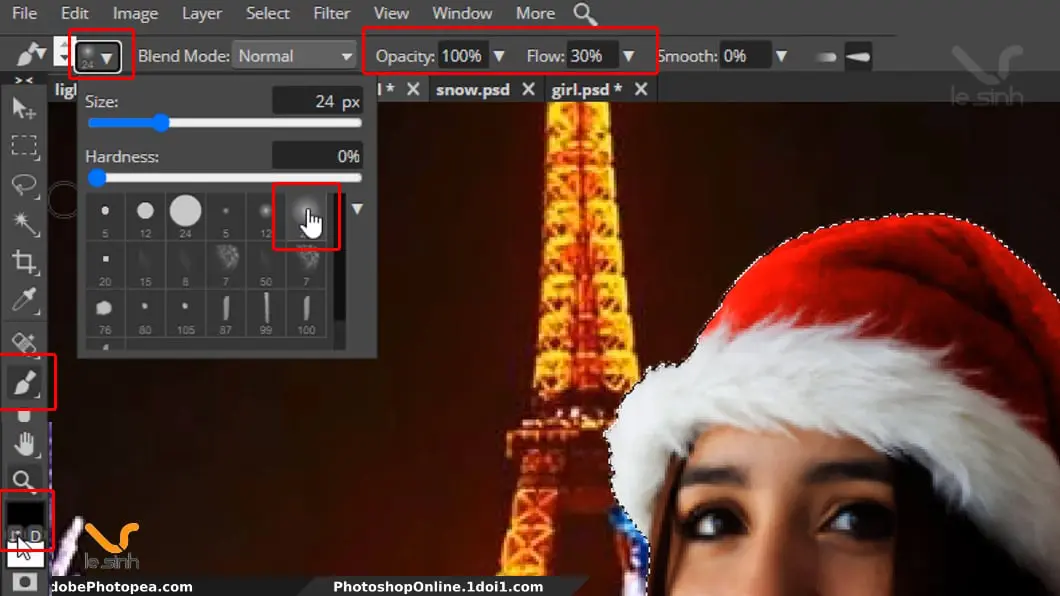
Before using the Brush Tool, click on the curves layer mask. Next, using the left mouse button, click and drag the mouse over the area of the image you want to highlight. Doing it until you like it is ok.
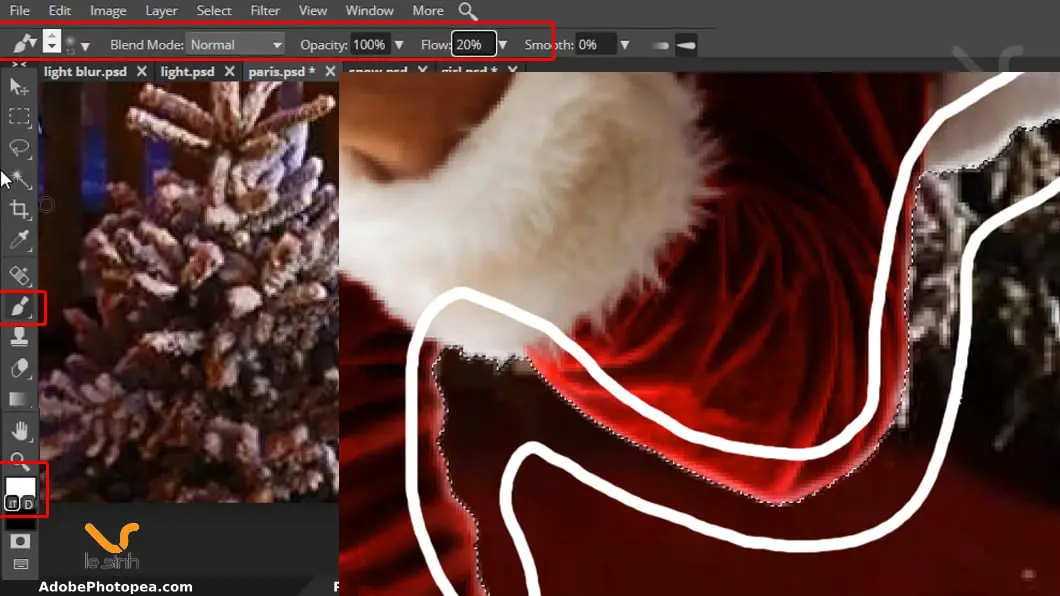
Once you’ve finished the above step, keep the girl’s selection. Create a new layer above the layer containing the girl “girl”. Then you can rename the layer just created as layer “whiter”. As we are going to use the Brush Tool to paint a white layer around the girl. The meaning of this is to create the effect of light shining around the girl, like when we were taking pictures, but there are lights behind the back.
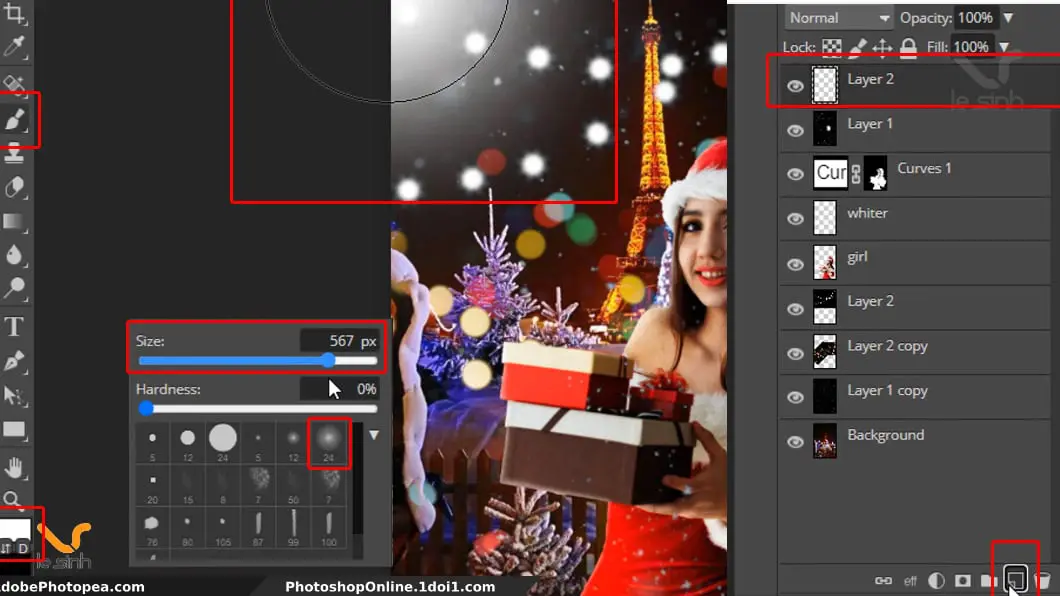
Step 7 : Still using the Brush Tool, you can reduce the Flow parameter to 20 or lower. And reduce the brush stroke size to 10 to 15. The palette turns white on top. Using the left mouse button, paint around the girl with blurred white lines. We are intentionally creating a glowing light effect around the girl’s clothes.
After completing this step. If the white outline is too dark, you can reduce the opacity of this “whiter” layer to 50% so the light looks lighter, more suitable. Complete the image processing. Exit the selection with the command Ctrl + D
Add effects to photos
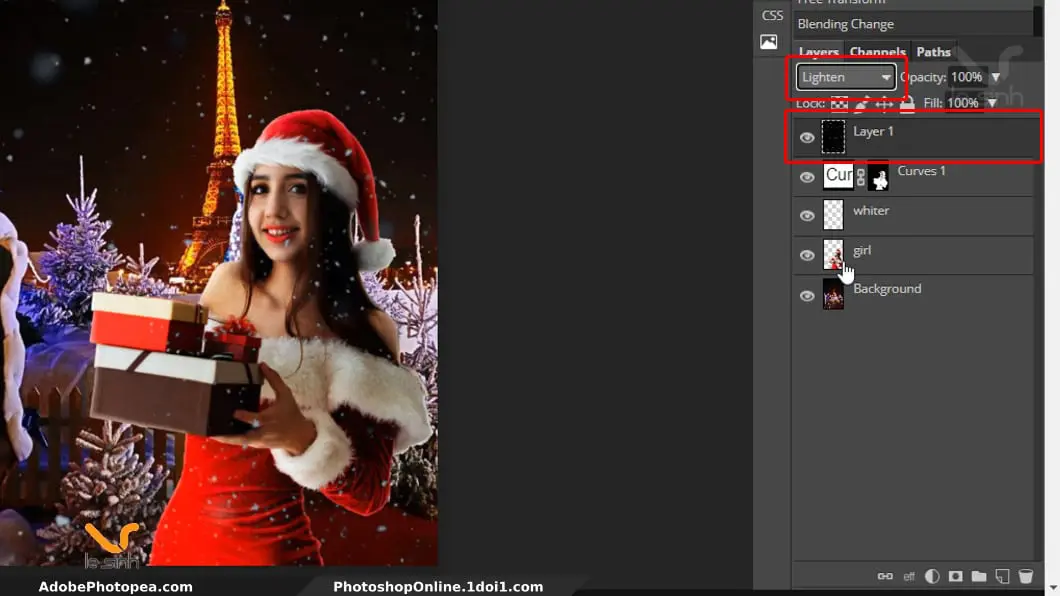
Step 8 : Convert to the “snow” file. Copy Ctrl + C the image and paste Ctrl + V into the “paris” file that we have been working with so far. Ctrl + T to adjust the “snow” file vertically (matches the current image). Zoom and zoom the “snow” image to match. Now scroll down to step 9 of online photoshop collage.

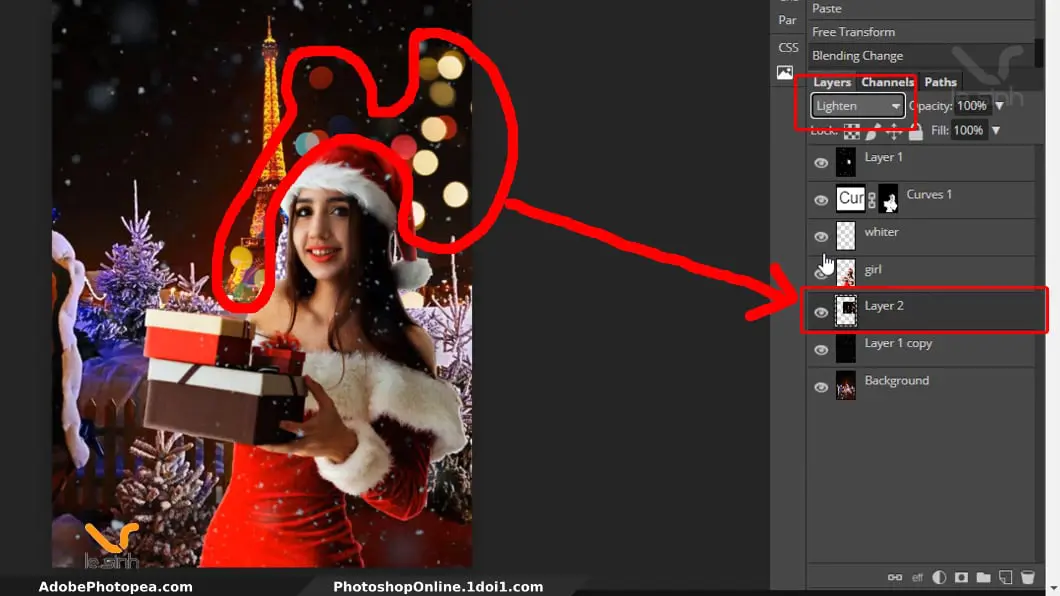
Step 9 : On the “snow” layer, choose the image blending parameter “lighten”. Once selected, you can see that the black in the “snow” layer is gone, leaving only the white snowflakes covering the scene.
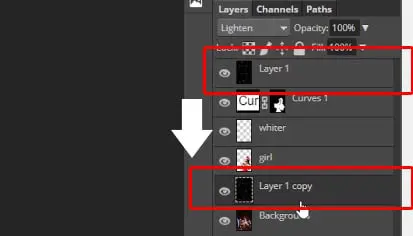
With the “snow” layer selected. Use the movie combination Ctrl + J (duplicate object) to make a copy of the “snow” layer. Left click and drag the duplicated “snow” layer below the “girl” layer. The reason I do this is because I want to create the effect that is closest to reality.
If we have only one “snow” layer above the girl, the snow is just covering the front of the girl’s face, I want the snow to be behind the girl and the snowflakes will be blurred, creating a far and near effect. Move the duplicated “snow” layer so that the snowflakes won’t match the original “snow” layer.
There is a little trick when moving layers below another layer. That is let’s Ctrl + T that layer. If you do not use the command Ctrl + T. When you want to select an underlying layer and move it, Photoshop software will most likely select the wrong layer above (not the layer you want to select).
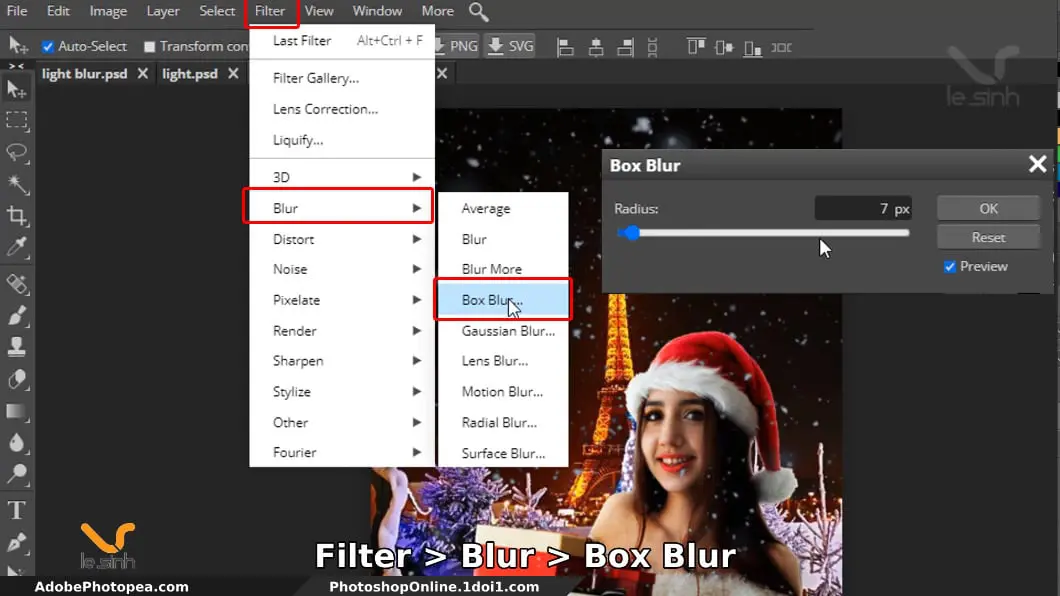
Step 10 : Blur the snow layer of the duplicated “snow” layer. Go to Filter> Blur> Box Blur. The parameter I choose is: 7px. Another article I’ve written on this website that uses the blur command is Gaussian Blur as a post on how to make blurry photos in Photoshop . But with online photoshop, I found that the Gaussian Blur command sometimes works very slowly. So I use Box blur and they are the same.
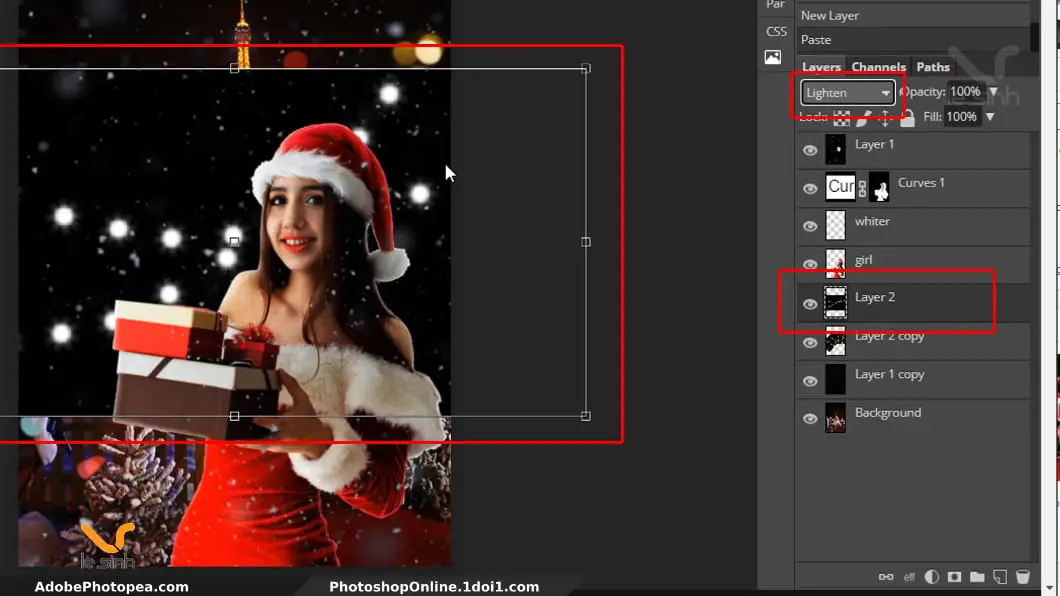
Step 11 : Like step 8, open the “light blur” file. Copy it, and go to your working “paris” file, create a new layer and paste the “light blur” image file into the new layer. This layer I call the “light blur” layer. It will be below the “girl” layer. Set the color blending parameter to “lighten” as shown in the image below. The purpose is to remove the black background from the image.
You can Ctrl + J to duplicate the “light blur” layer and Ctrl + T to drag the light bulbs in the “light blur” layer to the areas you want. Enter to end the command Ctrl + T. You can add Filter> Blur> Box Blur to the “light blur” layer to make the light blips more blurred, so it will be more realistic.
Step 12 : Open the “light” file that I attached at the beginning of the article, copy it like the one above. Go to the “paris” file, create a new layer and paste the “light” image file you copied into a new layer. This layer I call the “light” layer and it will be below the “girl” layer. Choose the “lighten” blending parameter for the “light” layer.
Step 13 : Create a new layer, and this new layer will be above all other layers. Use the Brush Tool with the settings shown below. Left click a corner of the image to create a spot of light, I’m trying to create a light that looks like a light bulb.
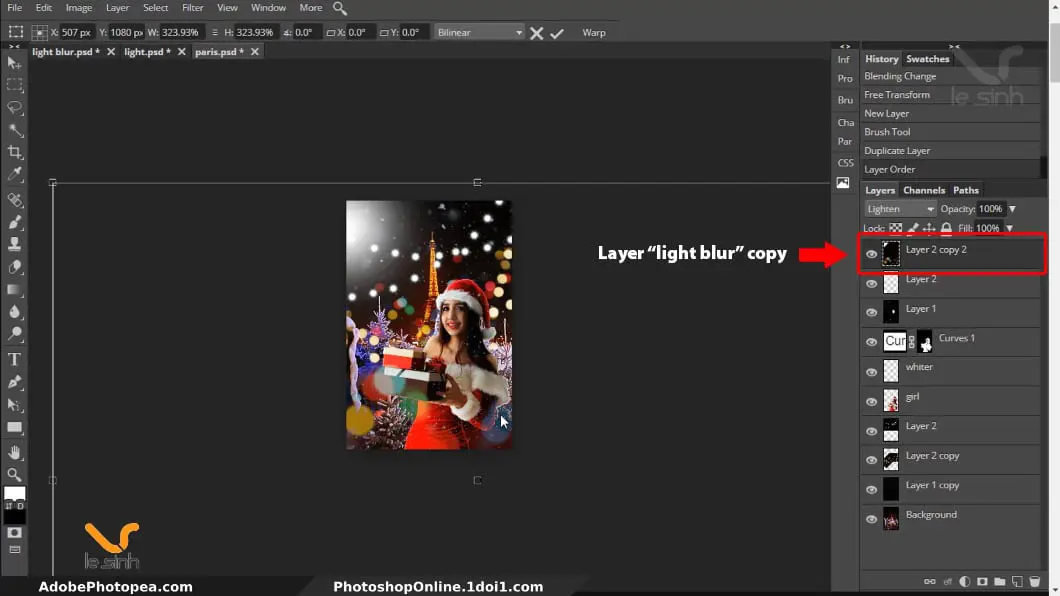
Step 14 : Normally, when taking pictures, there will be a “bright spots in front of the character” effect. I make use of the “light blur” layer again. Ctrl + J to make a copy of it. Put the duplicated “light blur” layer above all the other layers. Use the command Ctrl + T and drag the image out. When satisfied, continue with the Enter command to end the operation. You can add a little Filter> Blur> Box Blur to the highlights.
So Tutorial with photoshop collage are done, the last step is to tweak a little color to make the image more eye-catching.
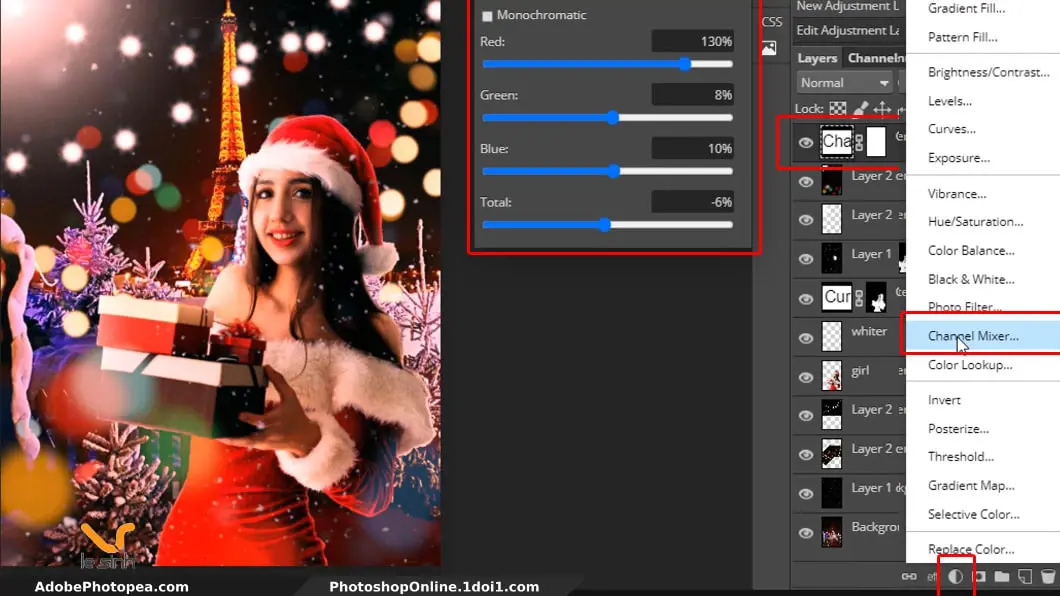
Step 15 : Create a color filter with the menu New Adjustment layer> channel mixer. The parameters I choose will be: Red 130%, Green 8%, Blue 10%, Total -6%. The parameter depends on your color preferences. And note, the Channel Mixer layer is at the top position – above all the other layers. This way, the colors from the Channel mixer will apply to all of the images below.
And the final product according to tutorial with photoshop collage post on photopea platform after completion. I hope that my little knowledge will help the user community who is learning and Tutorials photoshop . Wish you success and always be better than yourself.

Video tutorial to combine photos with photoshop
In the above article is a description of the explanation of tools when stitching photos with Photoshop. My descriptions may be a bit confusing for some of you. So, I would like to attach a practice video for you to see and understand more about Tutorial with photoshop collage.
At this point, the photoshop tutorial has been finished, thank you very much for taking the time to visit the website and see all this article. In addition to this online photoshop collage article. I have many other articles like changing the shirt color with photoshop or other articles. Hope you will continue to see other articles.
If this article is helpful to you, please help me by clicking on ads on the website. Because that is the only income of this website and a cup of coffee for me to be awake enough to write ^^. Thank you again for watching.